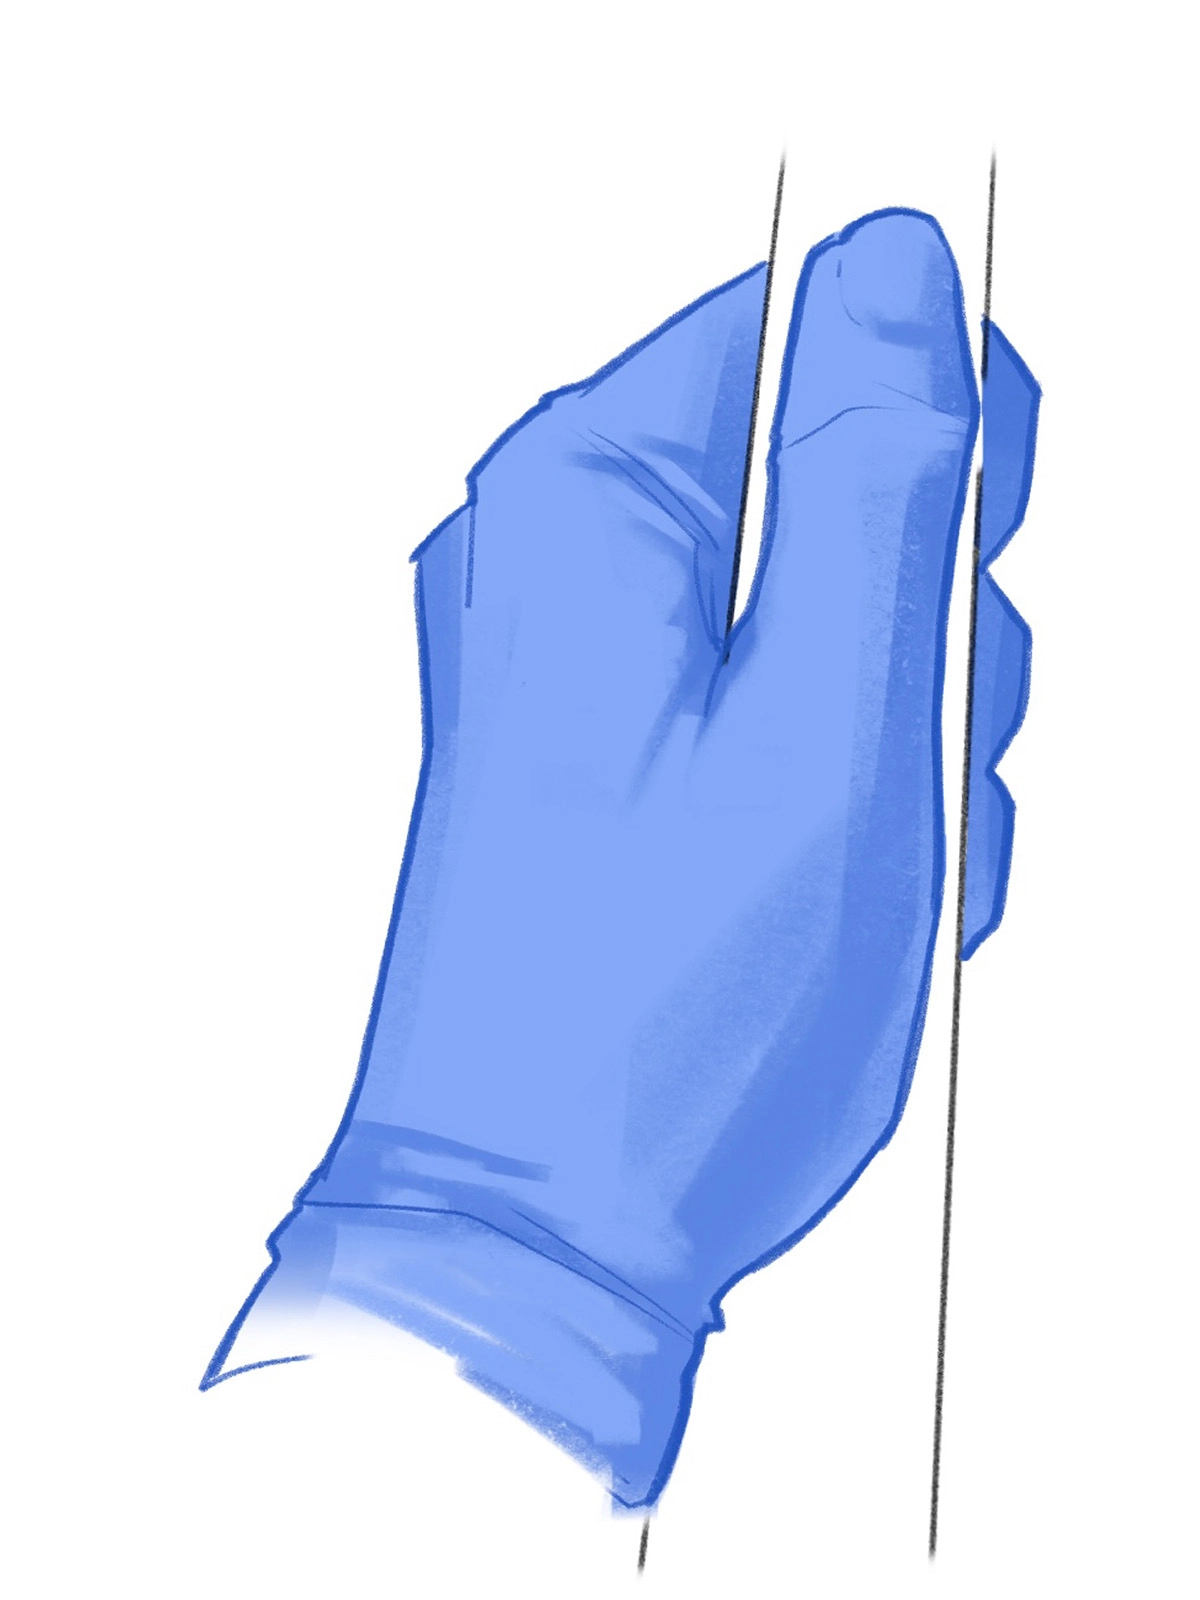
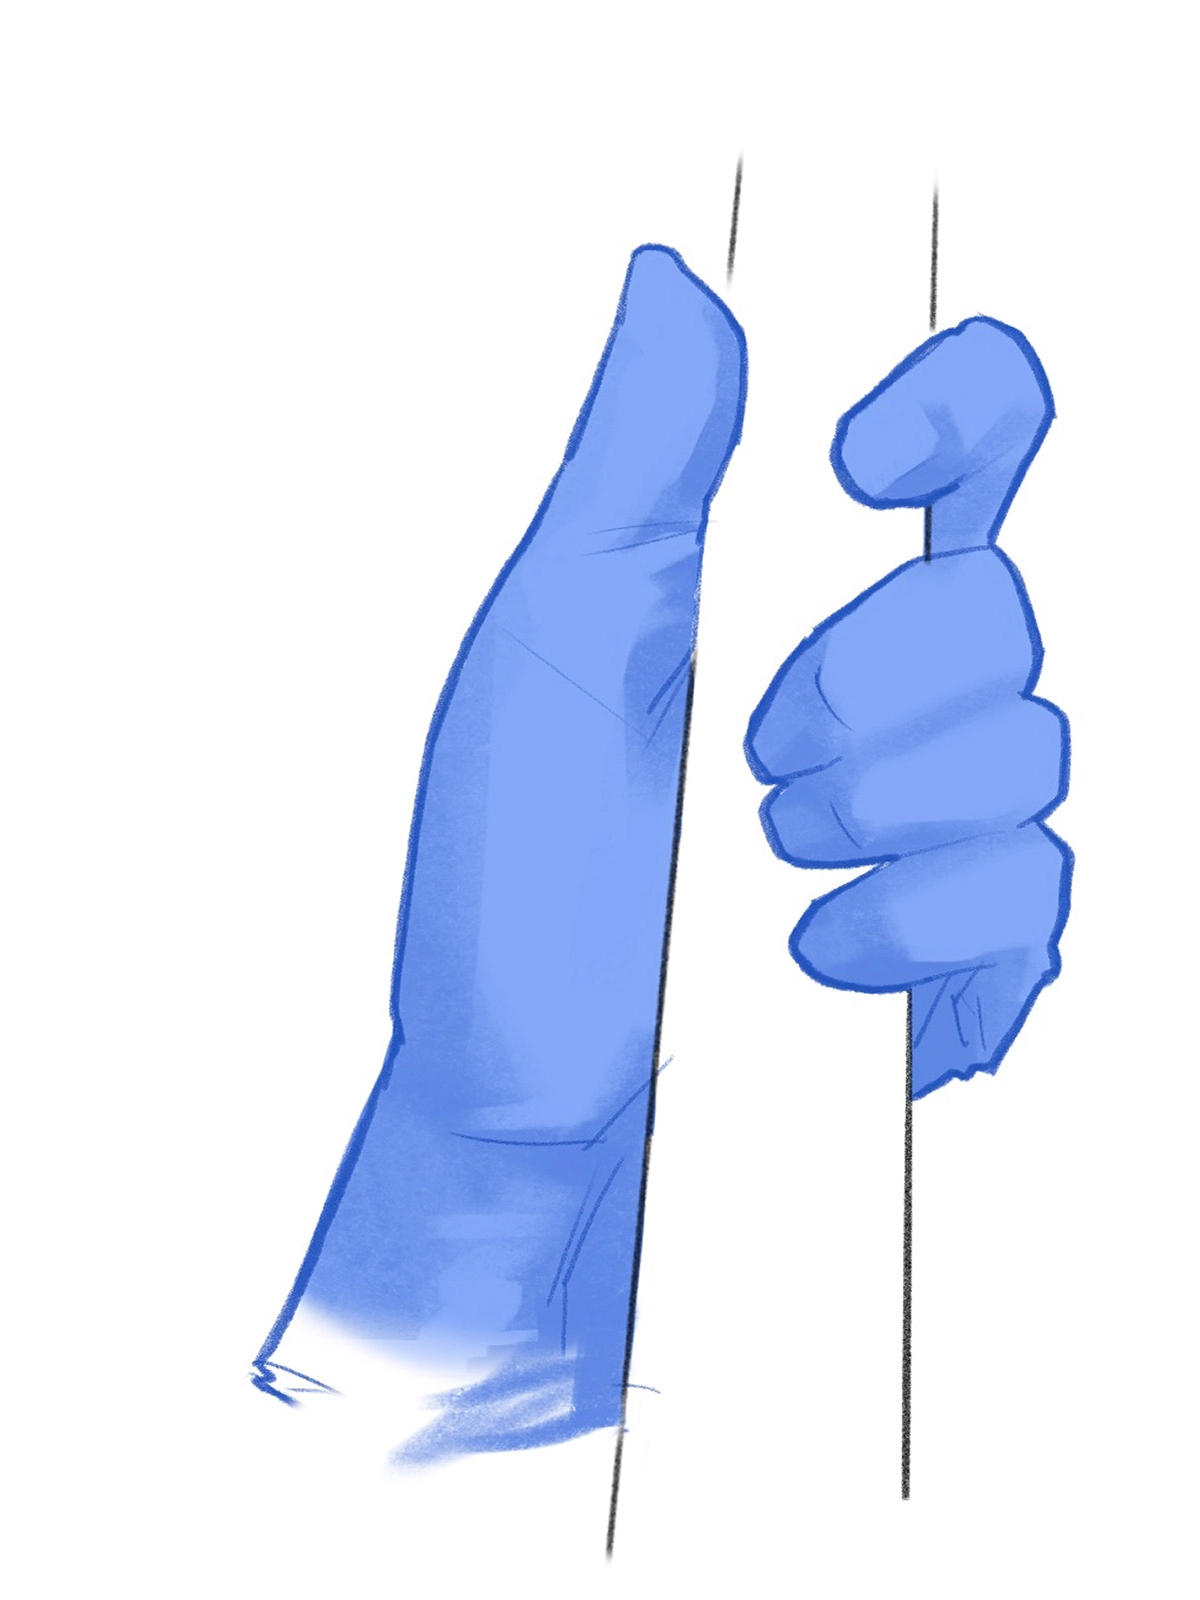
If you are right-handed, you will generally hold the transducer in your left hand and the needle in your right. Click to flip the image to a left-handed view.
Left: Conventional "handshake" grip with the palm facing medially. Movement to the left is abduction; movement to the right is adduction.
Right: Alternate "palm" grip with the palm facing up. Movement to the left is radial deviation; movement to the right is ulnar deviation.
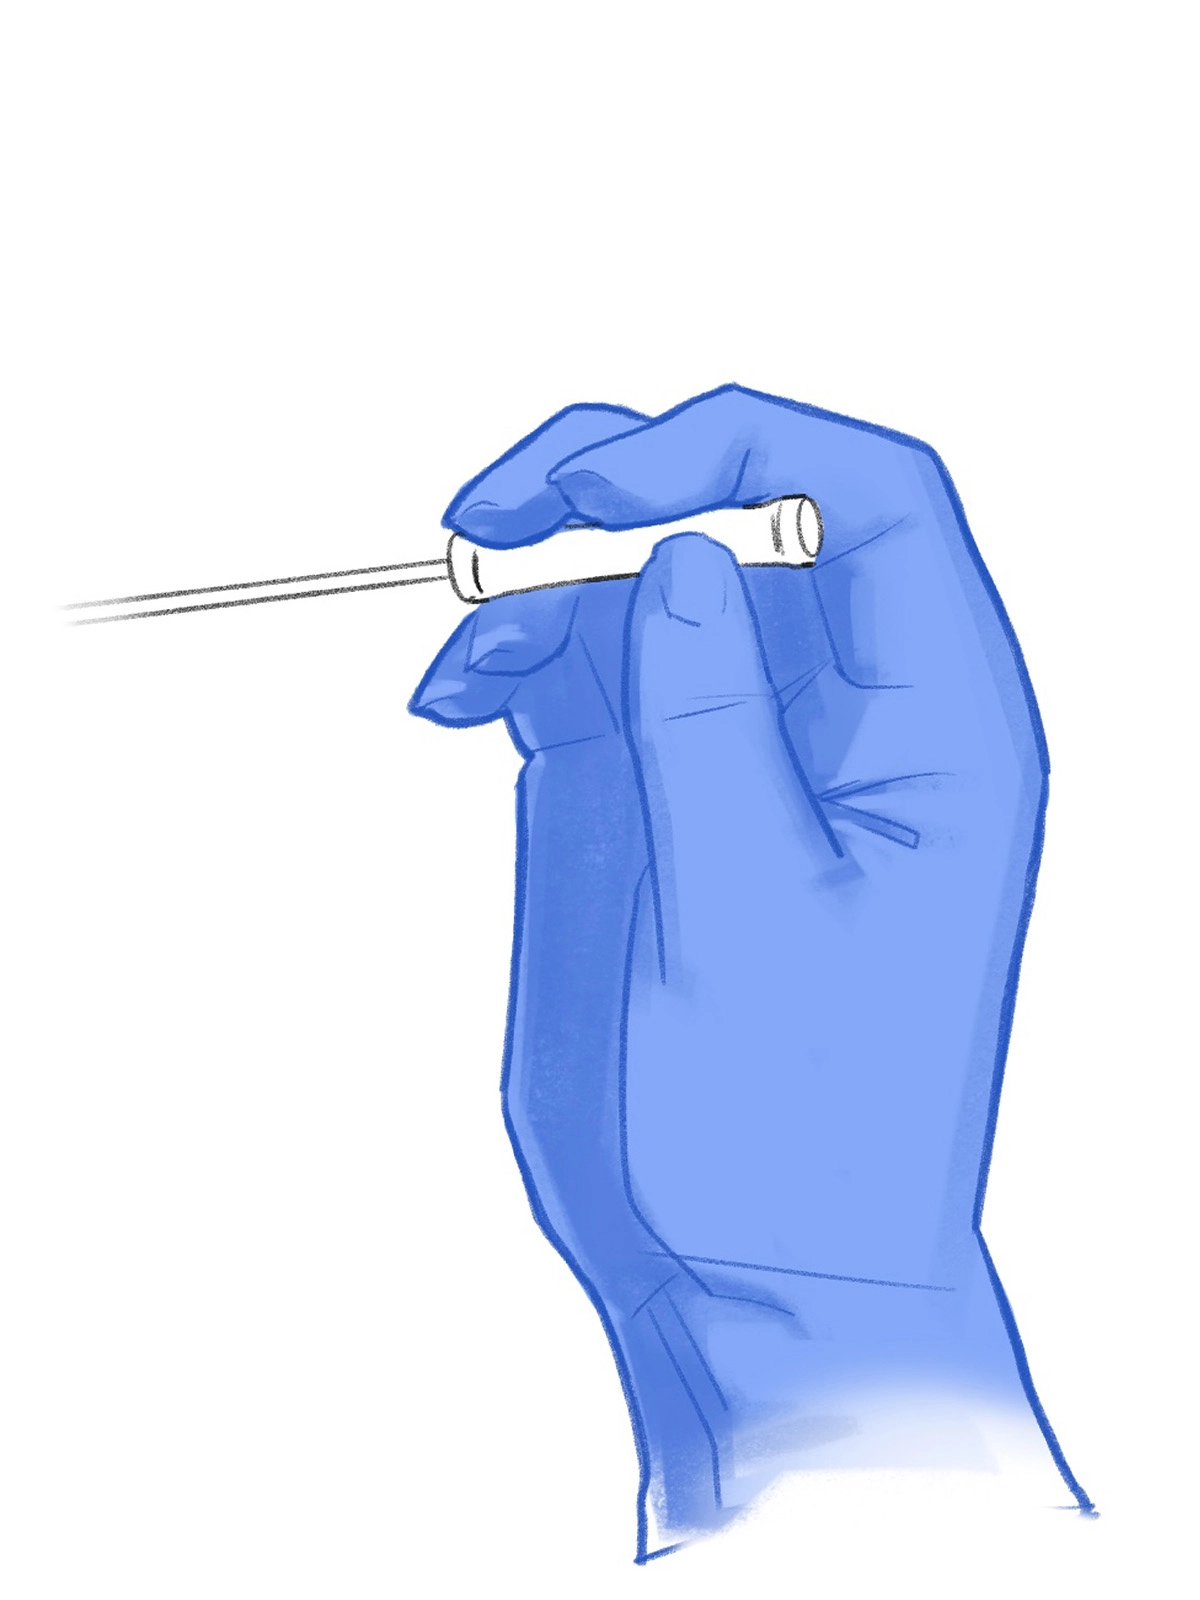
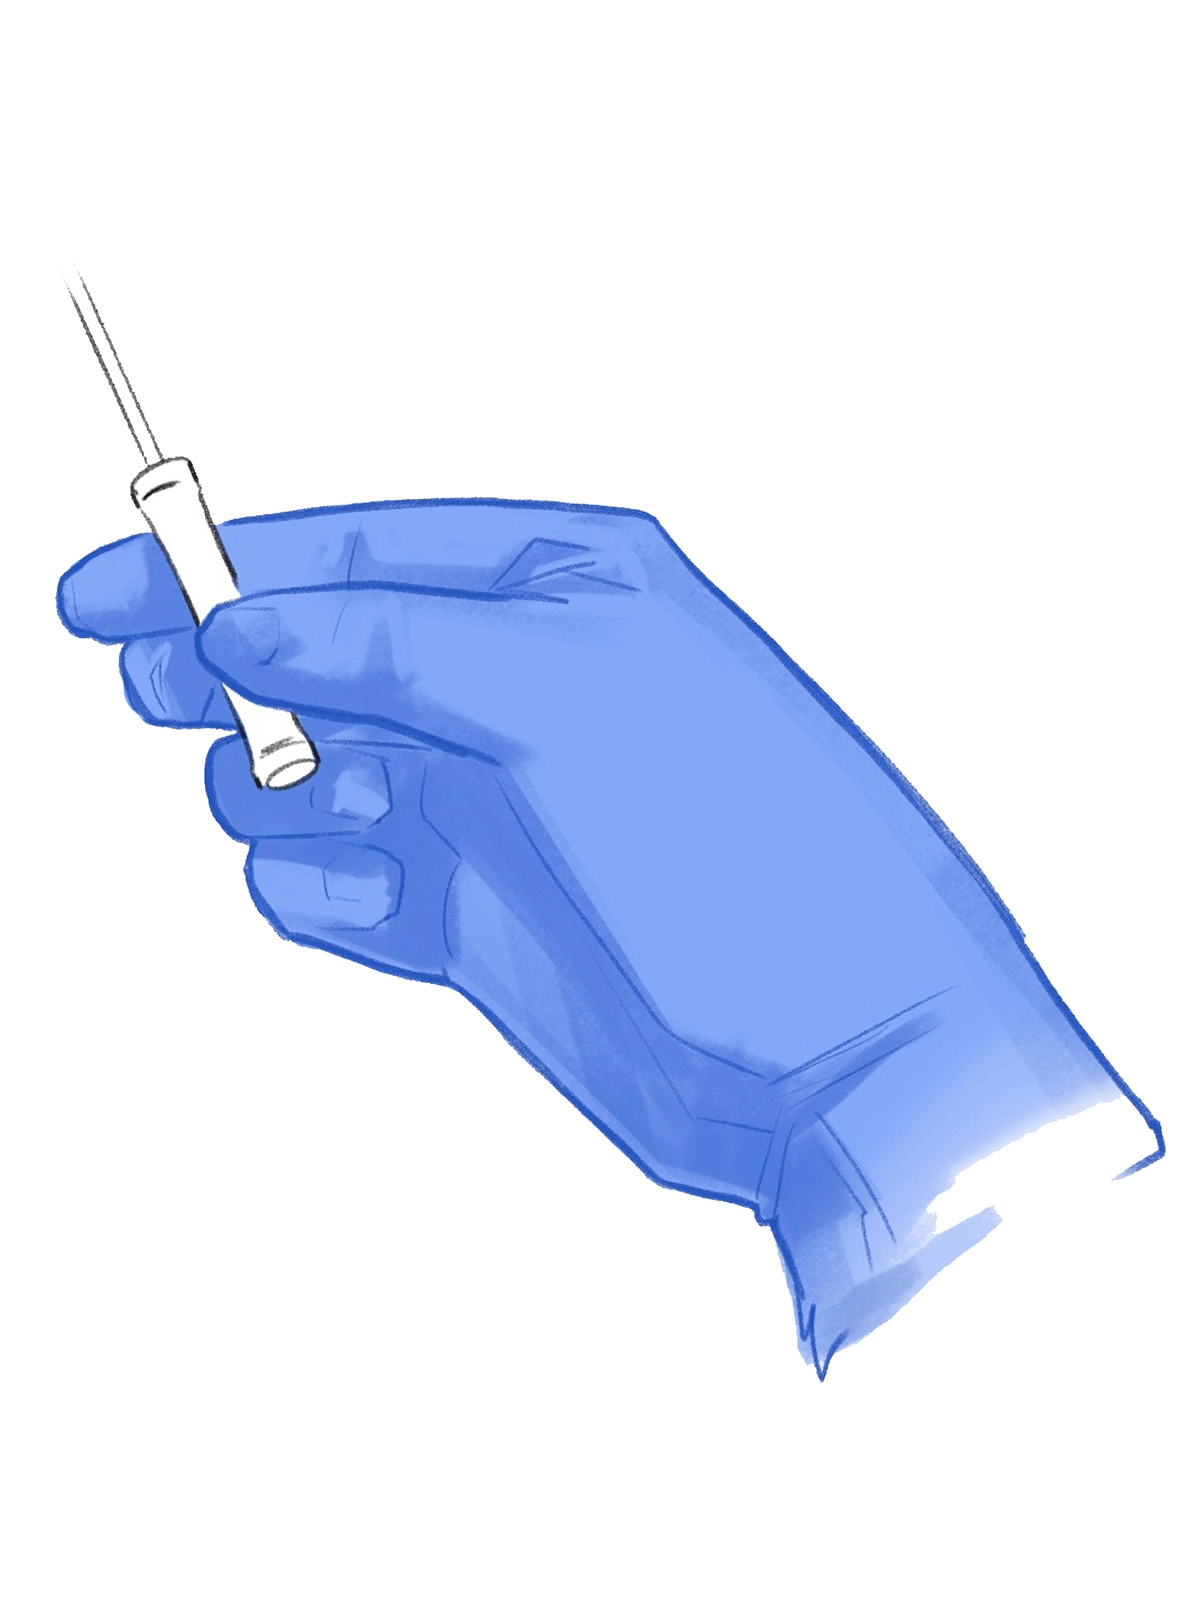
Needle grip
The base of the needle can be gripped in one of two ways:
Left: Traditional "overhand" grip, where the thumb is placed at the bottom of the needle base.
Right: Alternate "underhand" grip, where the index and middle fingers are placed at the base of the needle.
Module 2: Technical Preparation
2.1 Learning objectives
At the end of this module, you should be able to:
Identify the key equipment and personnel present in the oocyte retrieval suite.
Describe the layout and position of each item in relation to the patient and provider.
Explain the purpose of the aspiration circuit and the equipment on the worktable.
2.2 Introduction
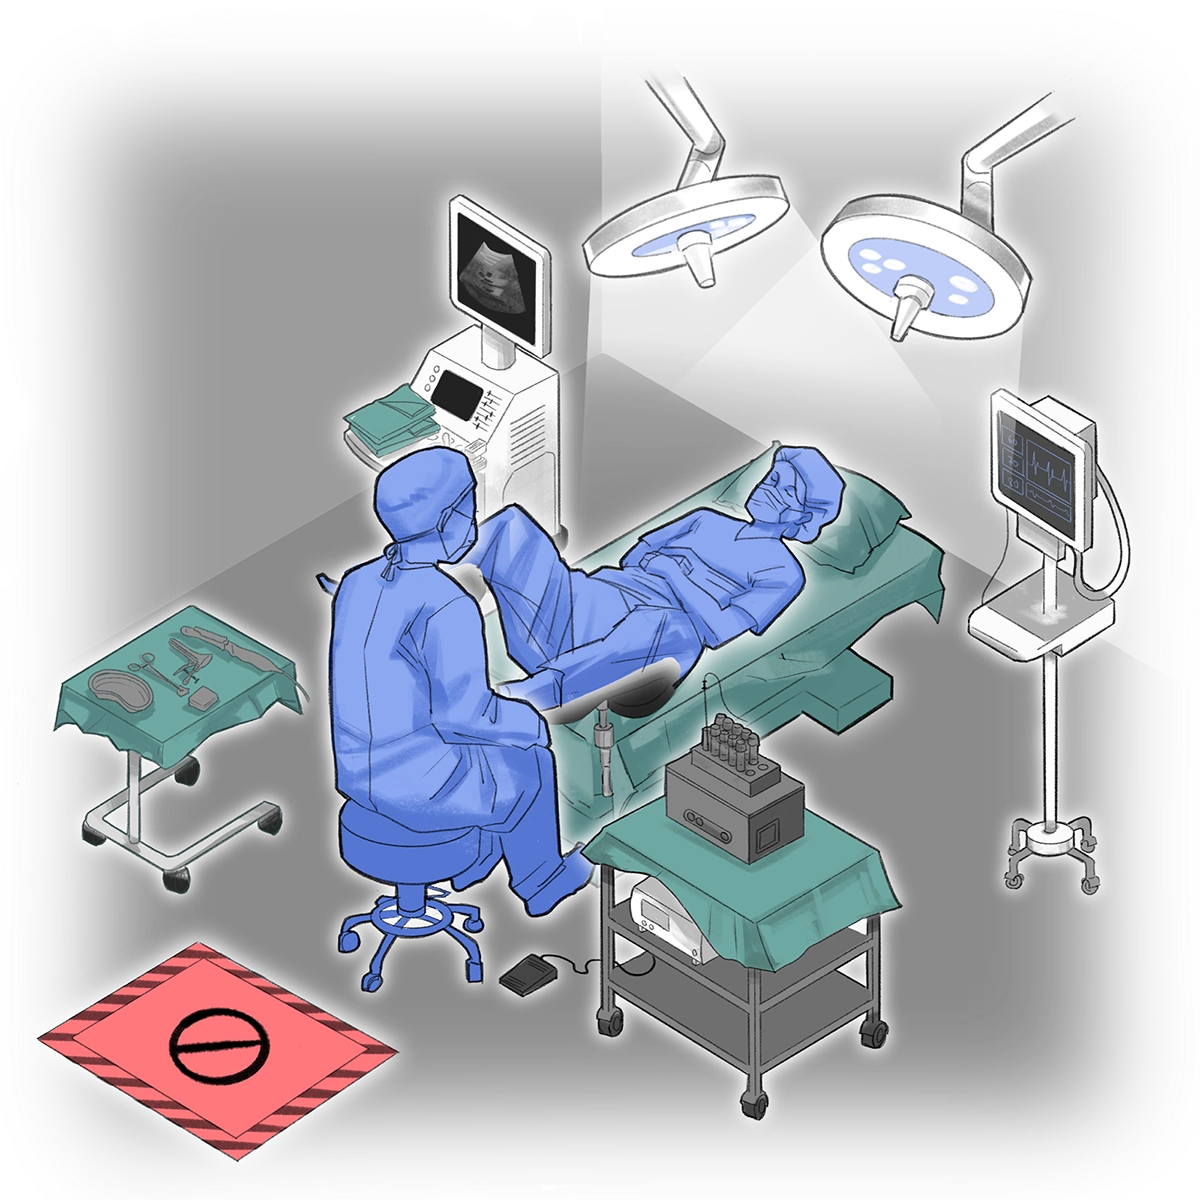
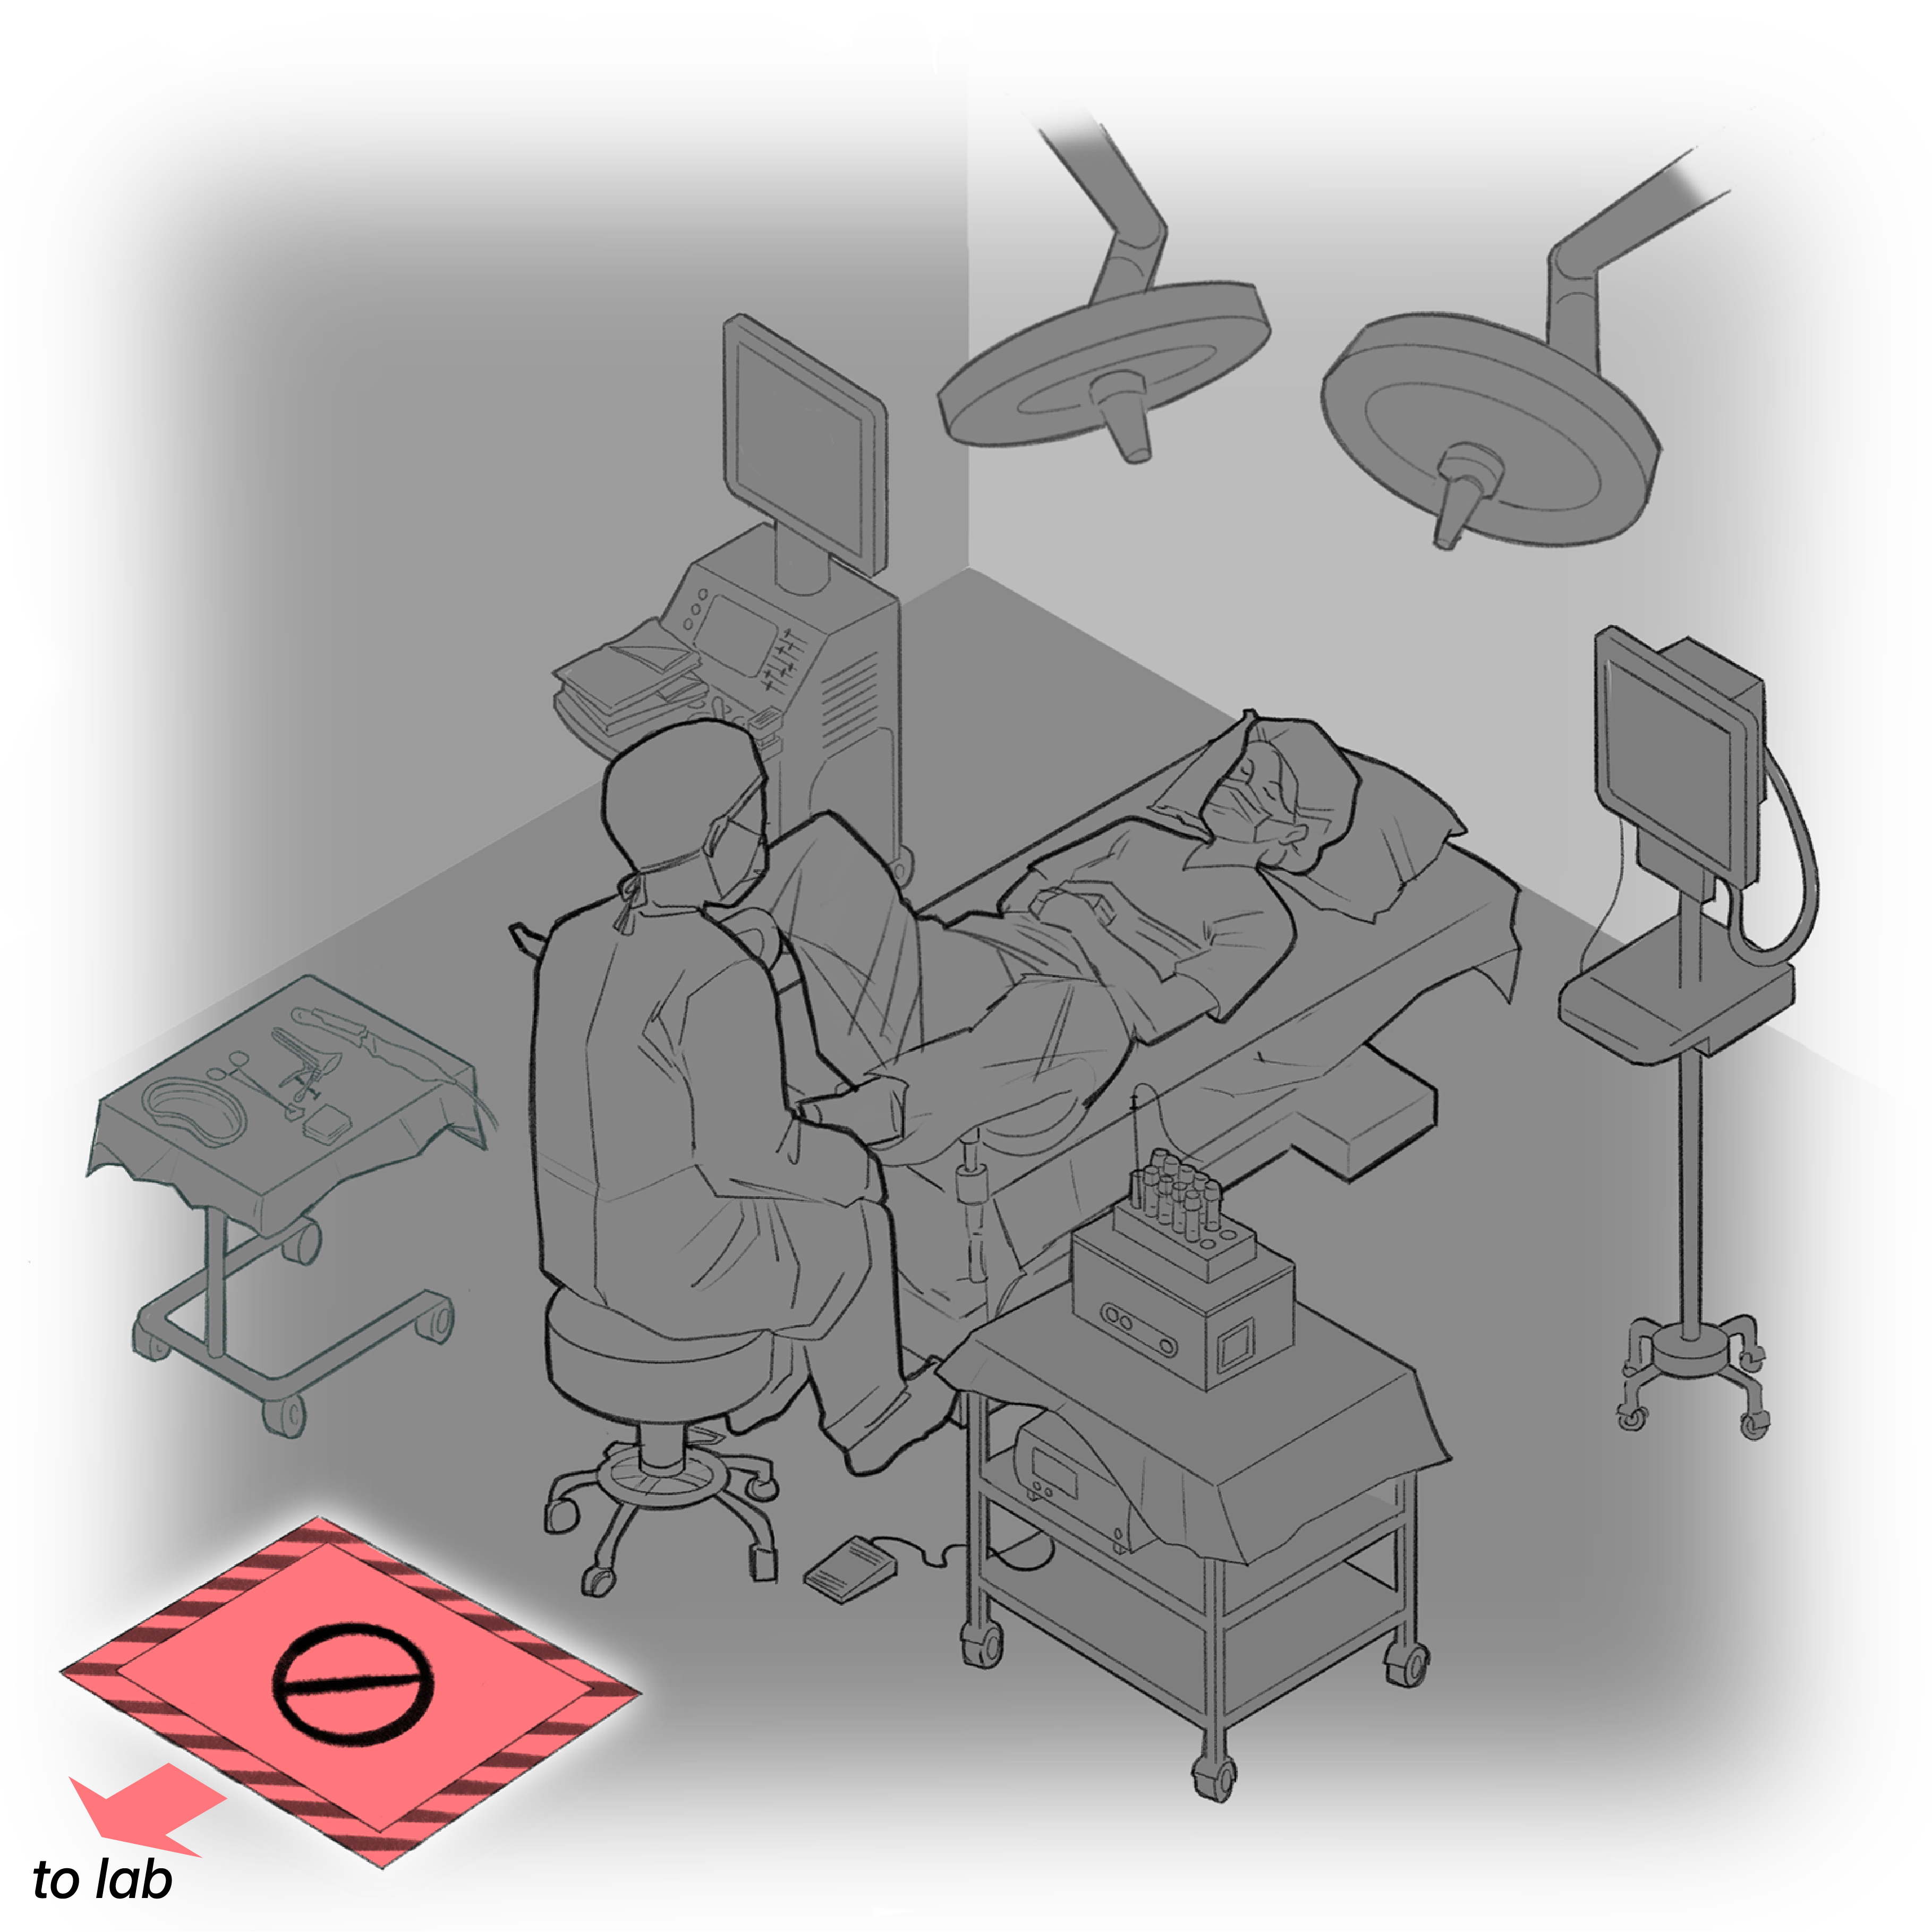
Welcome to the virtual oocyte retrieval suite. This room will look different depending on where you practice,
but this should familiarize you with the general layout and tools involved.
2.3 Procedure table
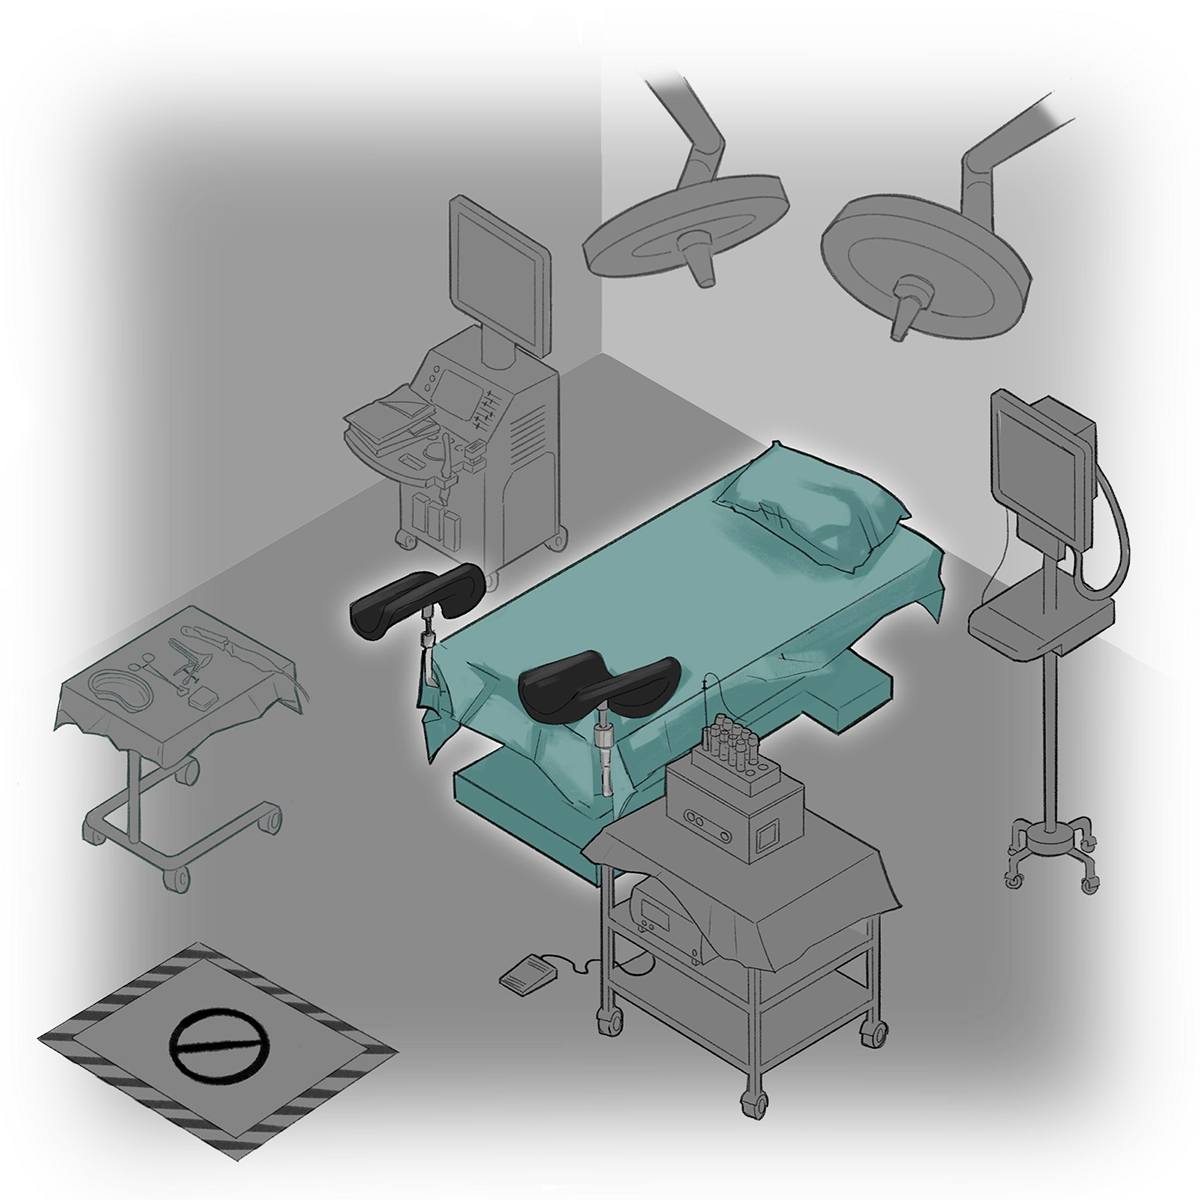
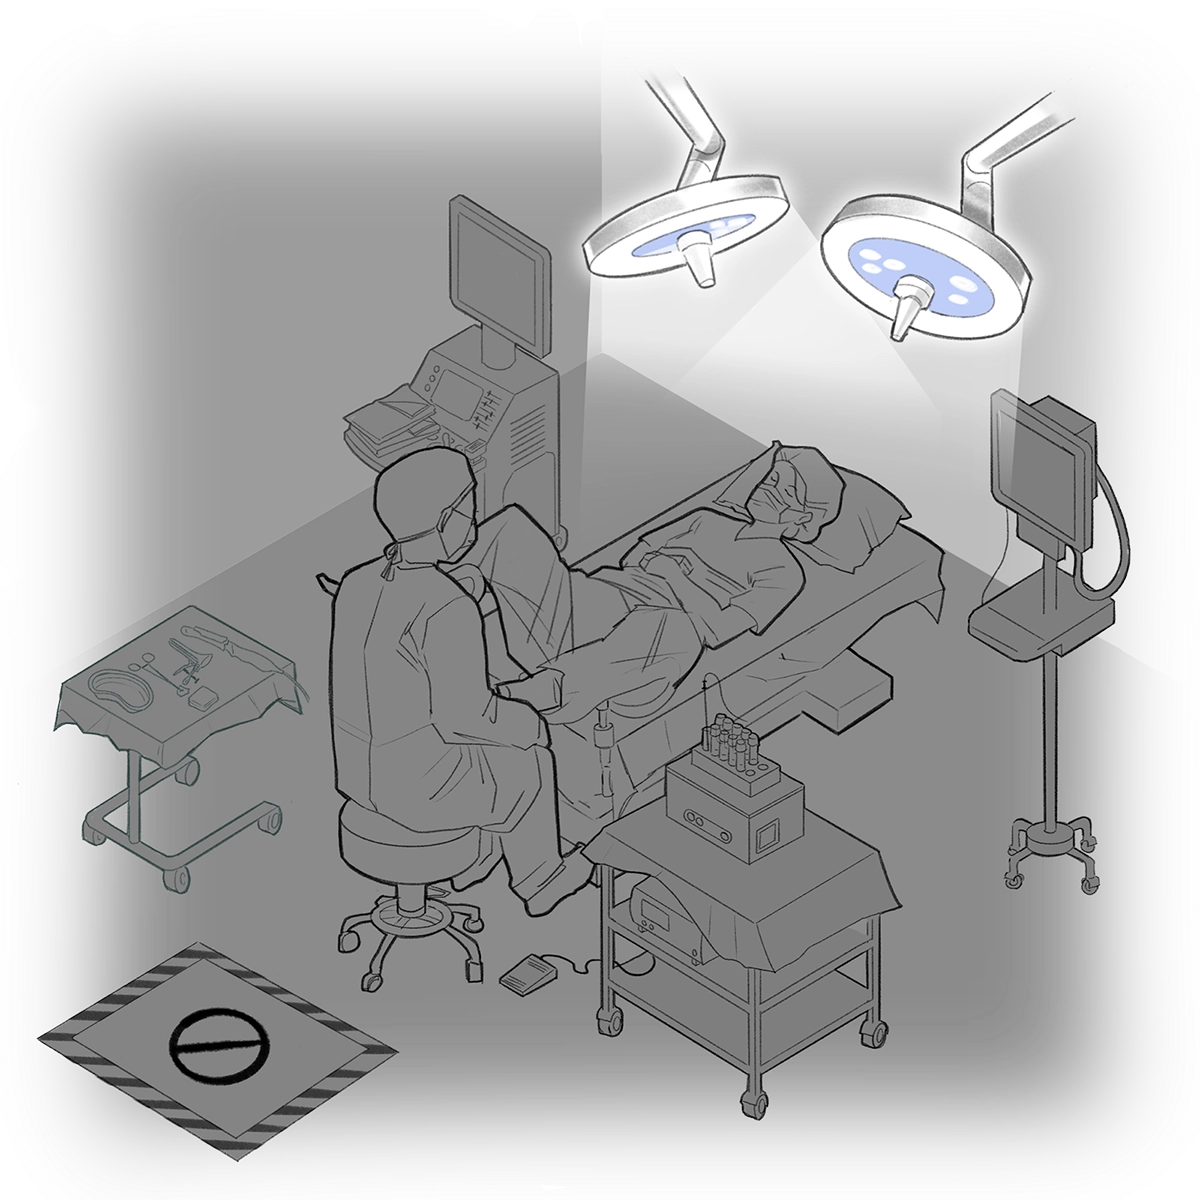
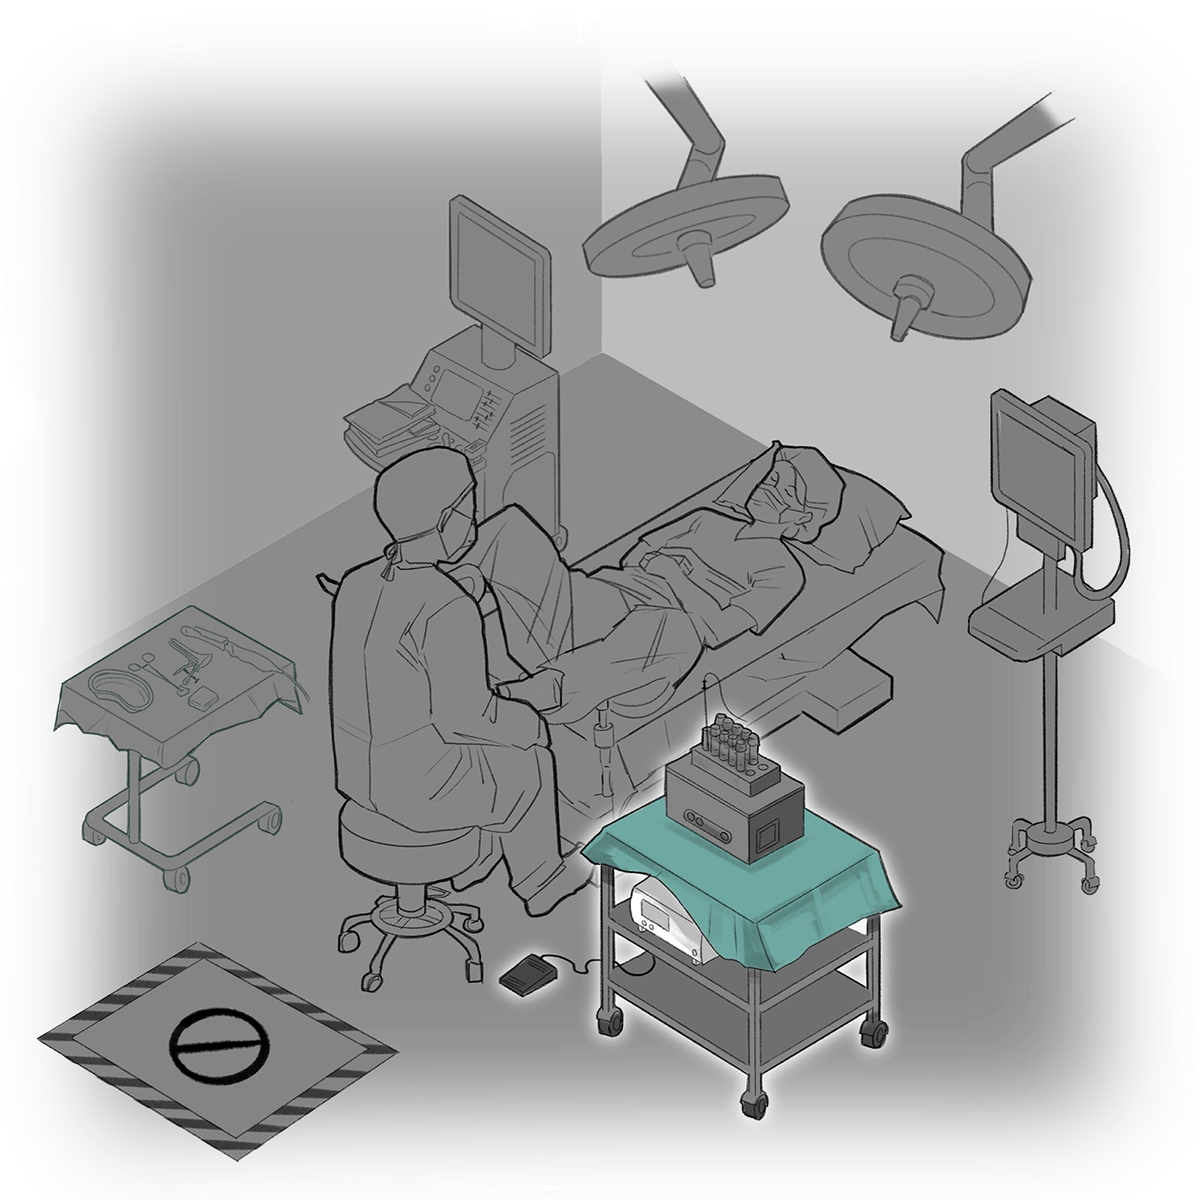
The center of the suite is occupied by a height-adjustable surgical or procedural table with stirrups.
2.4 Patient position
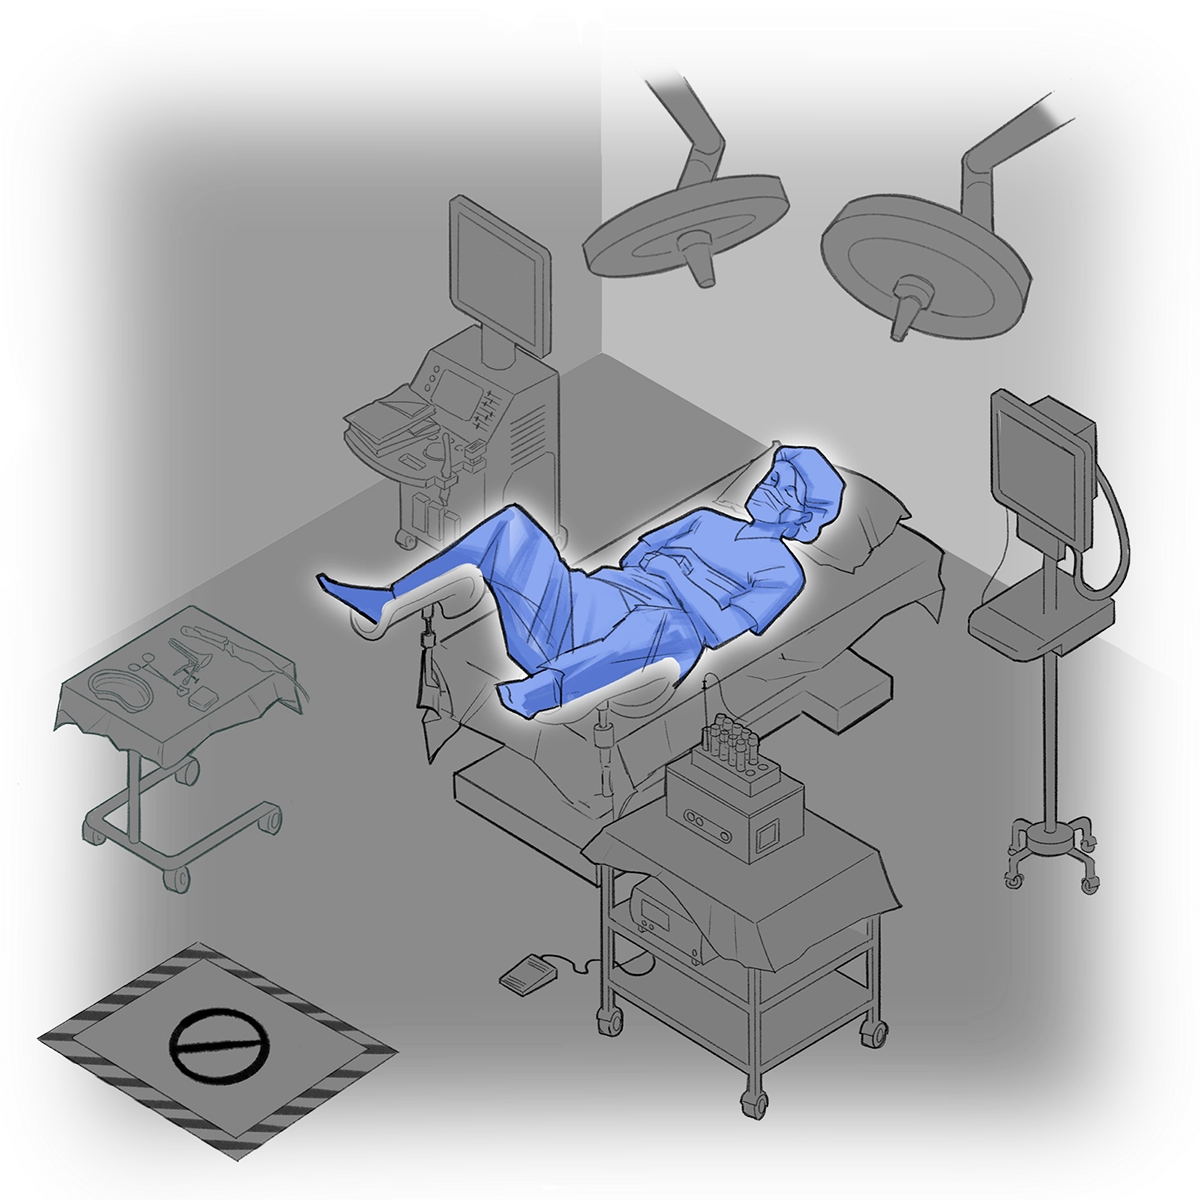
The patient is in dorsal lithotomy position, with the legs and feet covered in sterile drapes. The perineum
and lower abdomen can be covered as well. Some surgical or procedural tables can tilt to place the patient
in Trendelenburg or reverse Trendelenburg position or tilt the patient to the right or left. This may help
visualize the ovaries in certain cases.
2.5 Provider position
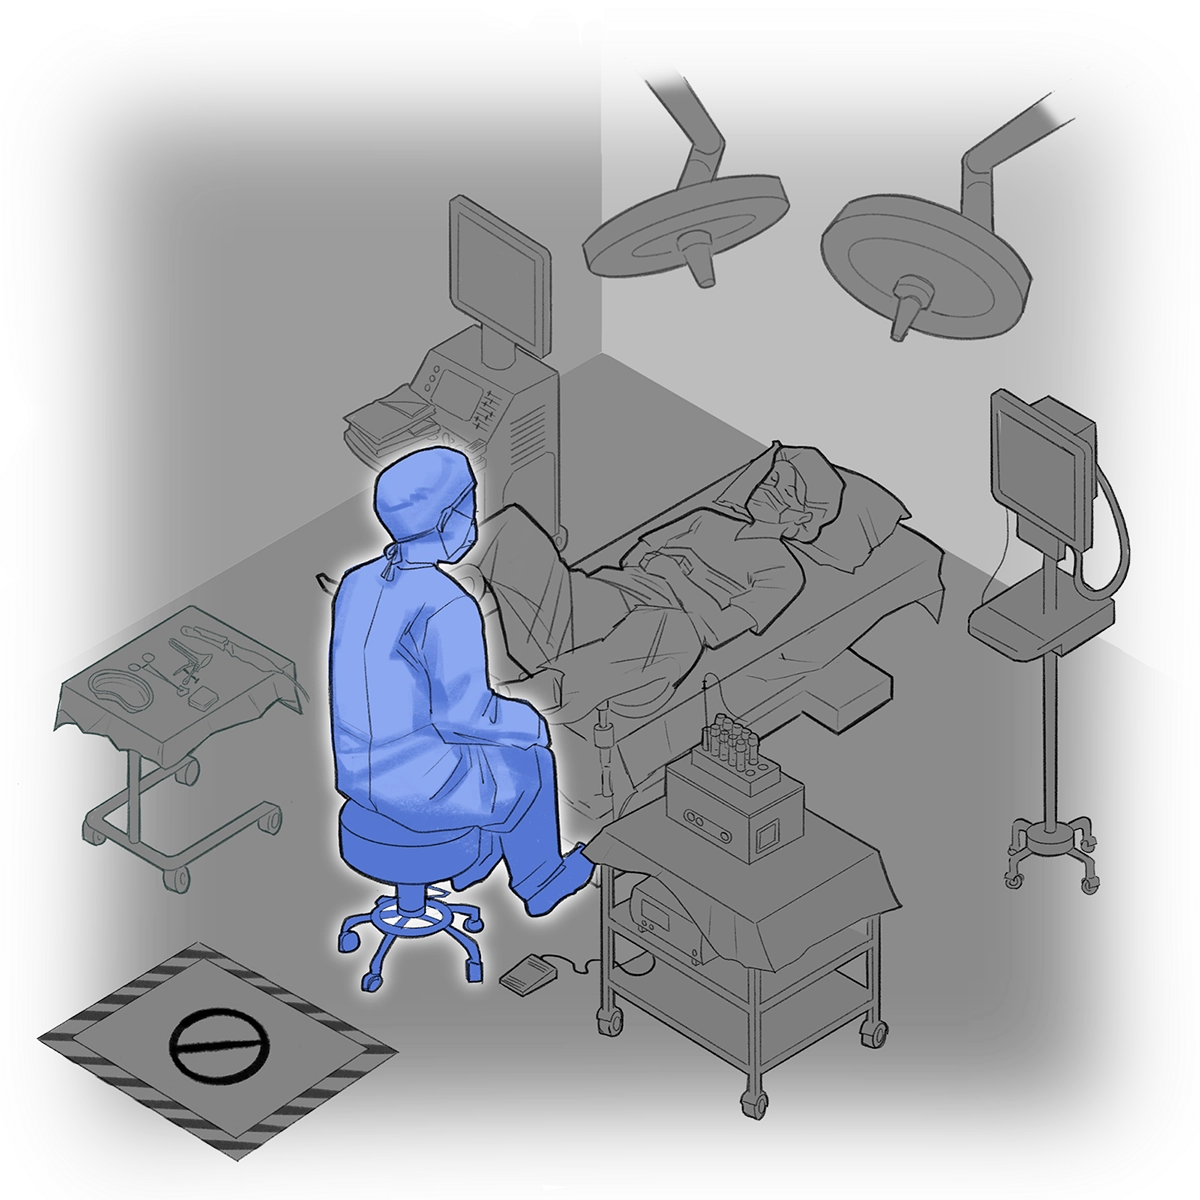
The provider is positioned between the patient's legs. The provider can be seated or standing during the
TVOR.
2.6 Lighting
The ceiling of the suite may have 1–2 surgical lights that can be adjusted using external handles and movable
arms.
2.7 Ultrasound machine and screen
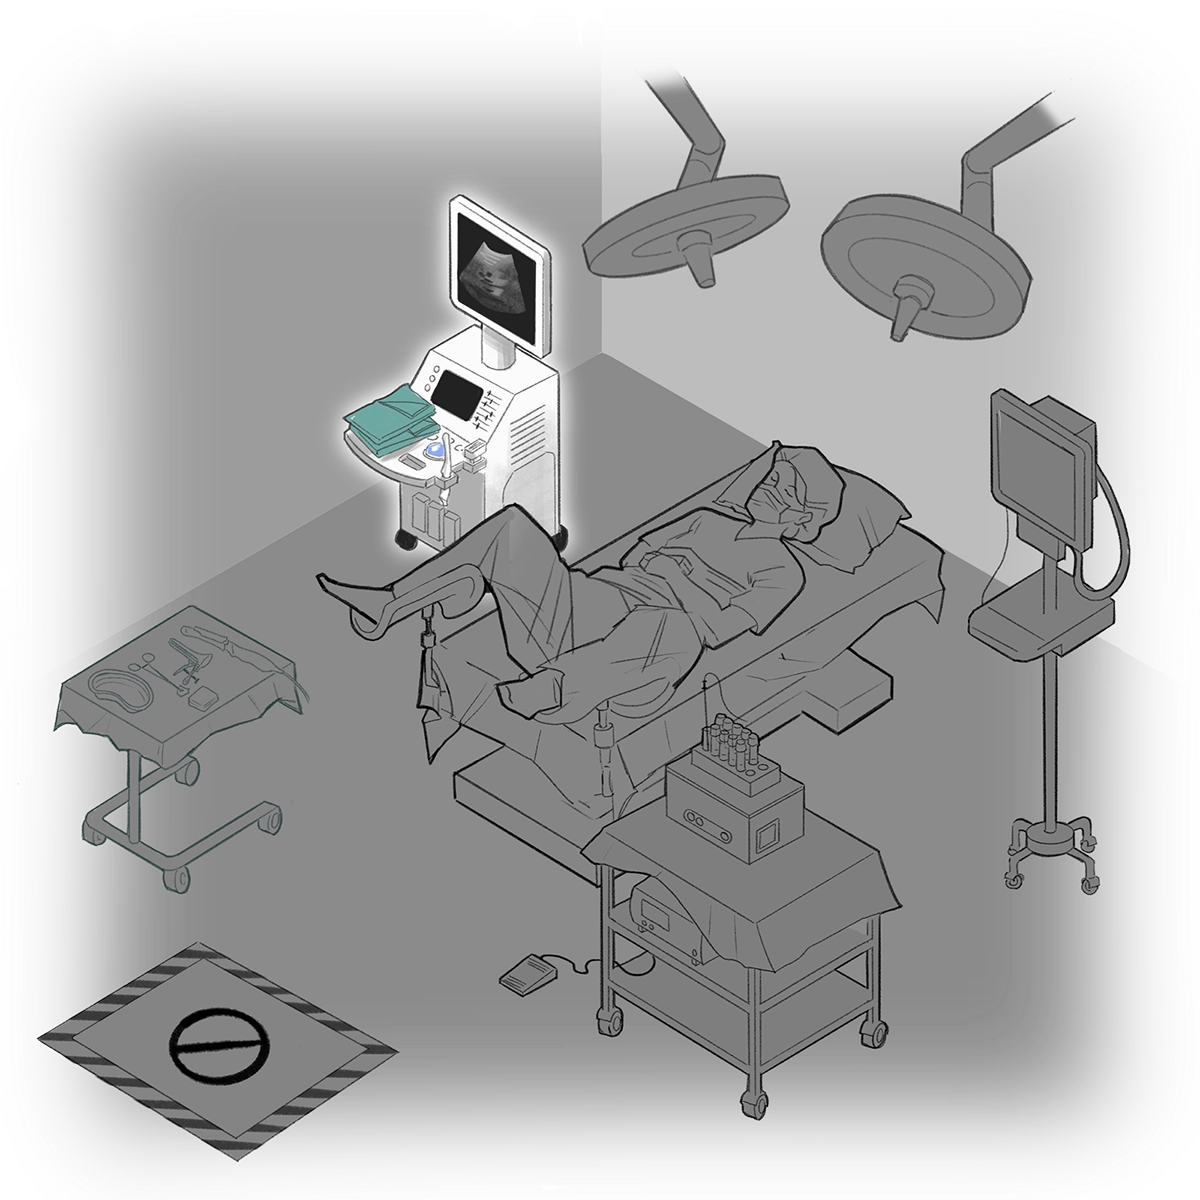
An ultrasound machine is placed to the right or the left of the patient. Ideally, the machine should have an
adjustable screen that can be moved and/or tilted toward or away from the operator. A sterile towel should be
placed over the buttons, knobs and trackball of the ultrasound machine so the operator can adjust the image
while remaining sterile.
2.8 Sedation
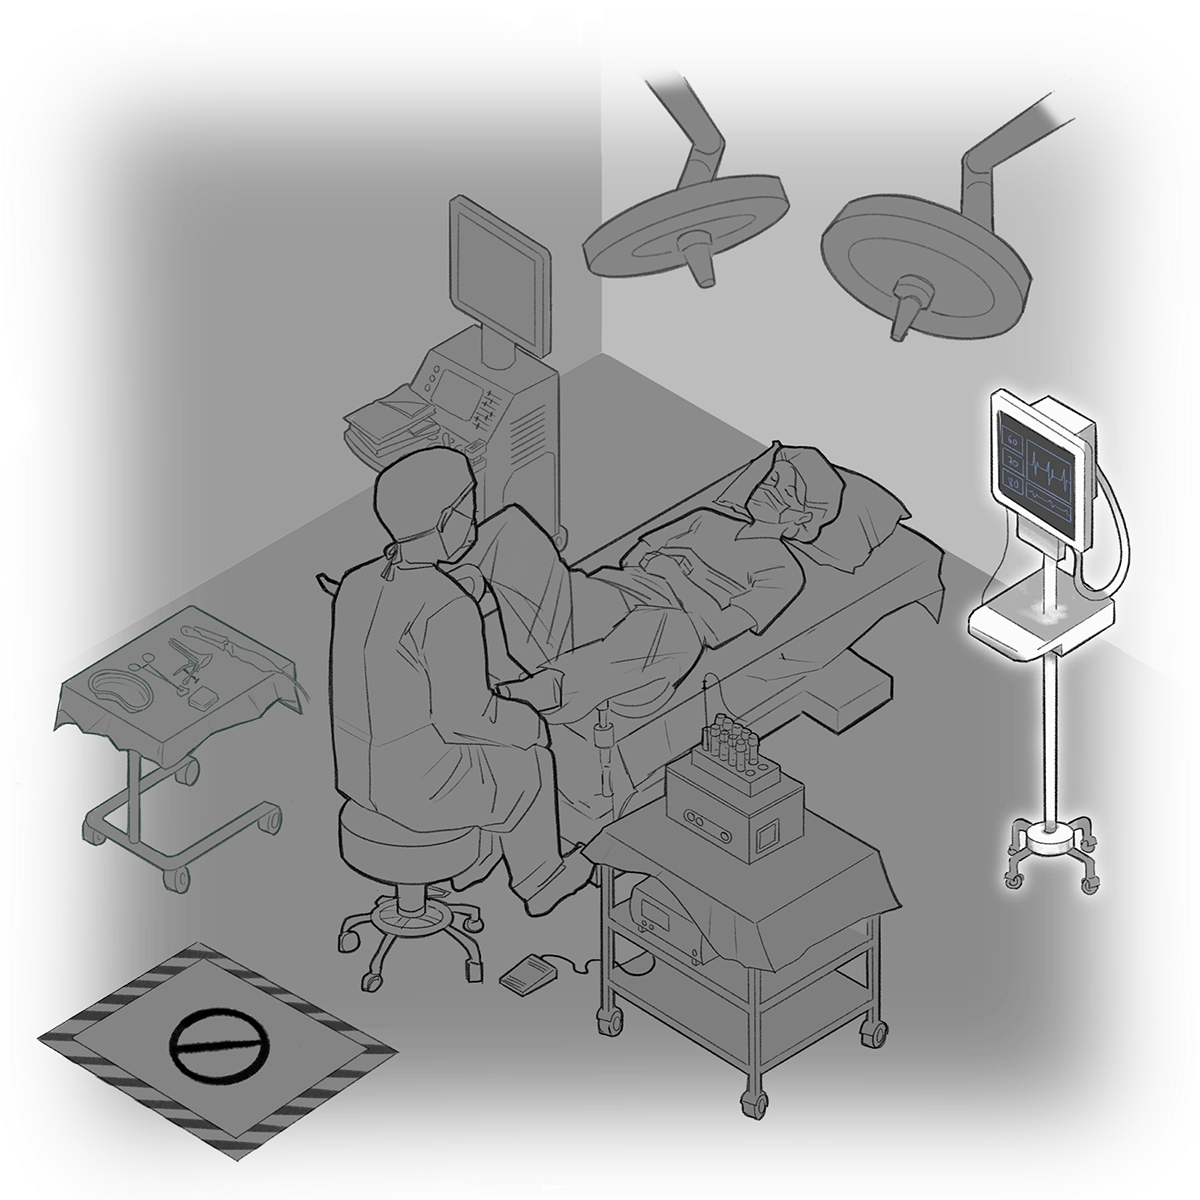
A portable vital signs monitor or anesthesia ventilator is placed at the head of the surgical or procedural
table.
An oxygen source with nasal canula or face mask should also be available at the head of the table. Ideally,
the nurse, anesthetist or anesthesiologist administering sedation should be positioned at the head of the
table.
2.9 Mayo stand
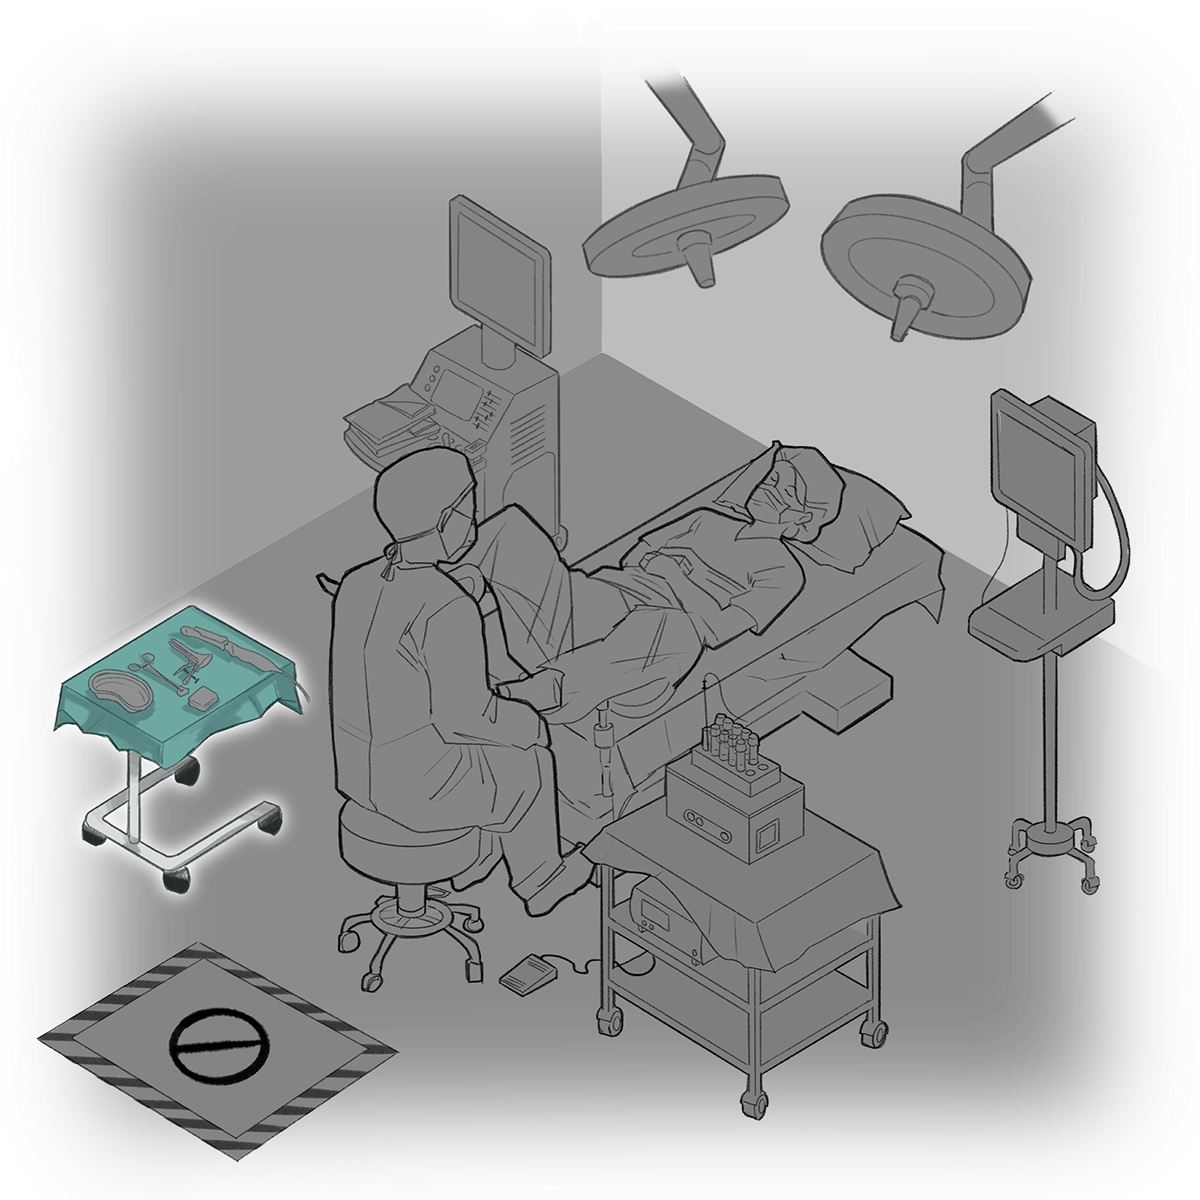
A Mayo stand with a sterile towel and equipment for the procedure is located near the patient's foot, on the
same side as the ultrasound machine.
The Mayo stand should have the following items:
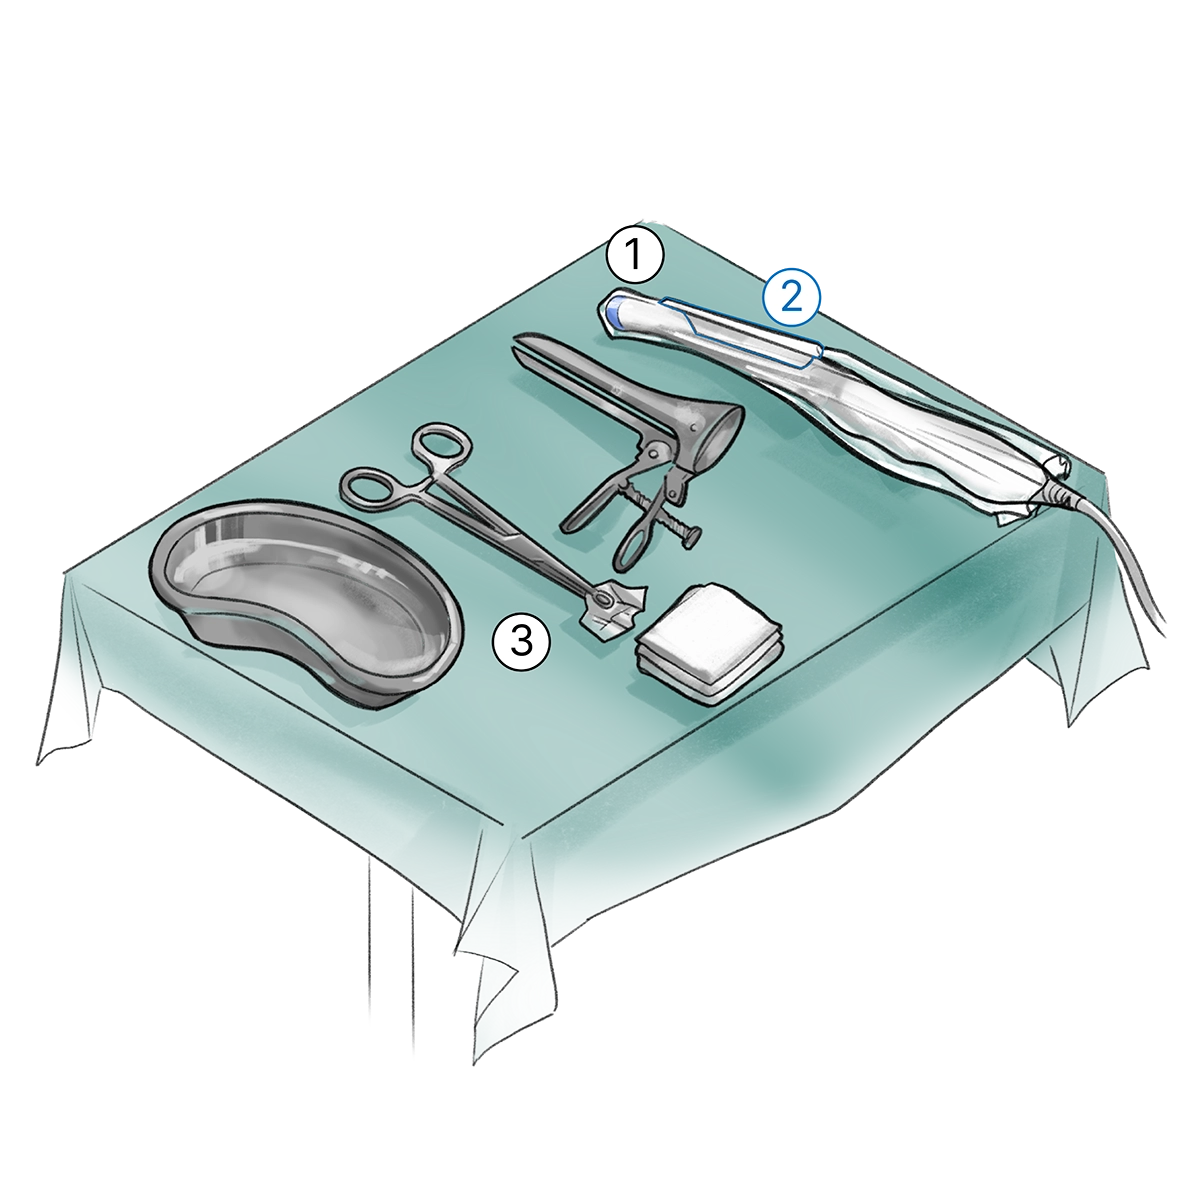
A transvaginal ultrasound transducer probe, covered with ultrasound gel and a sterile cover.
A sterile disposable plastic or reusable metal needle guide that can be attached by the provider or
support staff prior to performing TVOR. The aspiration needle will be passed through this guide.
A speculum, Ring/Kelly/Allis forceps, sterile gauze pads, and saline. These are used to disinfect the
vagina prior to TVOR, to examine the vagina after TVOR, and to establish hemostasis if there is vaginal
bleeding.
2.10 Worktable & circuit
A retrieval worktable with wheels should be placed near the patient's foot on the opposite side to the
ultrasound machine, and its surface covered with a sterile towel. A nurse or scrub/embryology technician is
usually seated at this worktable.
Top shelf
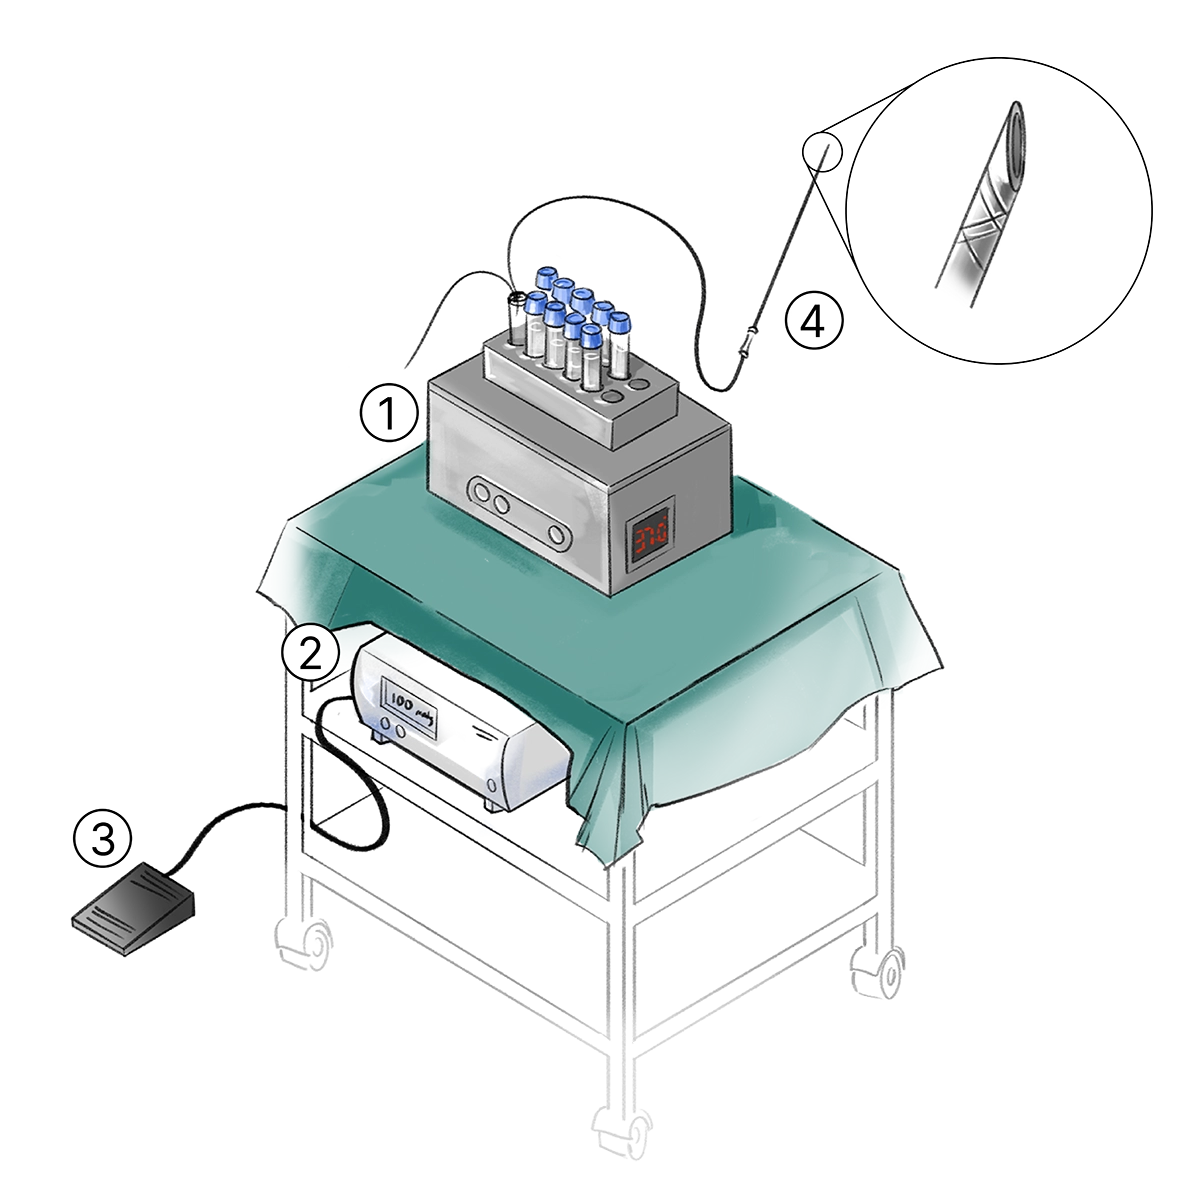
A test tube heater or rack at 37 °C, and approximately 10 test tubes containing culture media that is
isotonic and pH balanced.
Middle shelf
A vacuum pump. The pressure of the suction must be calibrated to 100–220 mmHg (according to the
manufacturer's instructions) just before starting and should be kept constant during the procedure.
Pedal for the vacuum pump to initiate aspiration. The pedal can be controlled by the provider or by an
assistant.
The aspiration needle. These needles can be single or double lumen, and 16 or 17 G with a length of
33–35 cm. The aspiration line of the needle is approximately 90 cm. The bevel or echogenic tip of the
needle should be easily visualized during TVOR.
The circuit
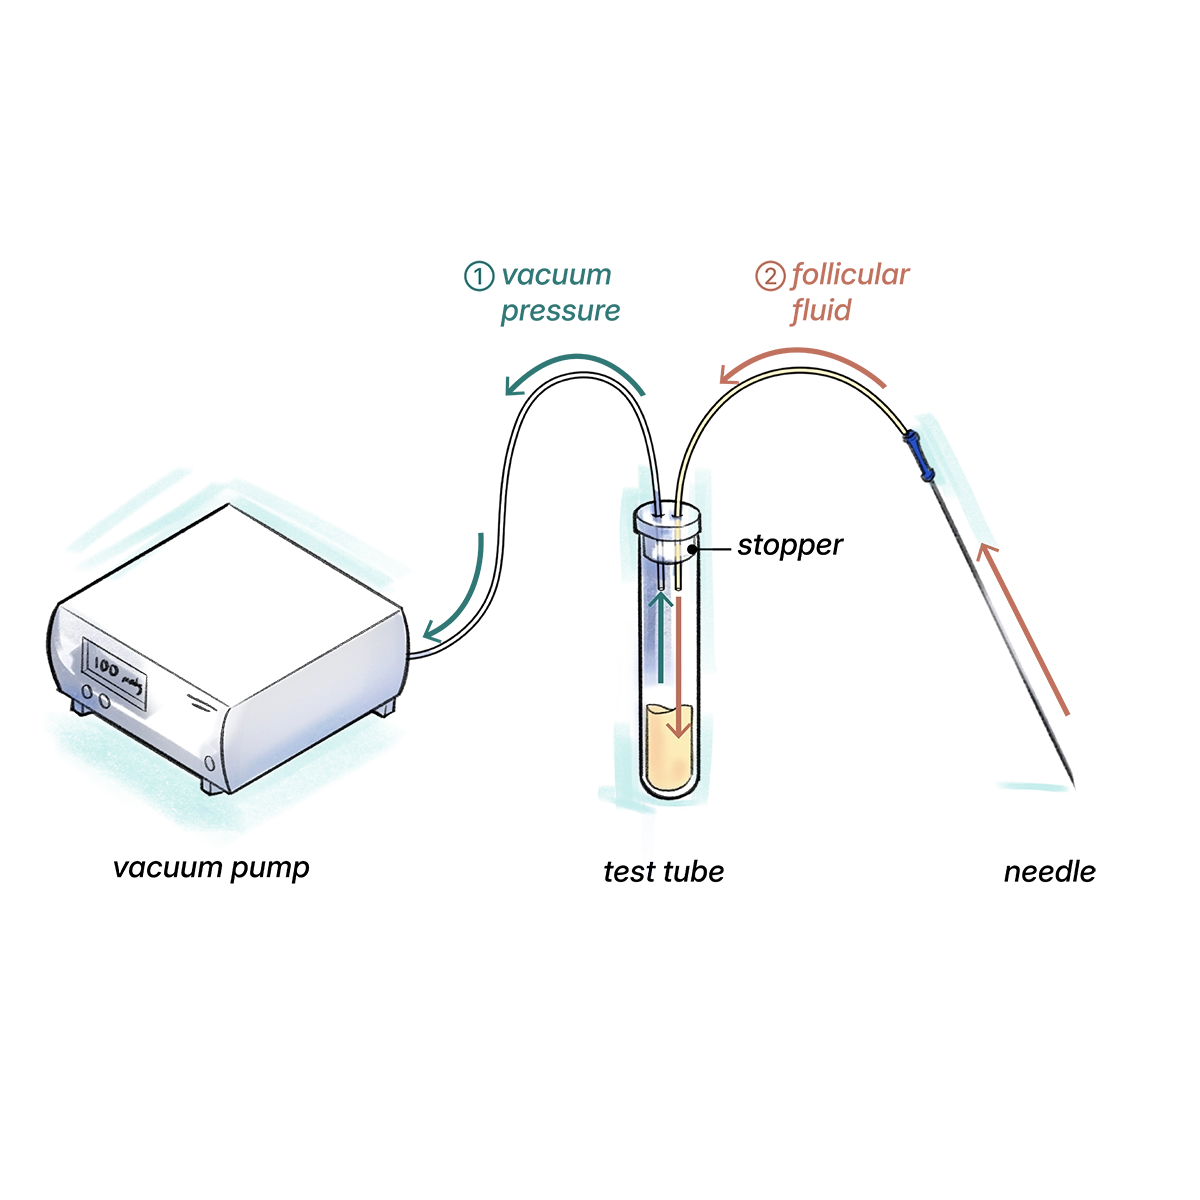
The vacuum pump, test tube, and needle form a single closed circuit. The rubber stopper seals the
test tube and serves as the circuit's center: one port connects to the needle, the other to the vacuum
pump.
(1) When the pump runs, it draws air out through its port, creating negative pressure inside the tube.
(2) That pressure pulls follicular fluid and oocytes up through the needle and into the test tube.
2.11 Workflow
In most cases, the embryology laboratory is adjacent to the retrieval suite. It is important not to block
this area, as tubes of follicular fluid will be transported to the lab throughout the procedure.
2.12 Conclusion
This module has reviewed the room setup. The next module will discuss the basics of the procedure.