Module 3: Procedure Principles
3.1 Learning objectives
At the end of this module, you should be able to:
- Identify key anatomic landmarks during transvaginal ultrasonography.
- Conduct an initial assessment at the start of the procedure.
- Identify the orientation of the ultrasound plane.
- Identify any anatomy or pathology that could complicate the procedure.
- Identify which ovary and follicle to aspirate first.
- Optimize the ultrasound image by adjusting machine settings and using deliberate movements of the transducer.
- Describe the technique of introducing the aspiration needle into the ovary.
3.2 Canadian prerequisites
Providers must have adequate training in gynecologic ultrasonography to perform a TVOR and/or TAOR safely. This module assumes that the provider has the appropriate medical training and is actively pursuing or has completed the following:
- Transition to Discipline Entrustable Professional Activity (EPA) #1 for Gynecologic Reproductive Endocrinology and Infertility as defined by the Royal College of Physicians and Surgeons of Canada
- Foundations EPA #1 for Gynecologic Reproductive Endocrinology and Infertility as defined by the Royal College of Physicians and Surgeons of Canada
- Core EPA #1 for Gynecologic Reproductive Endocrinology and Infertility as defined by the Royal College of Physicians and Surgeons of Canada OR Accreditation Council for Graduate Medical Education (ACGME) Competencies IV.B.1.b).(2).(b).(i) and IV.B.1.b).(2).(b).(ii) for Reproductive Endocrinology and Infertility
3.3 Stimulated ovary position
Normally, the ovaries are smaller and positioned higher in the pelvic brim. In the days leading up to TVOR, the patient will undergo ovarian stimulation to induce the development of multiple follicles. This typically causes the ovaries to enlarge and descend into the pelvis, adjacent to the vaginal wall. In this position, the ovaries can be easily visualized with an ultrasound transducer and accessed with the aspiration needle through the right and left vaginal fornices.

Figure 3.3a: Interactive viewer for understanding ovary position. After loading the 3d model, use the slider to see the change in ovary size and position before and after stimulation. Click + drag to rotate the model. Scroll to zoom in and out of the model. Note the changing distance between the right ovary and the right vaginal fornix.
3.4 Initial scan
- Examine the cervix and vagina with a speculum, then disinfect with gauze and saline.
- Gently introduce the transvaginal transducer into the patient's vagina. Hold the transducer in the sagittal plane.
- Move the transducer laterally towards the right vaginal fornix until the right ovary is identified. Take note of any small ovarian or vaginal vessels and the right iliac vessels.
Figure 3.4a: Doppler ultrasound footage showing the vaginal vessels.
- Move the transducer laterally towards the left vaginal fornix until the left ovary is identified. Again, note the left ovarian, vaginal, and iliac vessels. The uterus should be identified as you pass from one side to the other.
Use both longitudinal and transverse planes of the transducer while performing the TVOR to be certain of the anatomy and boundaries of the ovarian cortex.

Figure 3.4b: Interactive sample global scan viewer. After loading the 3d model, use the slider to move the probe from the right fornix to the left fornix. Click + drag to rotate the model. Scroll to zoom in and out of the model. Note the appearance of the ovaries, uterus, and vessels.
The internal iliac vessels may be misinterpreted as follicles by inexperienced providers. It is important to avoid puncturing these during the procedure. Remember that the plane of the transducer can be rotated for better visualization. To confirm the identity of the iliac vessels, look for a change in shape when the transducer plane is rotated. When the ultrasound is in the coronal plane, the iliac vessel will appear more circular, which may be difficult to differentiate from follicles. Rotate the probe to see the cross-section of the vessel elongate. If there is still doubt, look for pulsation in the vessel.
Figure 3.4c: Interactive iliac vessel viewer. After loading the 3d model, use the slider to rotate the probe and see the change in the plane and ultrasound image of the iliac vessel. Click + drag to rotate the model. Scroll to zoom in and out of the model.
Doppler imaging on the ultrasound machine will also help visualize blood flow.

Figure 3.4d: Doppler ultrasound footage showing the iliac vessels.
During the initial scan, pay close attention to the anatomy. Look for any pertinent findings, such as endometrial fluid or free fluid in the pelvis.
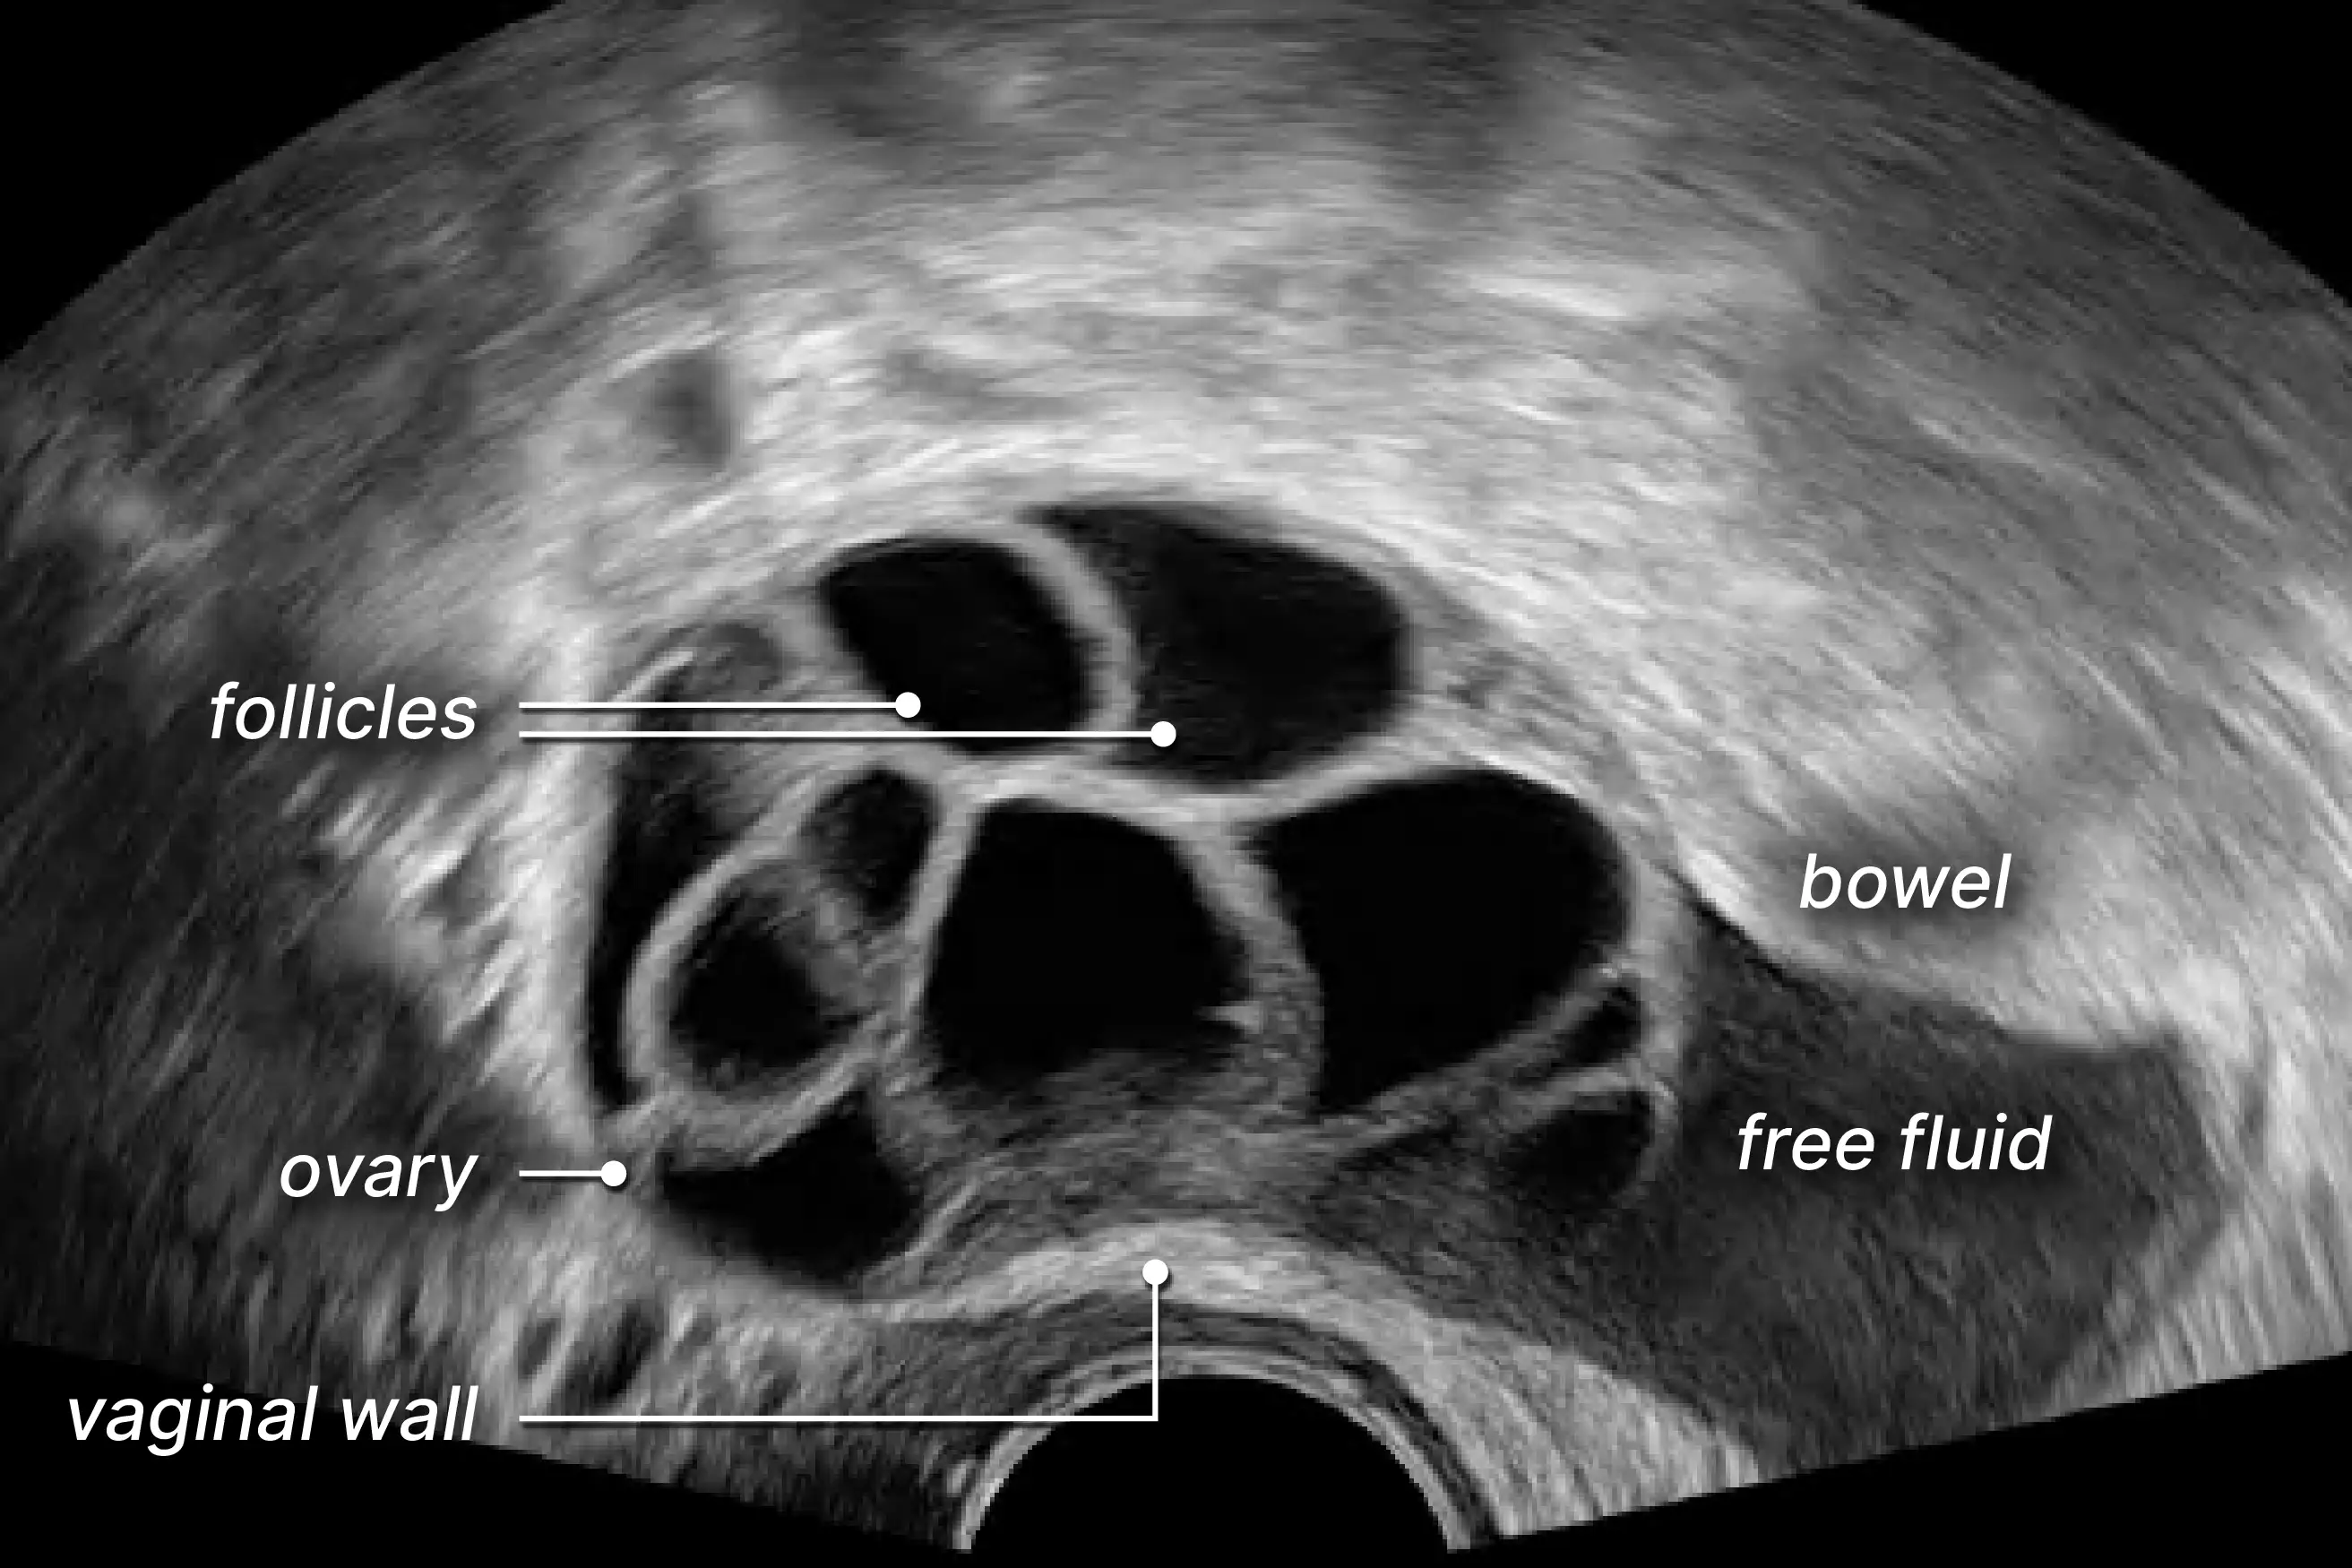
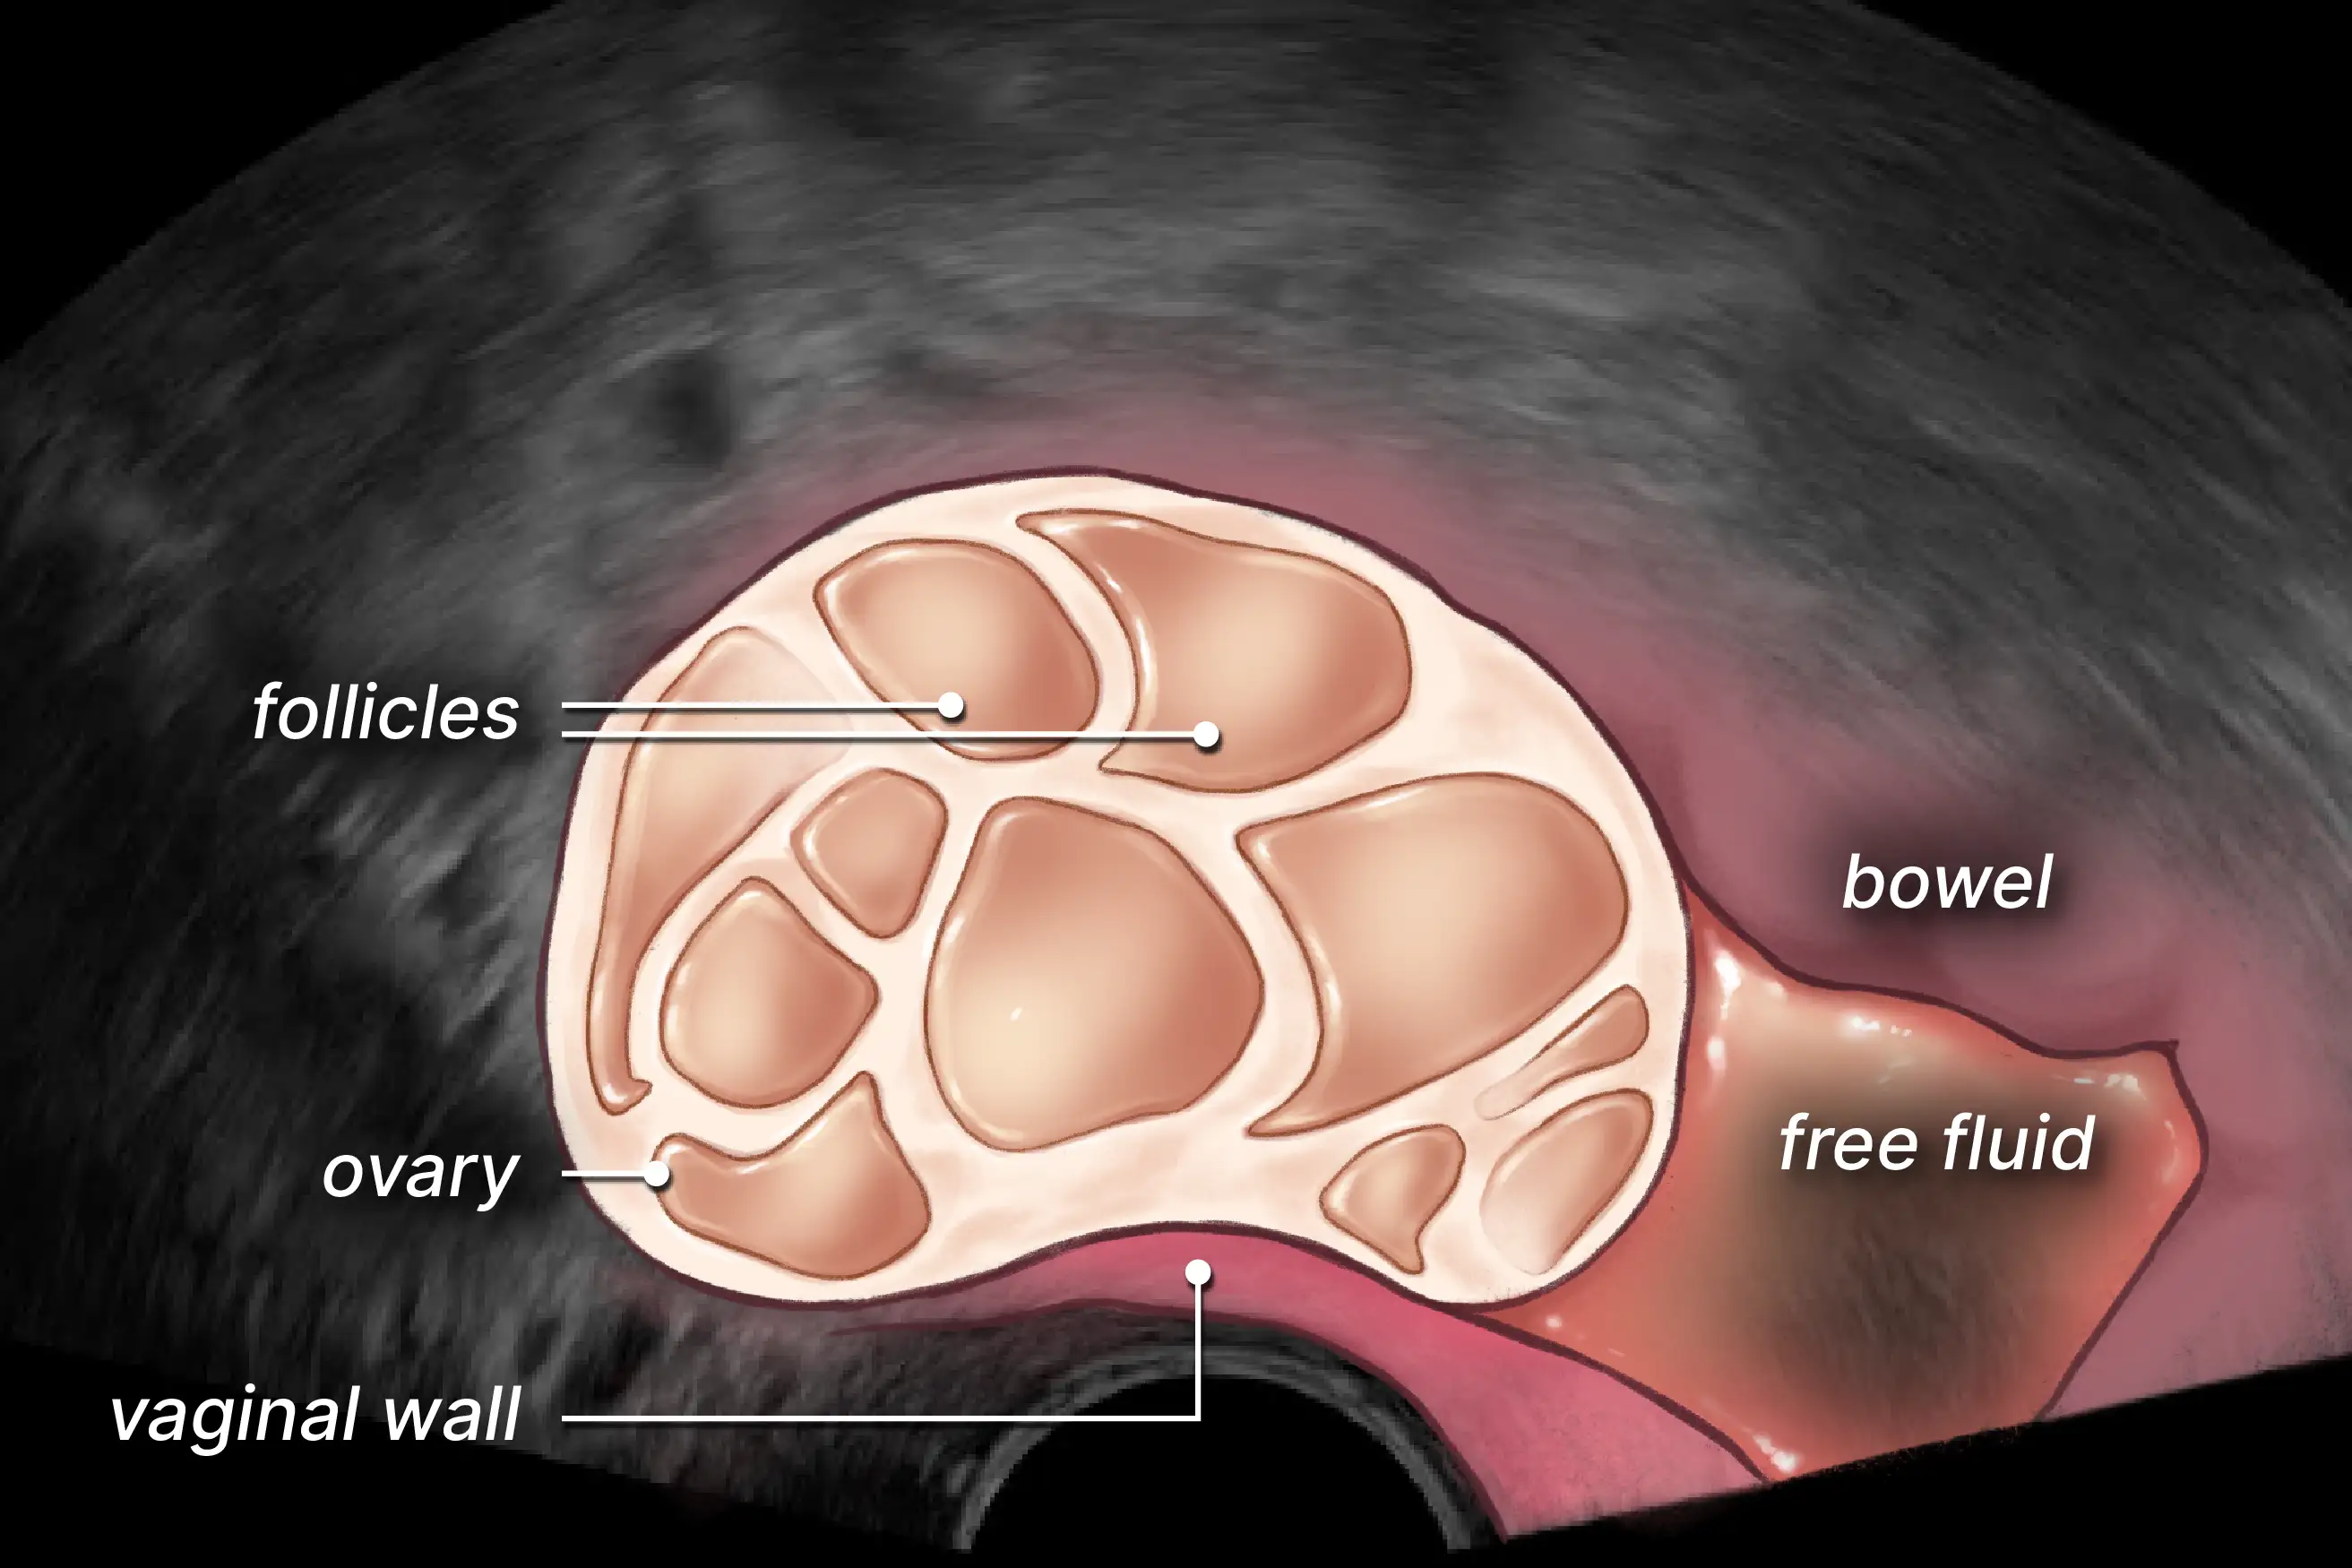
Figure 3.4e: Free serous fluid in the rectouterine pouch of the pelvis.
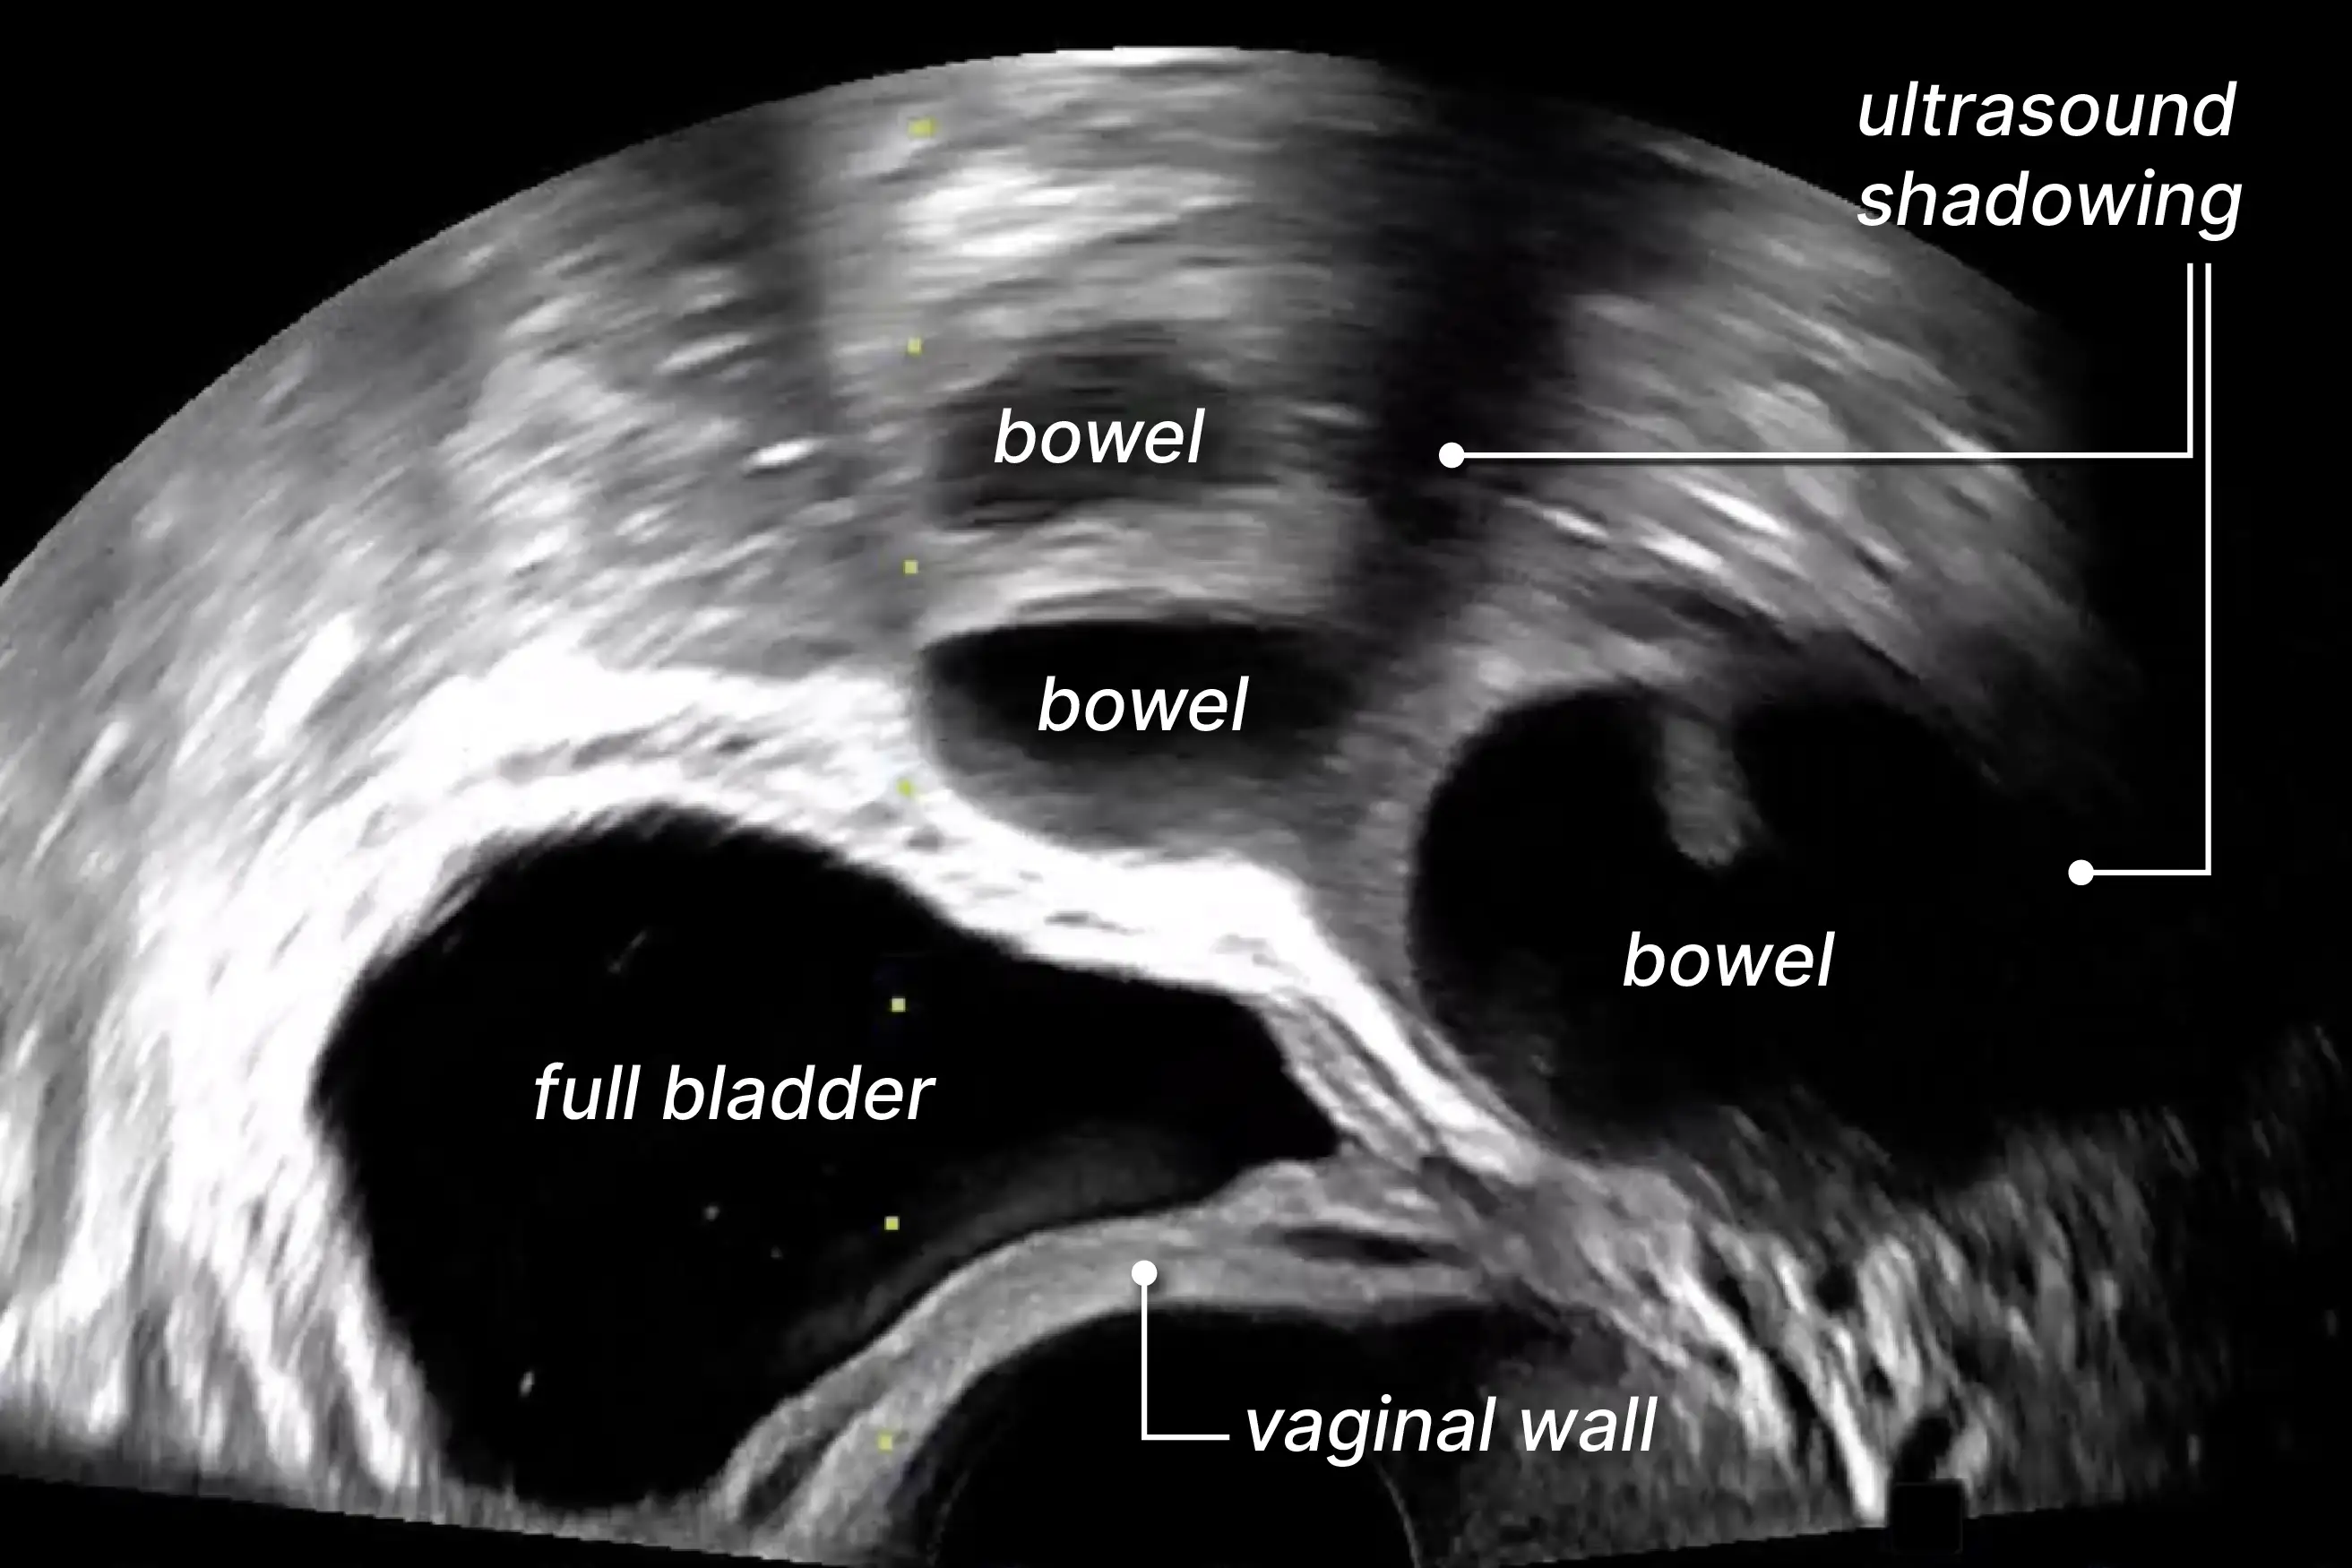
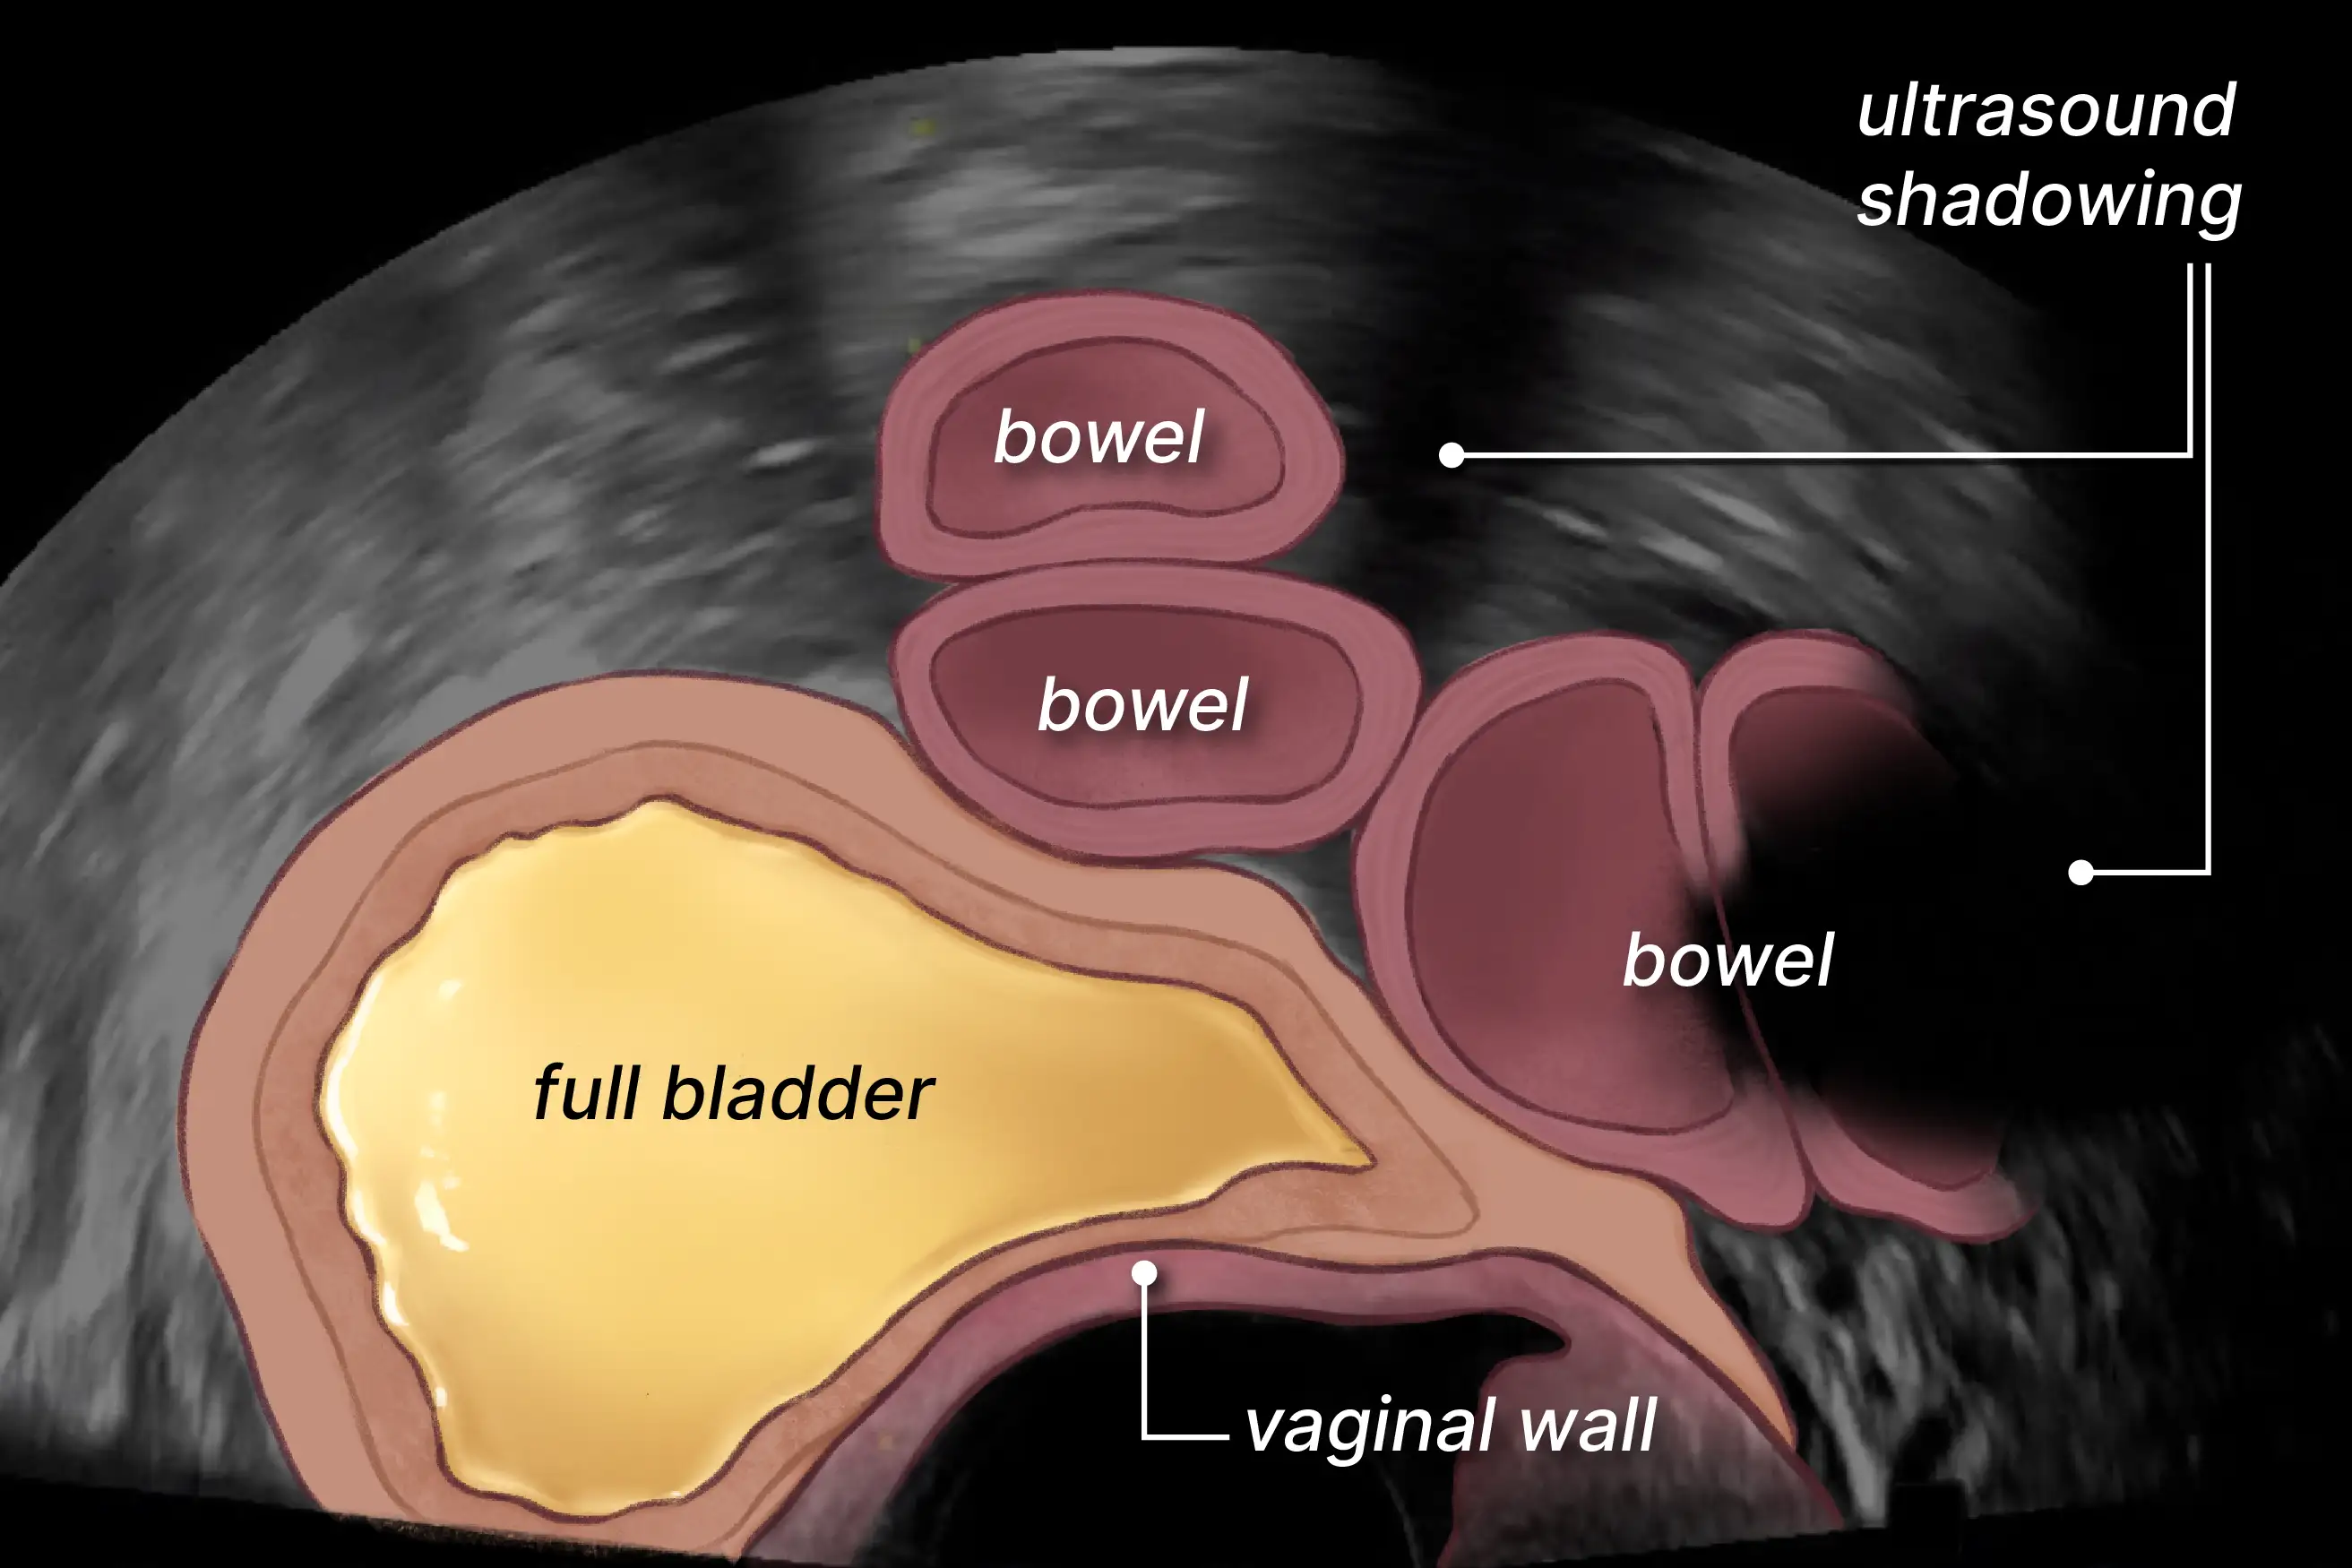
Figure 3.4f: Bladder containing urine alongside loops of bowel. Shadowing is a characteristic feature of bowel on ultrasound.
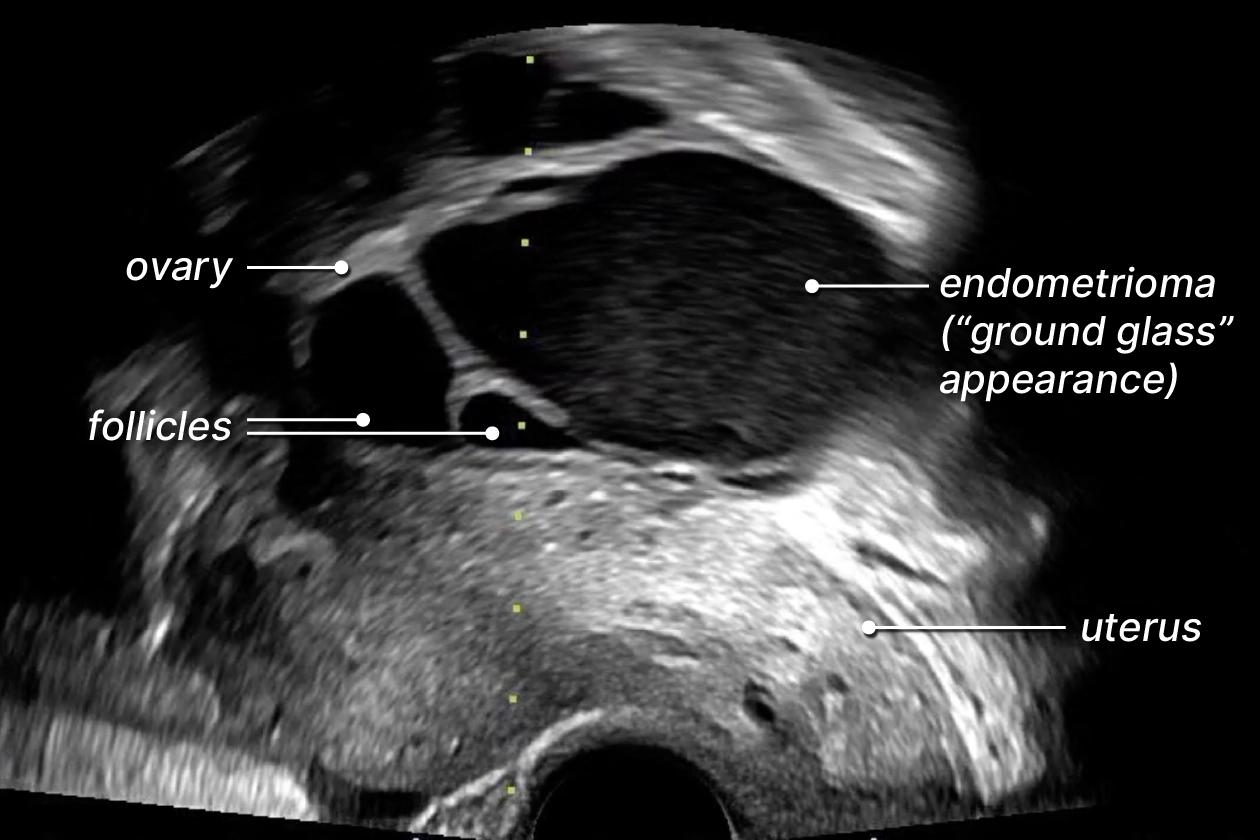
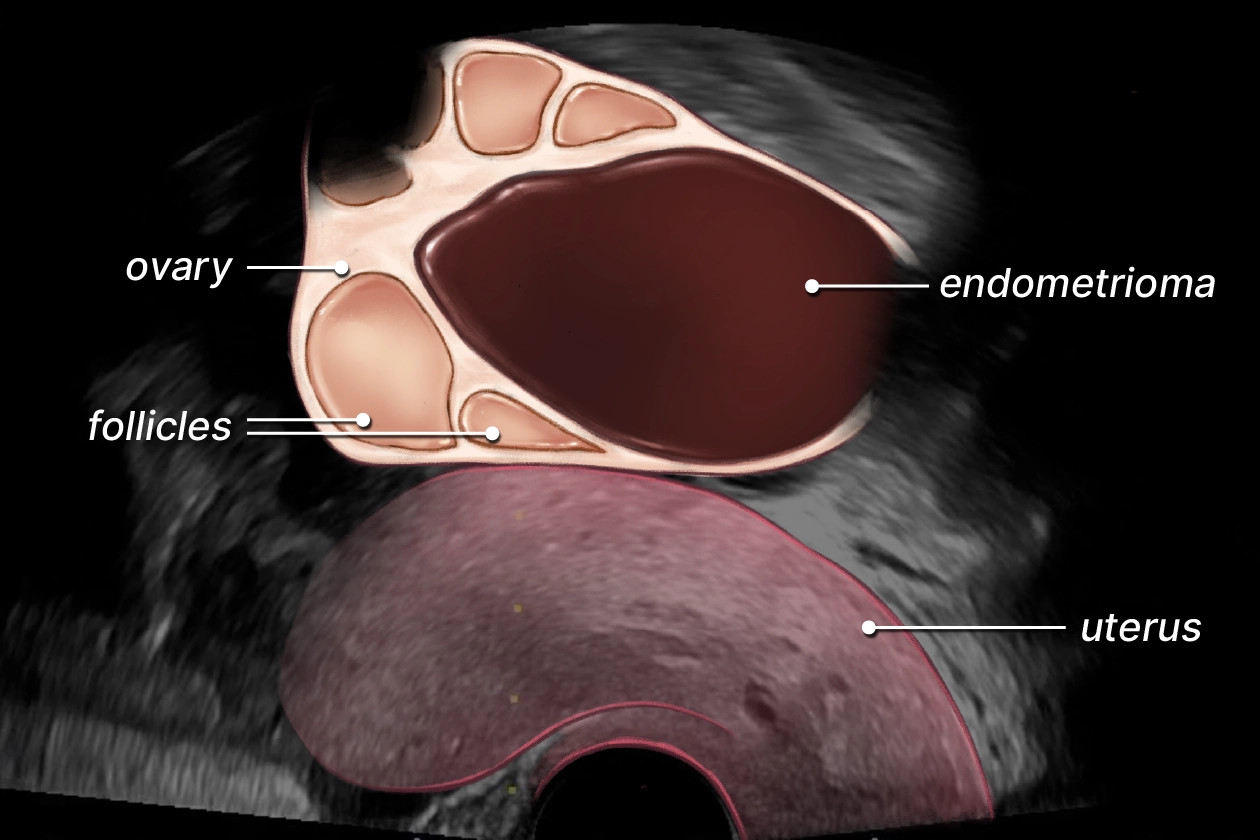
Figure 3.4g: Endometrioma in the ovary. Note its characteristic "ground-glass" appearance, as opposed to follicles, which are fluid-filled and anechoic.
Before proceeding with needle puncture, assess both ovaries and determine which one to start with. Ease of visualization and access is more important than which one has the most follicles.
It is also important to assess the patient's comfort during the initial scan to determine whether additional sedation or analgesia is needed.
3.5 Ultrasound adjustment
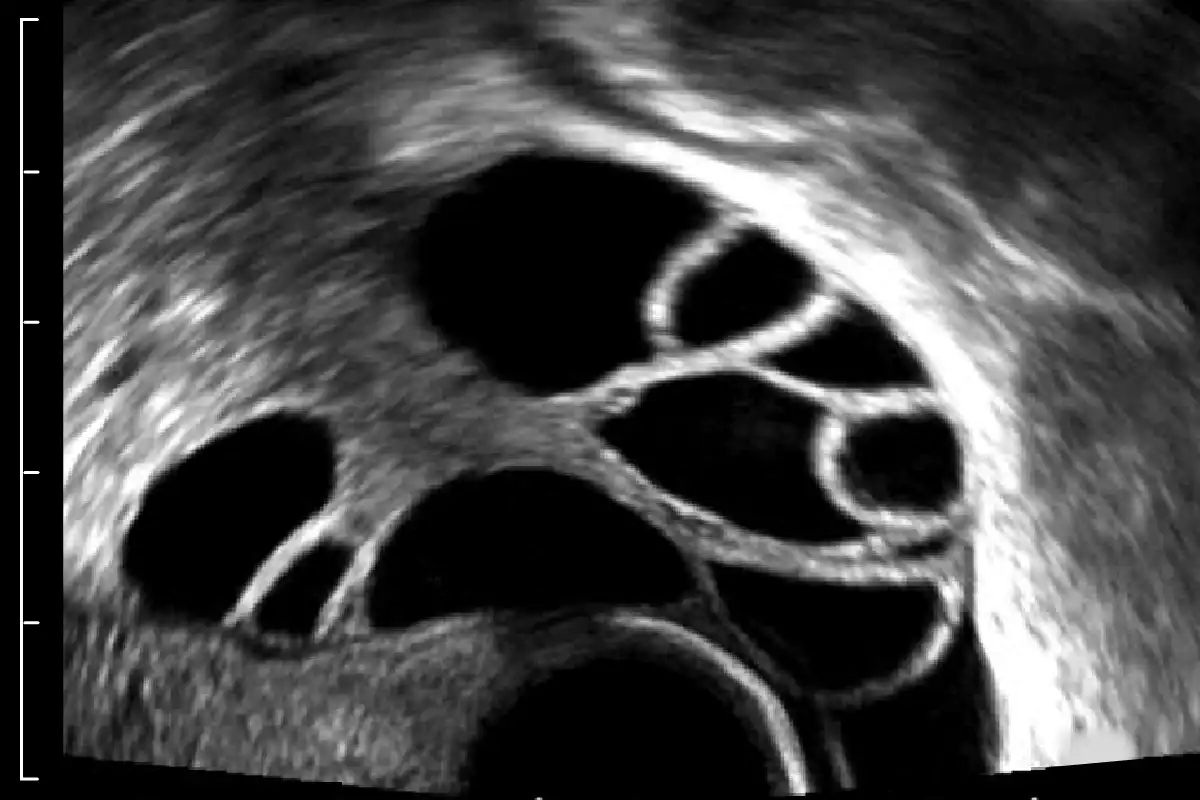
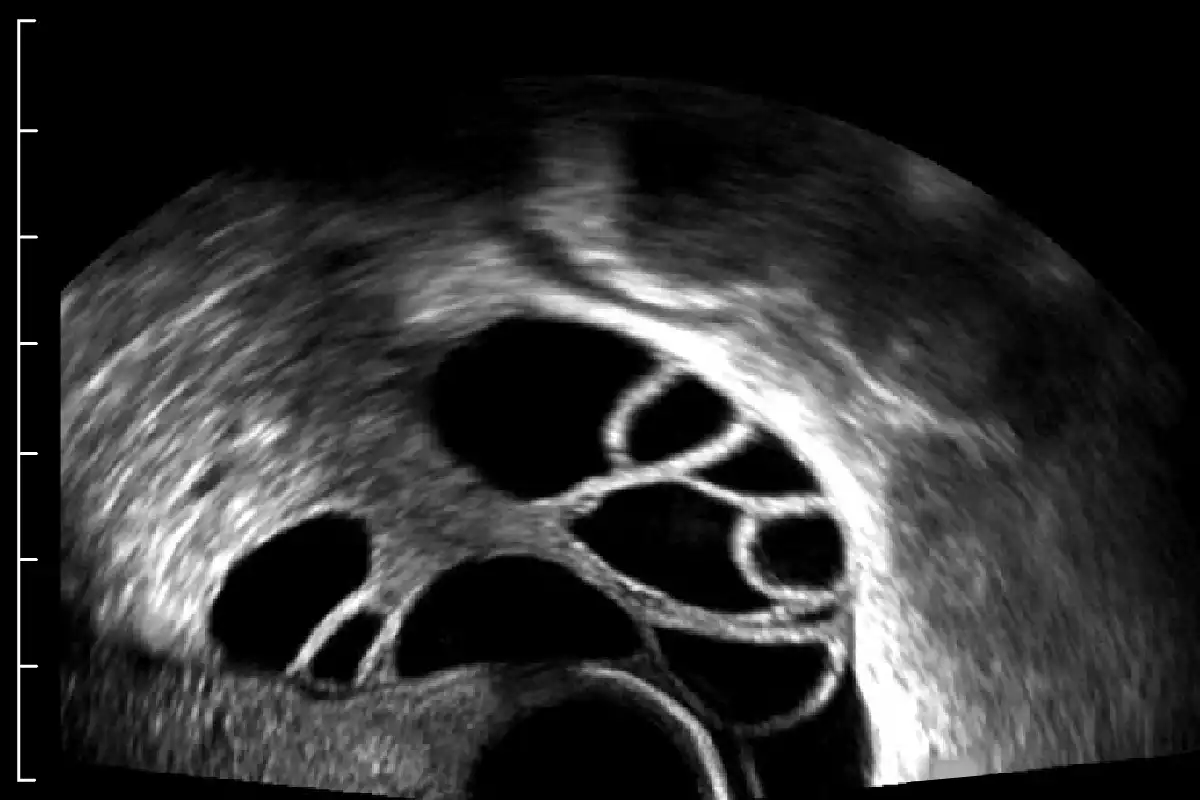
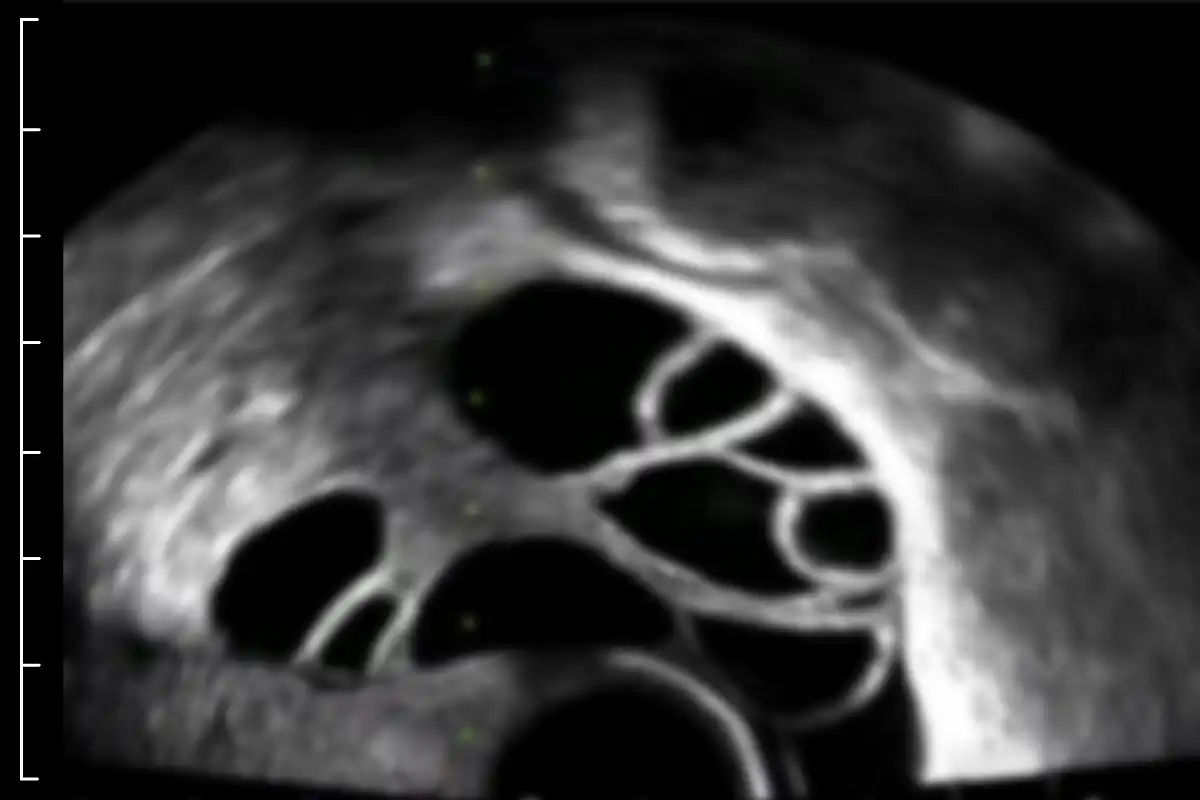
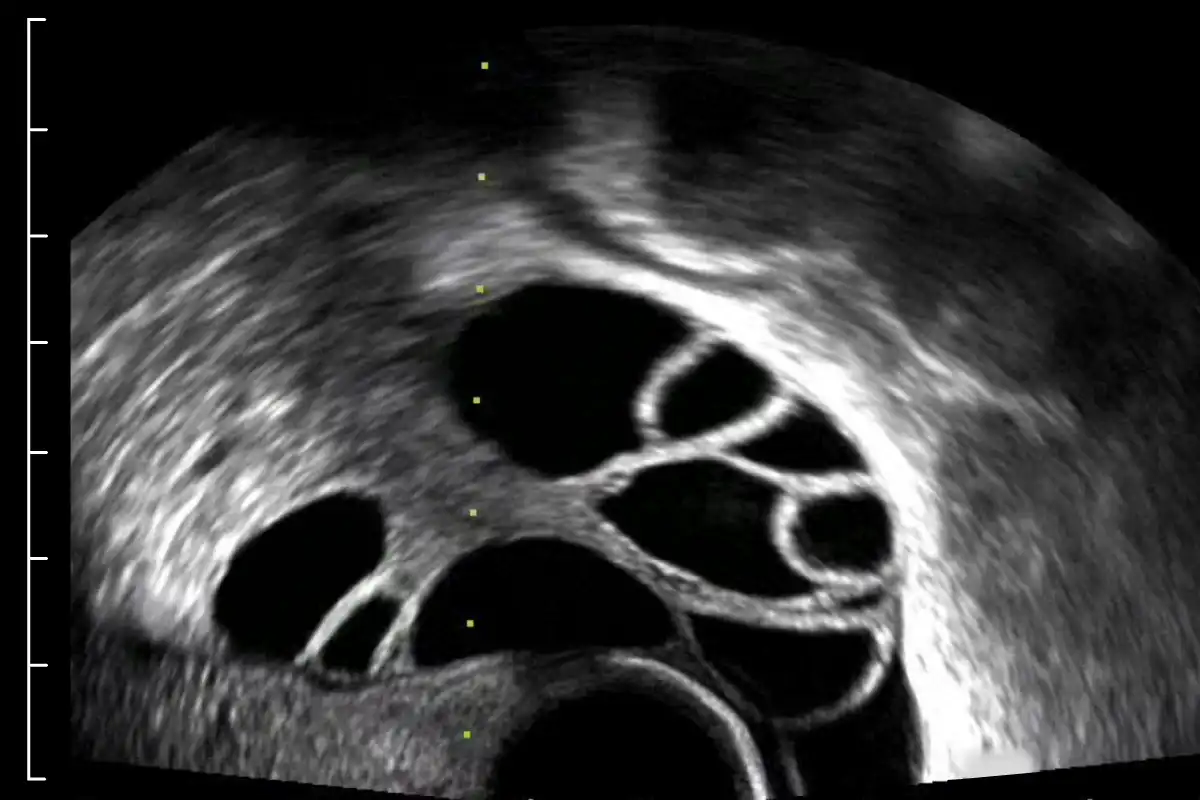
Improve visualization of the ovary, follicles, and needle during TVOR by adjusting the ultrasound settings and maneuvering the transducer until clear ultrasound images are achieved. There are a few key ways to adjust the ultrasound image: 1
Depth — increase and decrease how far into the body the ultrasound can see
Increase depth
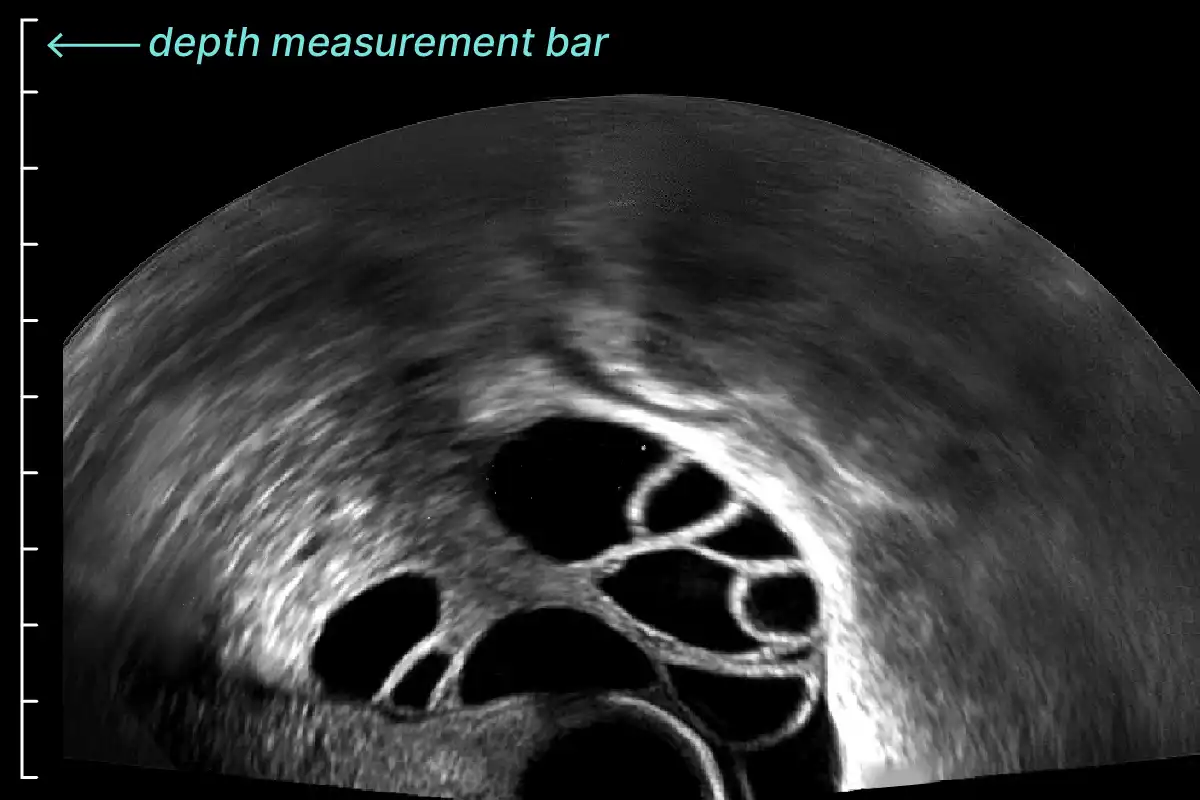
Decrease depth
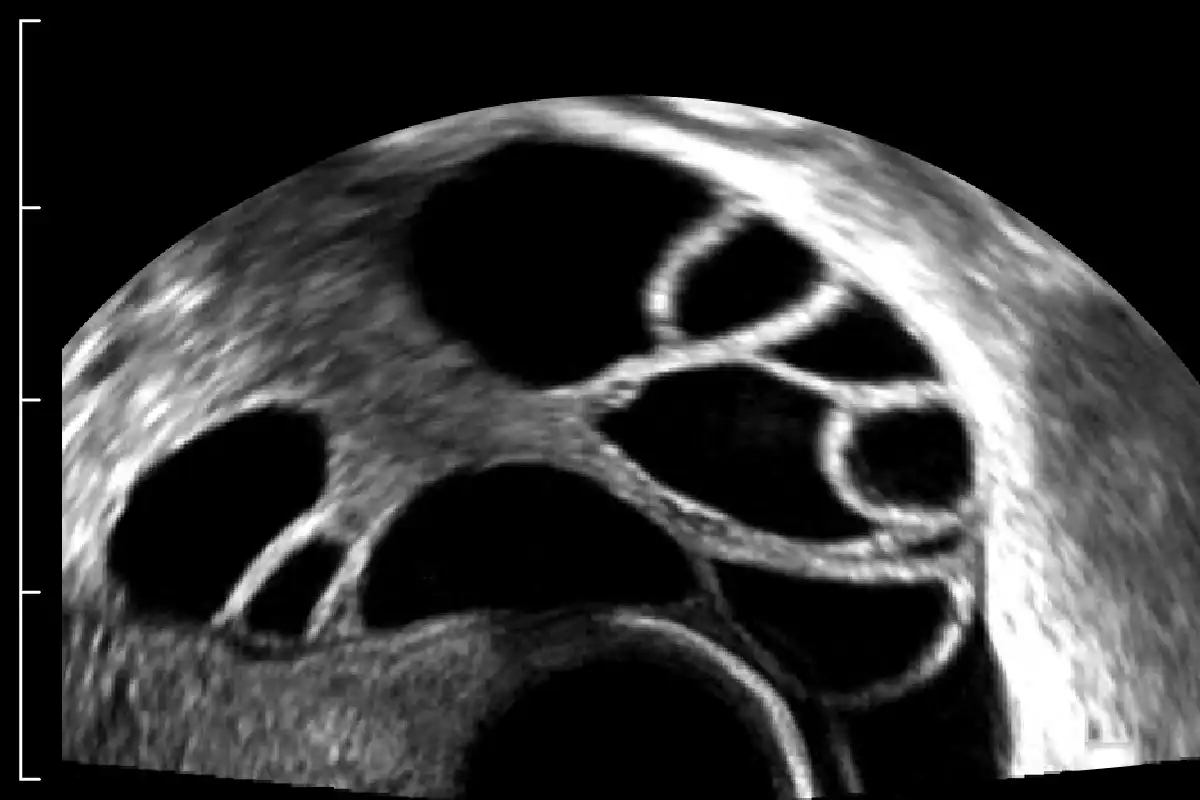
Zoom — magnify a section of the image
Zoom in
Zoom out
Resolution — adjust the amount of detail in the image
Low resolution
High resolution
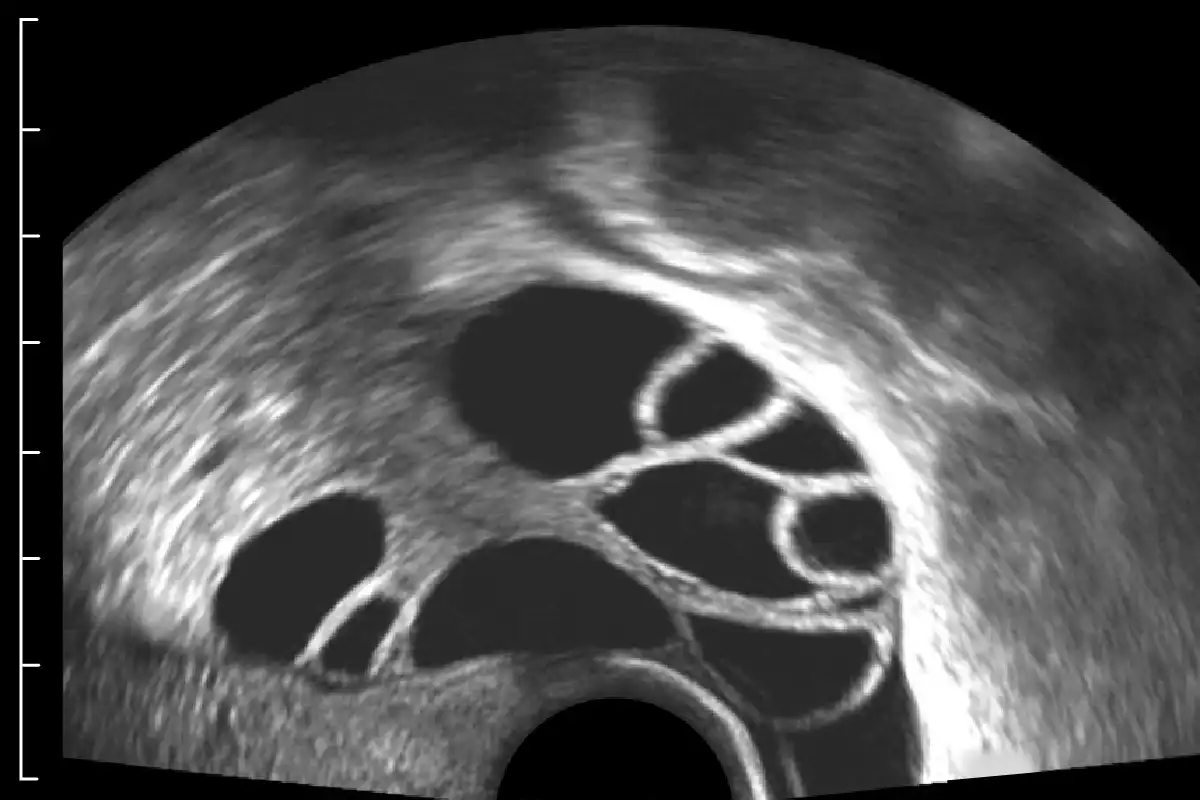
Gain — adjust the brightness of the image
Under-gained
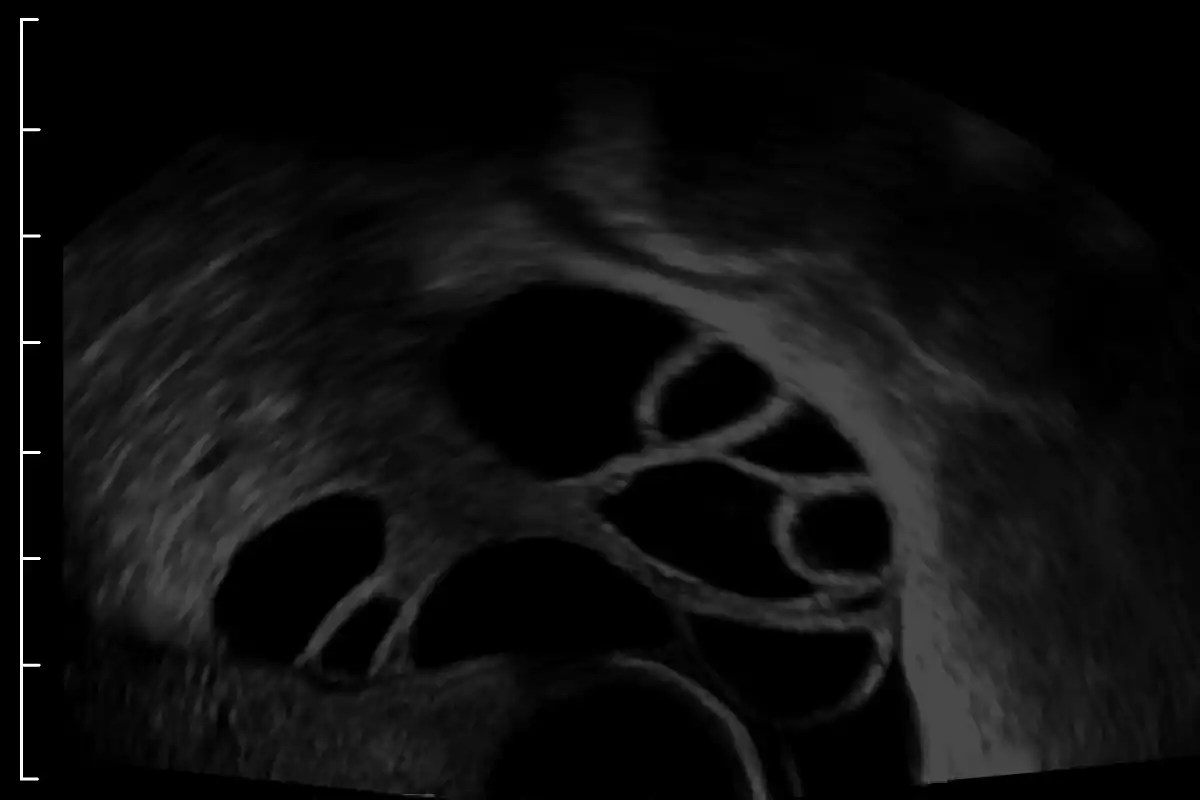
Optimal gain
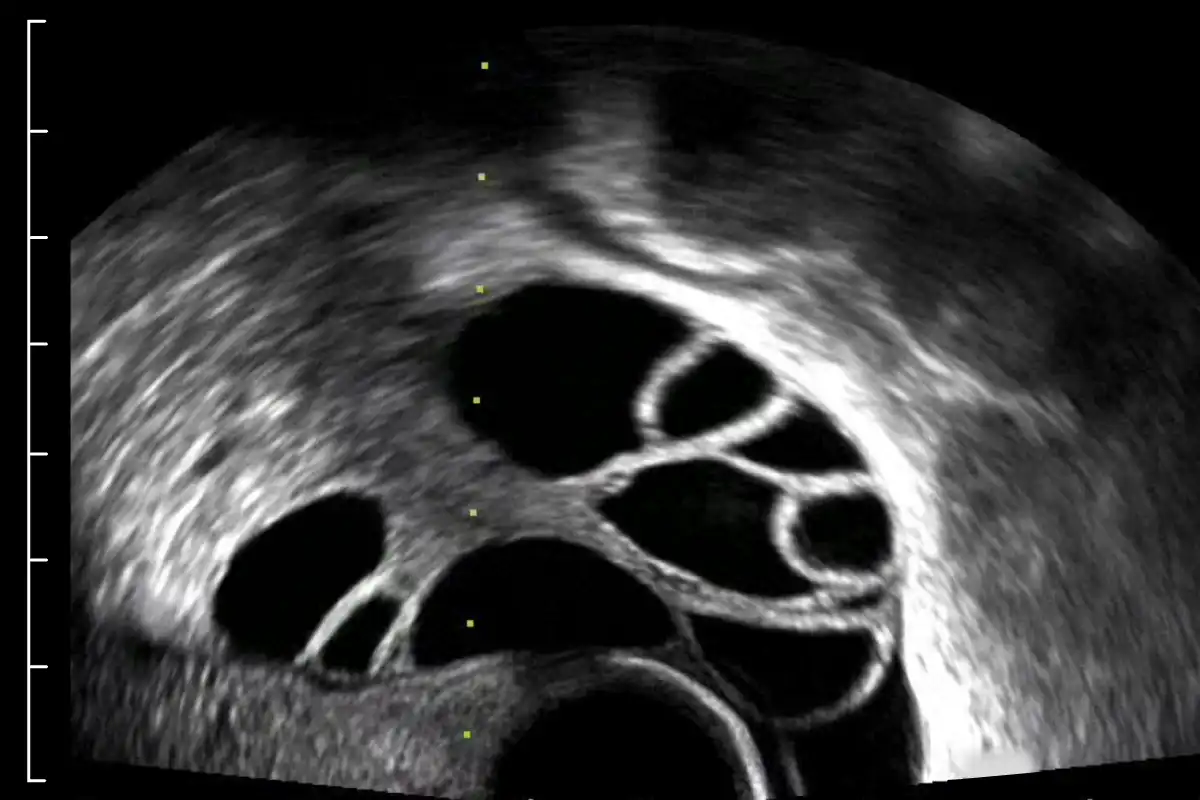
Over-gained
Focus — where the beam is most concentrated on the screen; aim this for the middle of the ovary
Increase focus depth
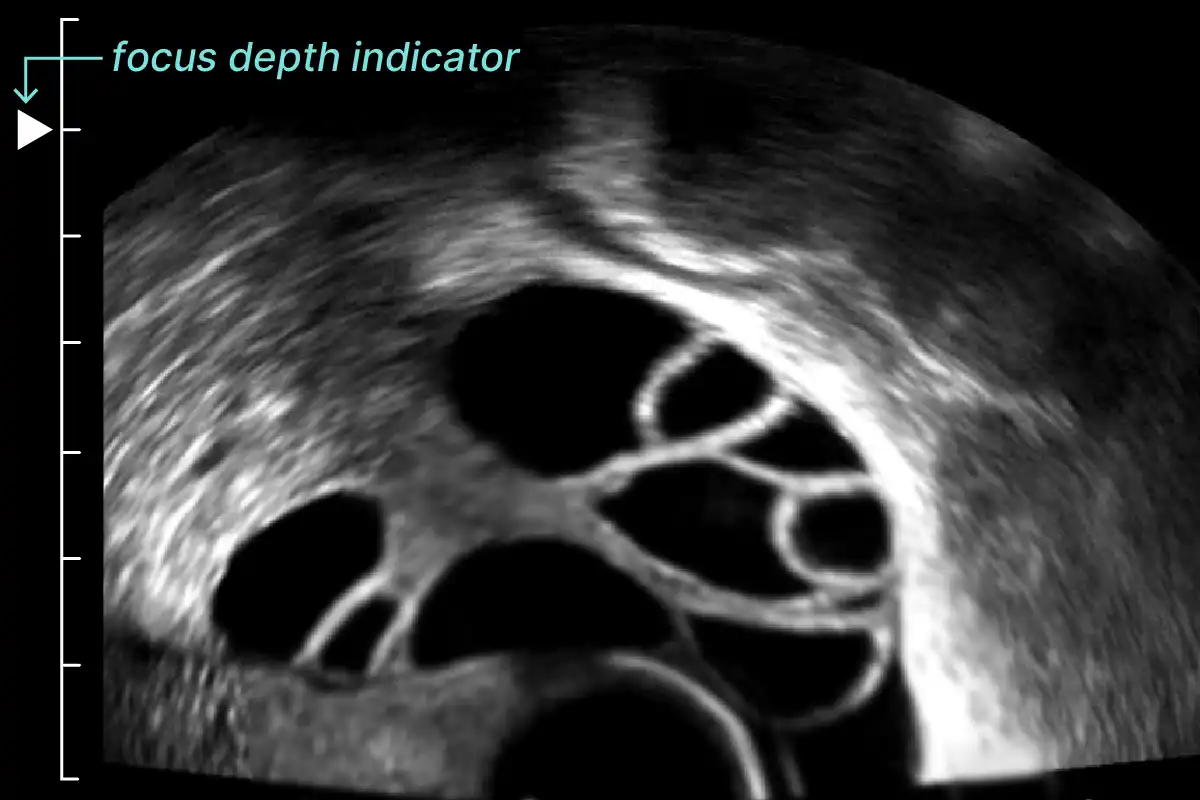
Decrease focus depth
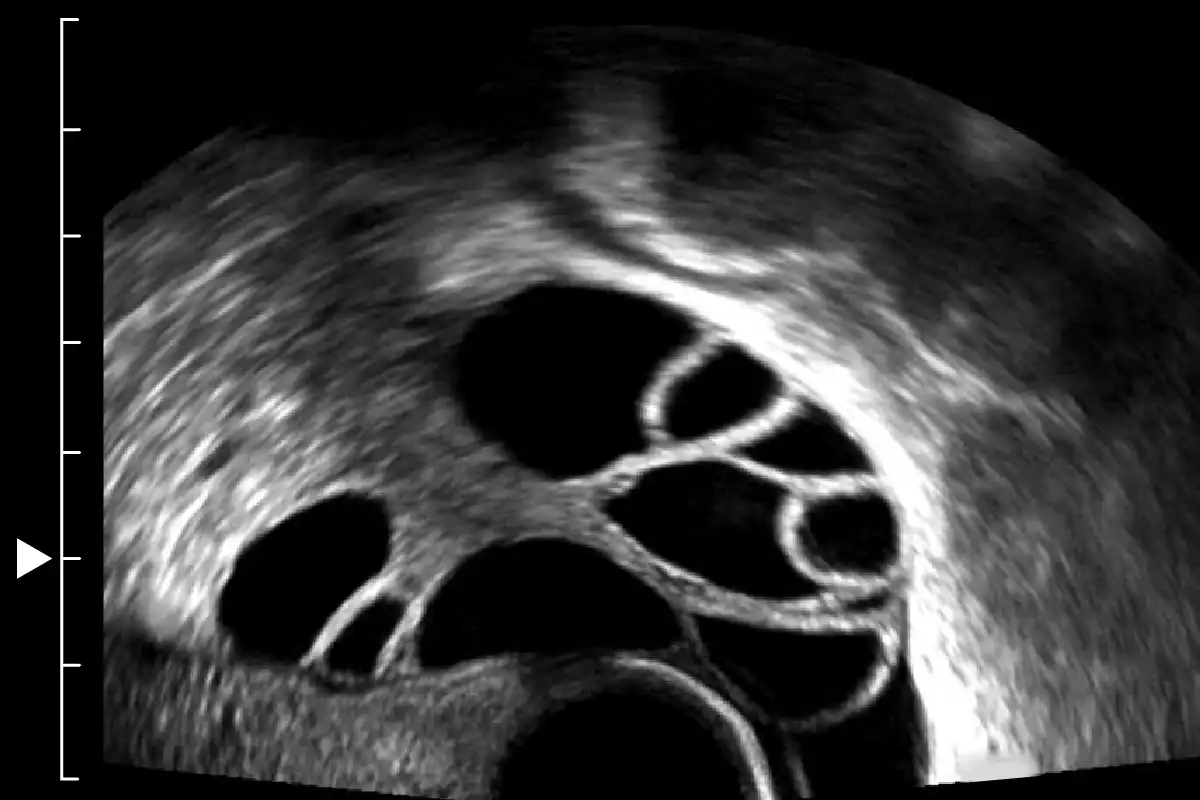
Needle guide track — enable to show the predicted needle trajectory
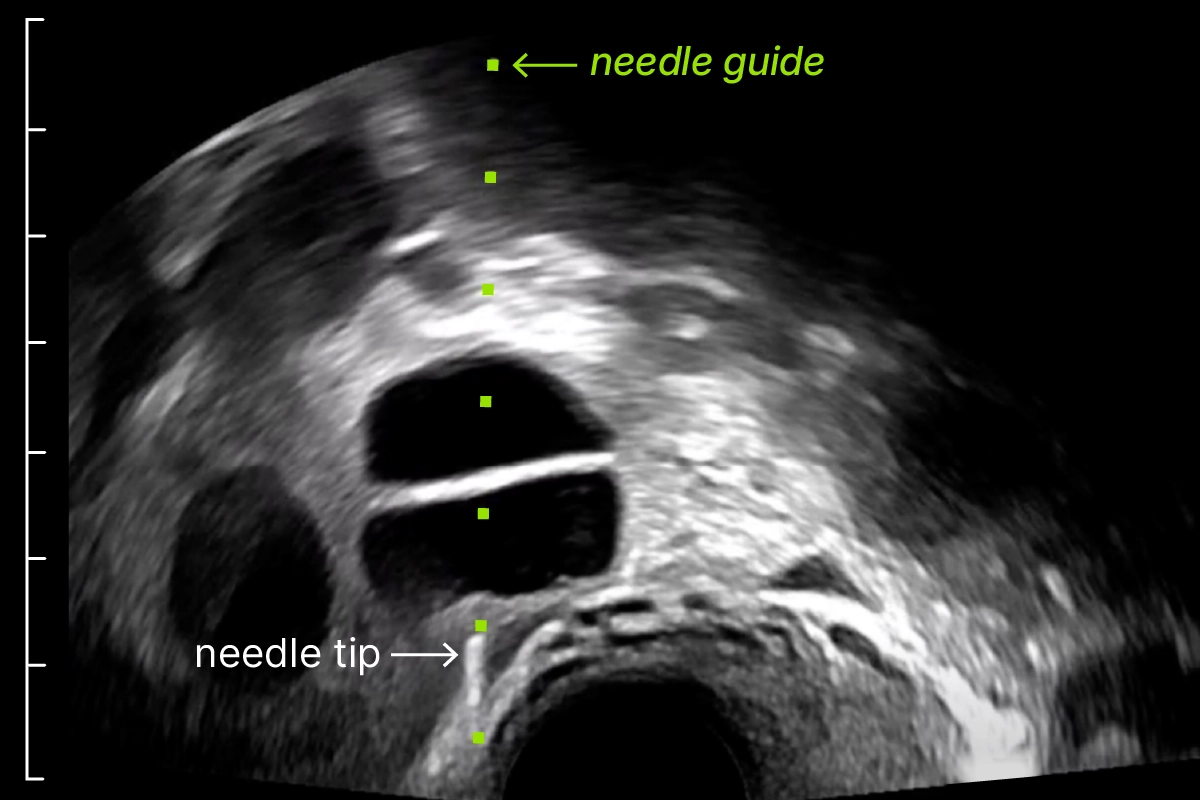
Typically, zoom and depth should be adjusted until the whole ovary occupies 75% of the image field. Both the top and bottom of the ovaries should be visible. This ensures good visualization of the aspiration needle throughout the procedure.
3.6 Ovary position adjustment
Good visualization and positioning of the ovaries is key to performing a safe and effective TVOR. In preparation for needle puncture, press the transvaginal transducer firmly into the vaginal fornix to minimize the space between the transducer and the ovary. This ensures there are no intervening structures in the trajectory of the needle and will "pin" or stabilize the ovary.

Figure 3.6a: Interactive video showing "pinning" with internal transducer pressure to stabilize and improve visualization of the ovary.
Applying transducer pressure can also help to visualize and/or stabilize:
- Ovaries that descend asymmetrically into the pelvis
- Ovaries that are difficult to visualize
- Large ovaries that are hypermobile and "bounce" away from the aspiration needle
In these cases, you can also apply external abdominal or supra-pubic pressure to bring the ovarian follicles closer to the vaginal wall. You may need to vary the direction and force of the pressure in order to bring the ovaries into an optimal position.
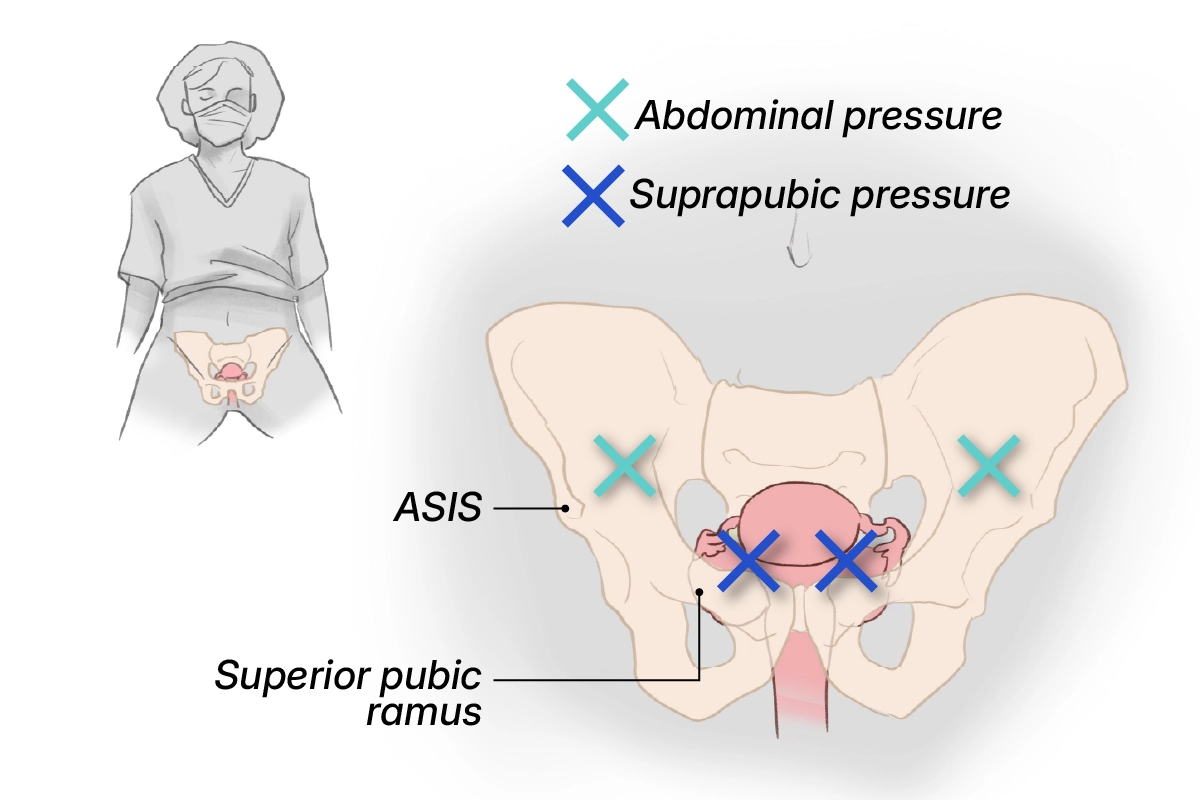
Figure 3.6b: Apply abdominal pressure slightly medial to the anterior superior iliac spine, and suprapubic pressure cranial to the superior pubic ramus.

Figure 3.6c: Interactive video showing external abdominal pressure applied to improve the position and visualization of the ovary.
Good ovary positioning can improve visualization and reduce the number of ovarian needle punctures needed during the procedure.
3.7 Ovary puncture
Once the ovary is stabilized, introduce the aspiration needle through the needle guide. When the needle tip is visible at the edge of the ultrasound screen, position the transducer so the needle guide is aligned with the follicle you intend to aspirate.
Make sure you can clearly visualize the needle tip prior to puncture. The etching on the needle tip makes it more echogenic, so it should appear bright white in the image. Keeping track of the needle tip is essential to prevent unintentional injury to the patient.
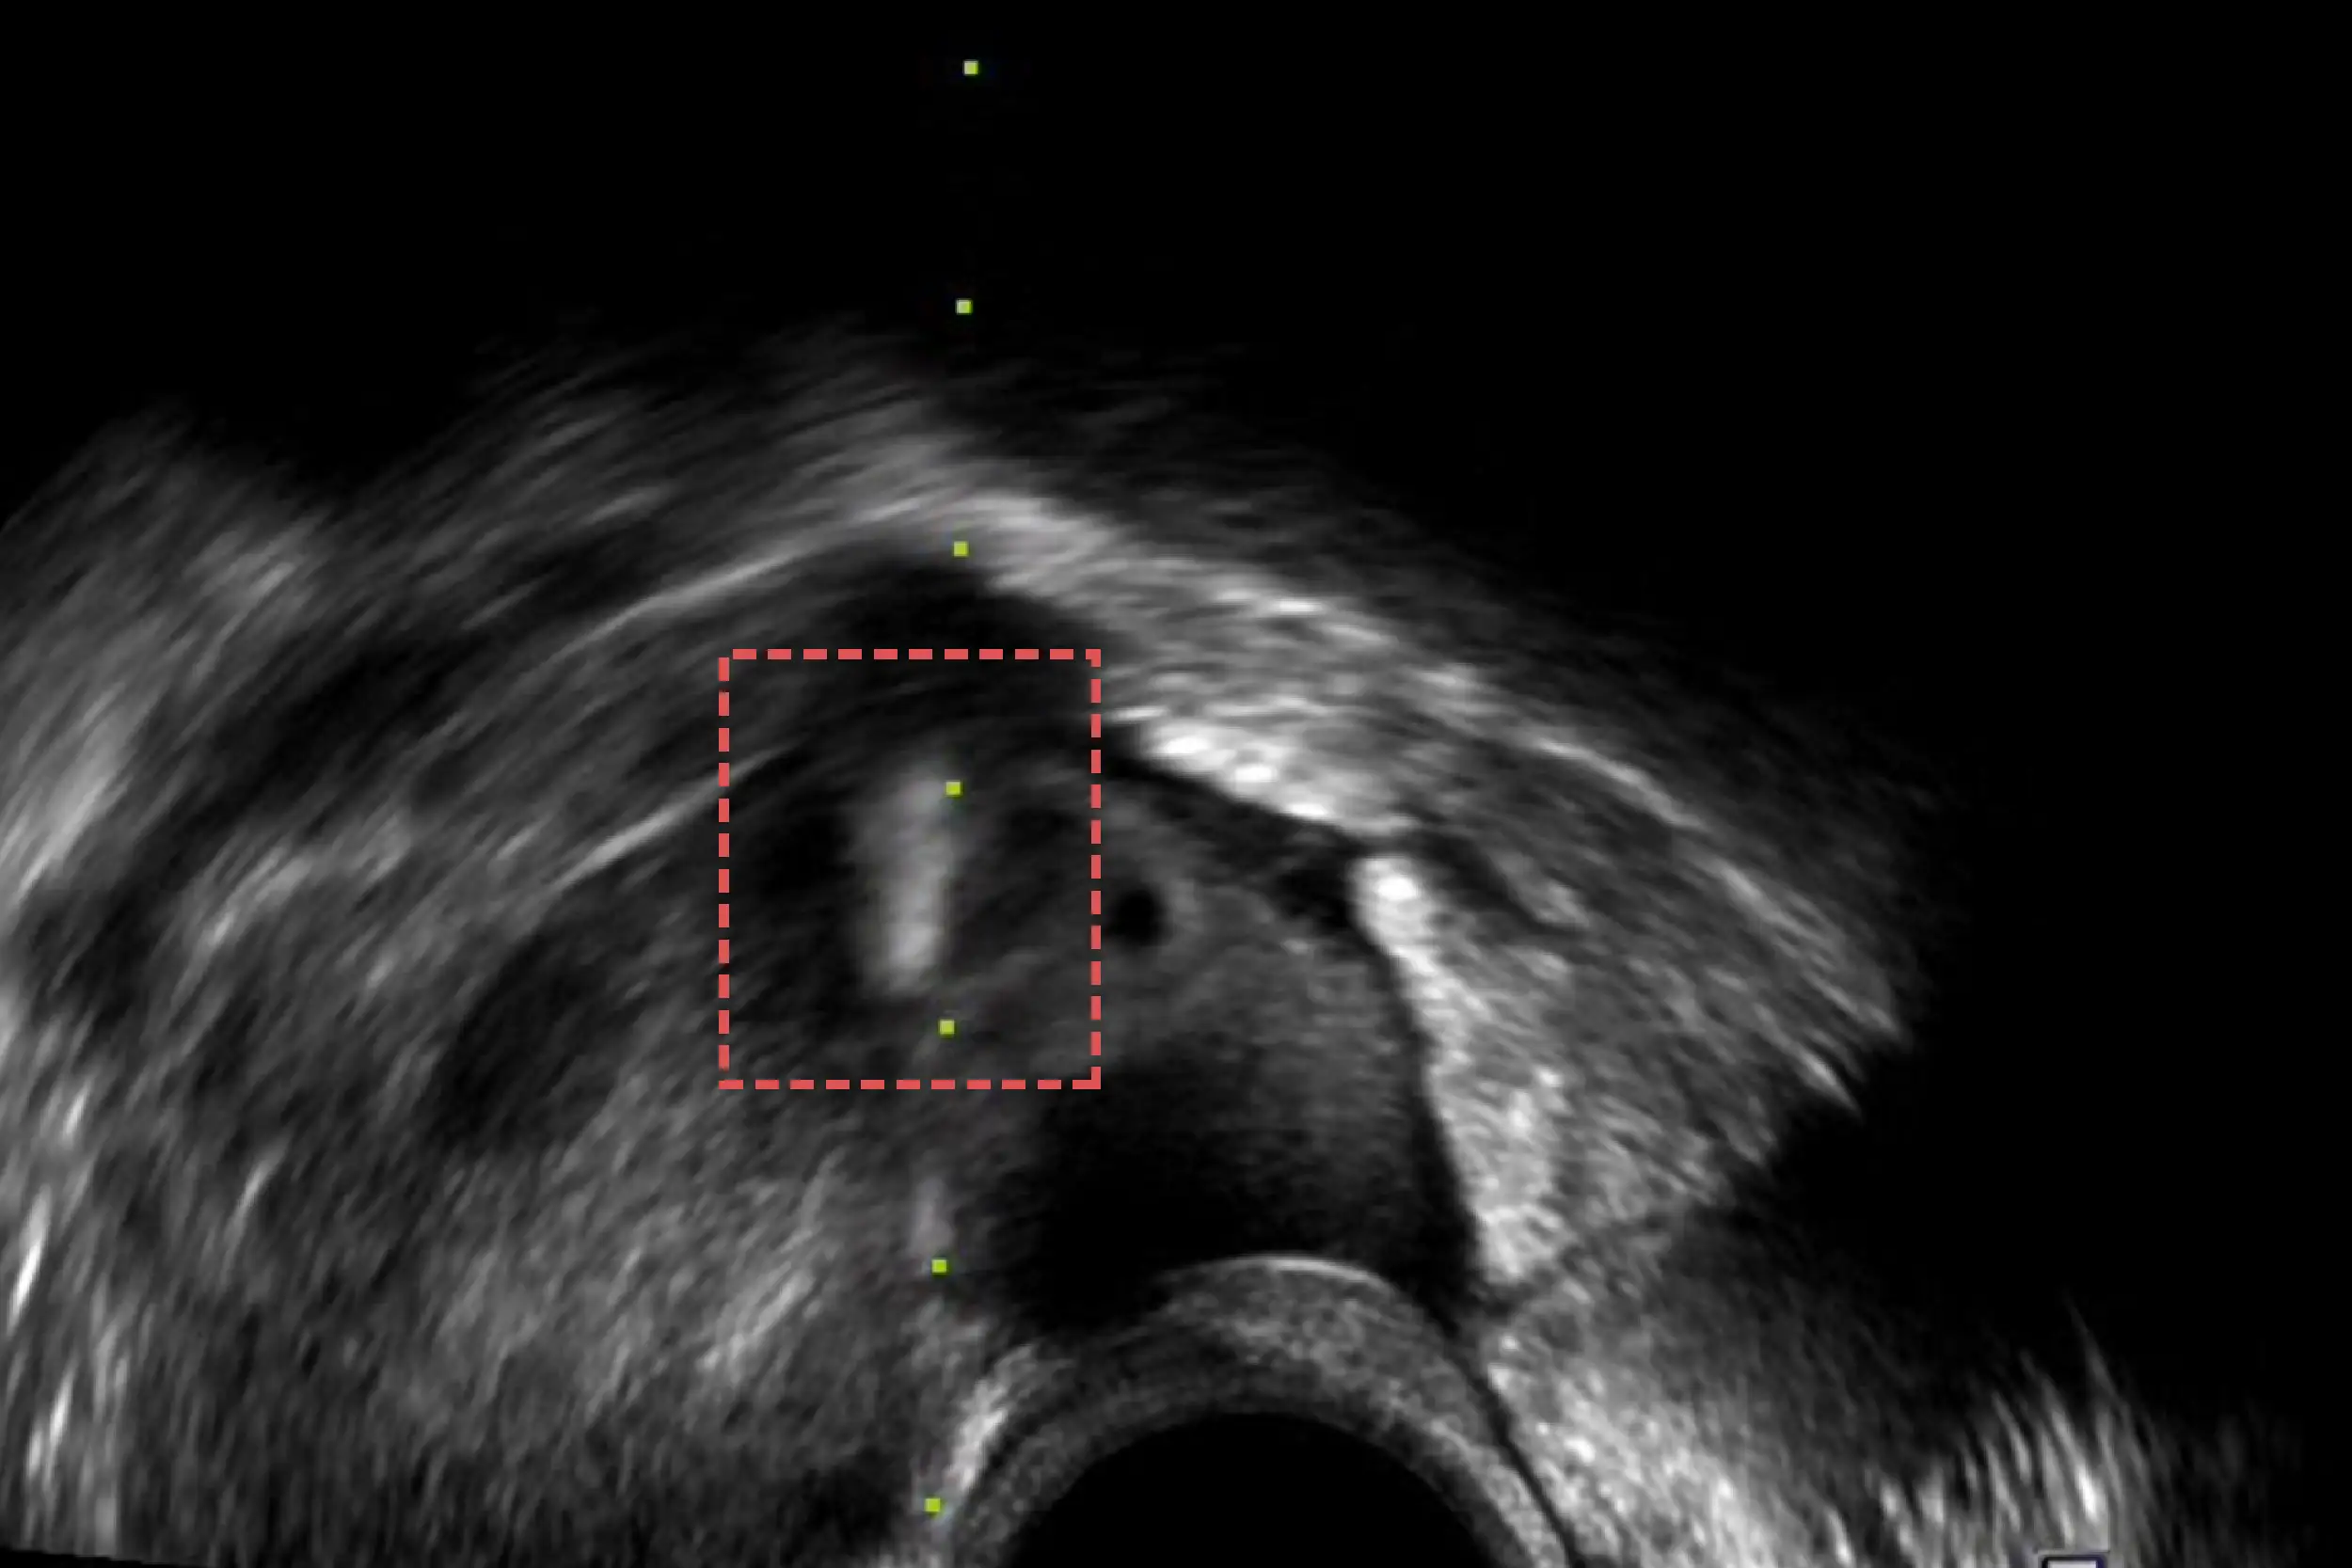
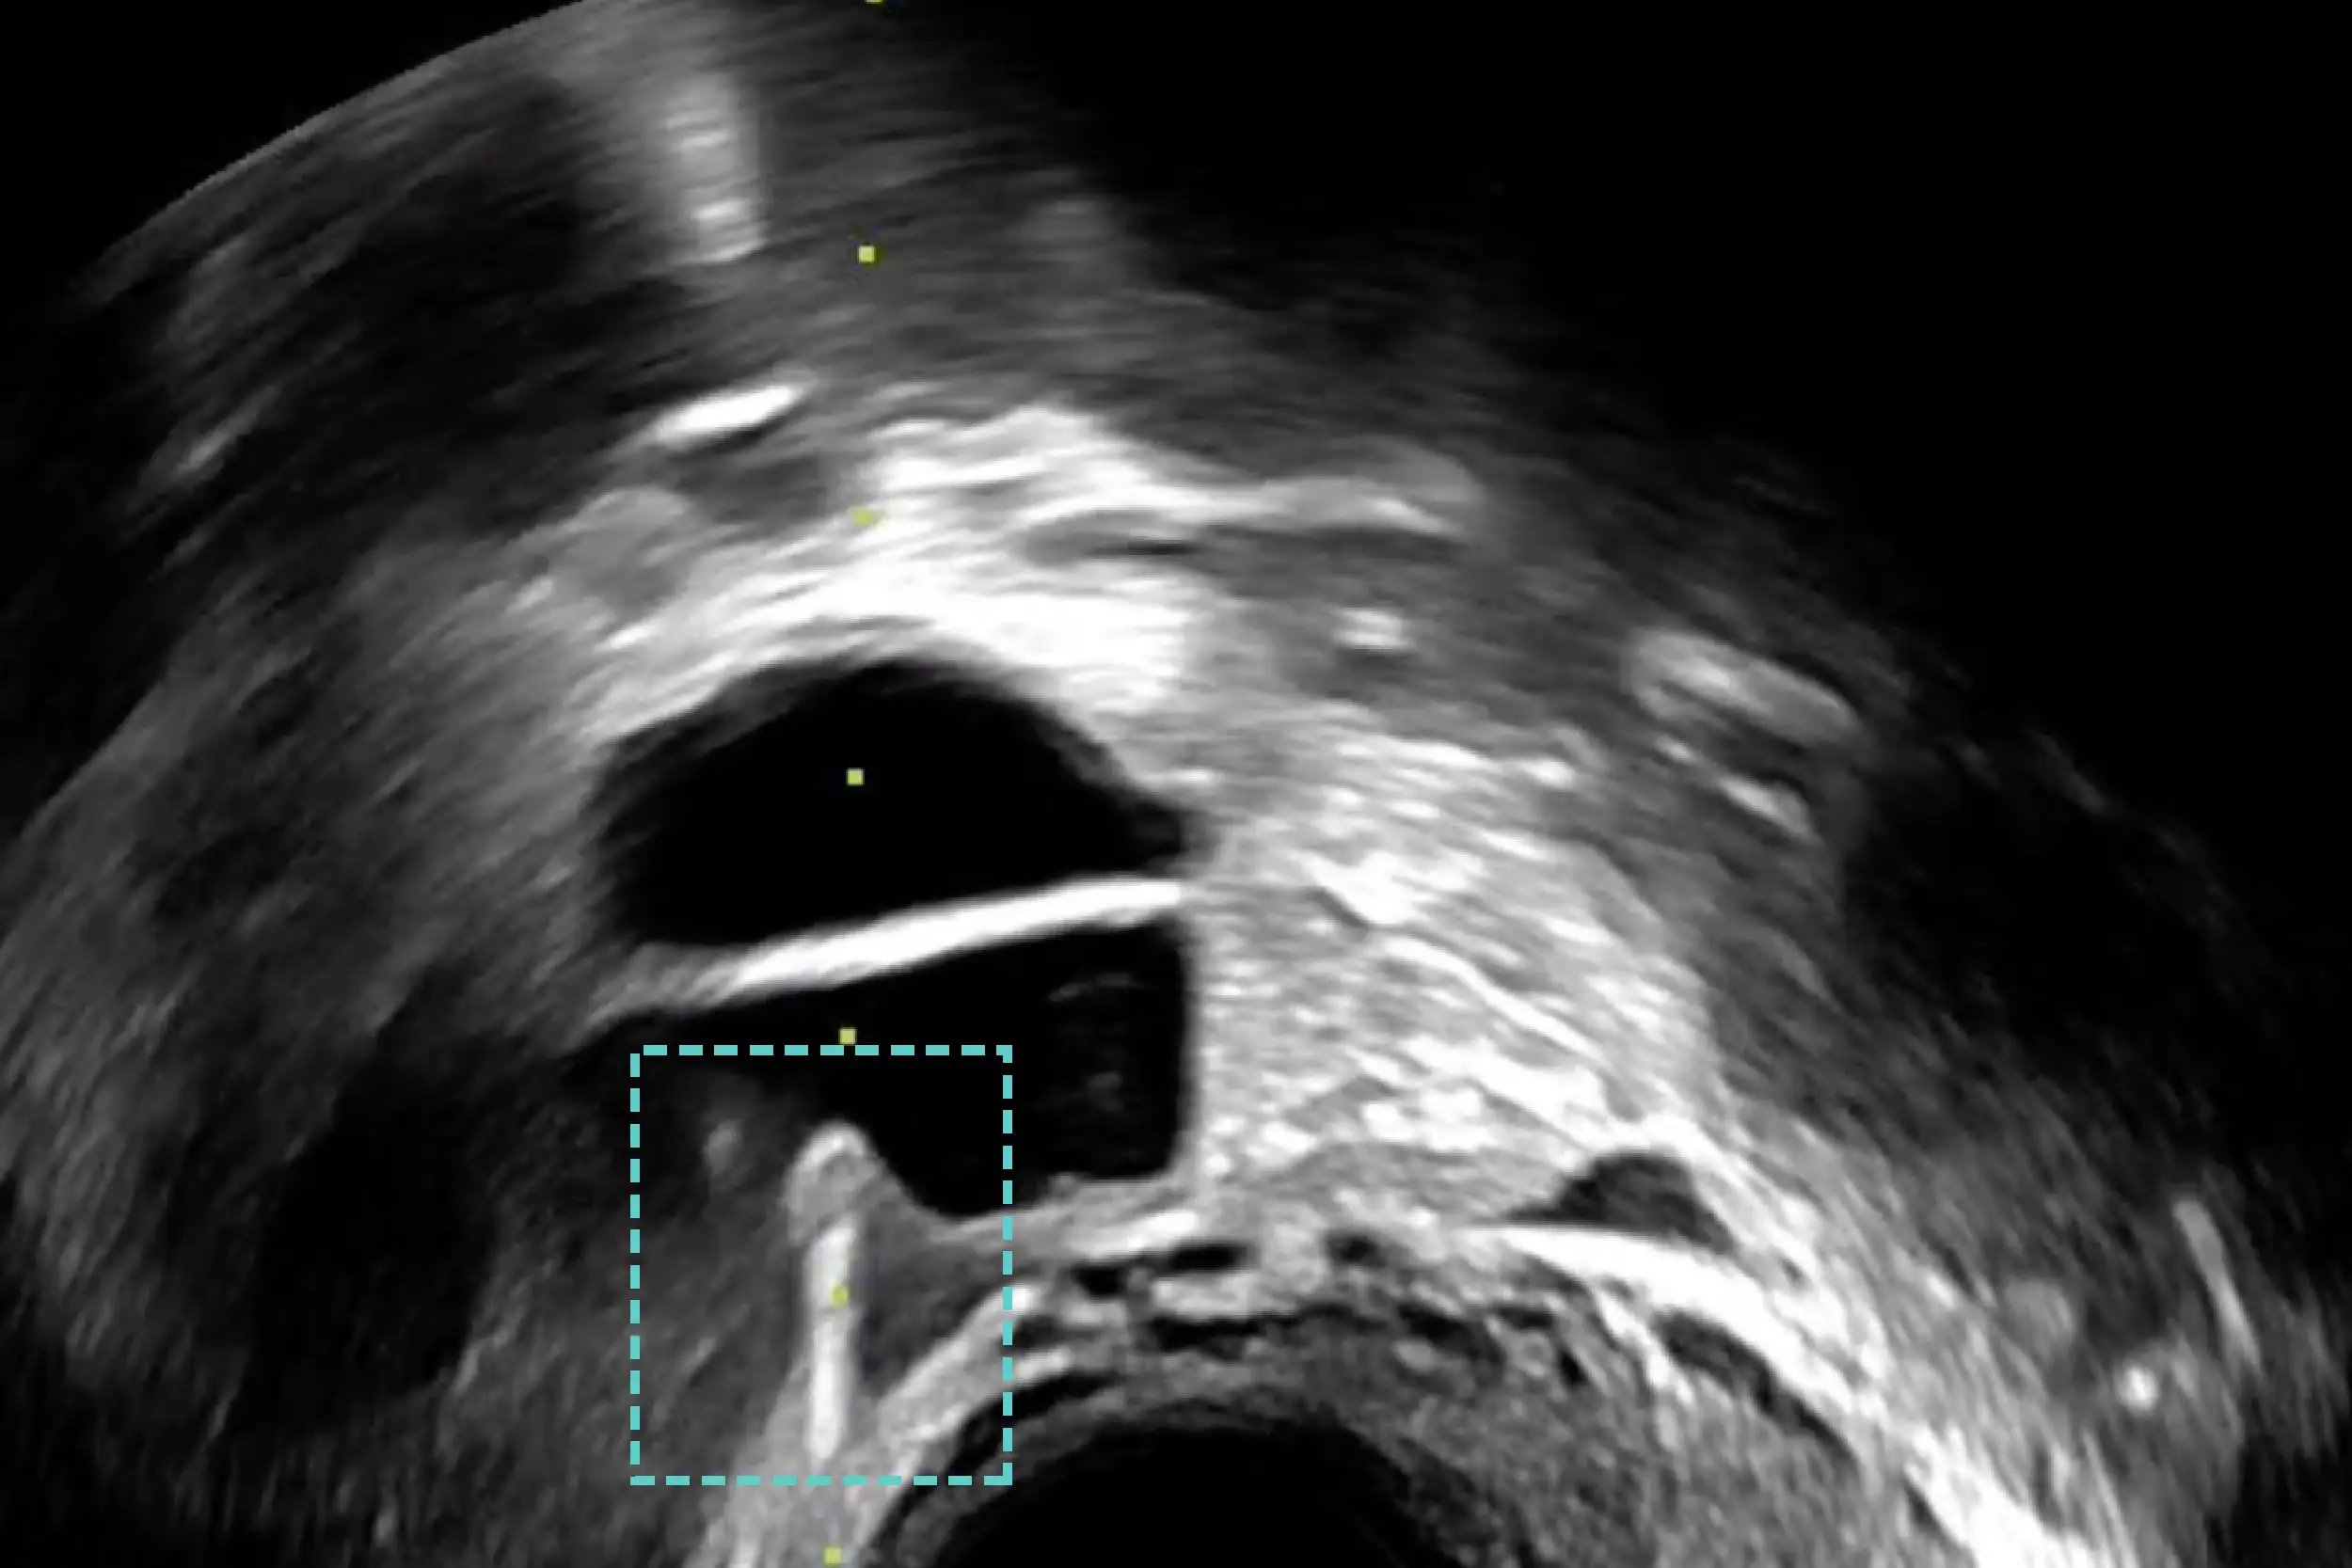
Figure 3.7a: Example of poor (left) and good (right) needle tip visualization. Note how in both cases, the dotted green needle guide is aligned with the follicle.
If at any point during the procedure you cannot visualize the needle, try the following in sequence:
- Make small adjustments to the position of your ultrasound probe.
- Pull the needle out to the edge of the ovarian cortex, locate the needle tip, and then re-enter.
- Remove the needle completely, flush it with culture media, and reintroduce it into the ovary.
Just before the follicular puncture, apply vacuum suction yourself or by verbally notifying your assistant.
Suction and flow
Once the follicle is punctured and the suction is initiated by stepping on the pedal, the assistant seated at the retrieval worktable will confirm the flow of follicular fluid with a verbal command such as "flowing".
Ideally, the fluid should be clear and flow continuously. If it is reddish or flowing slowly, the assistant should notify the provider with "dripping", "stopped", or "sanguineous".
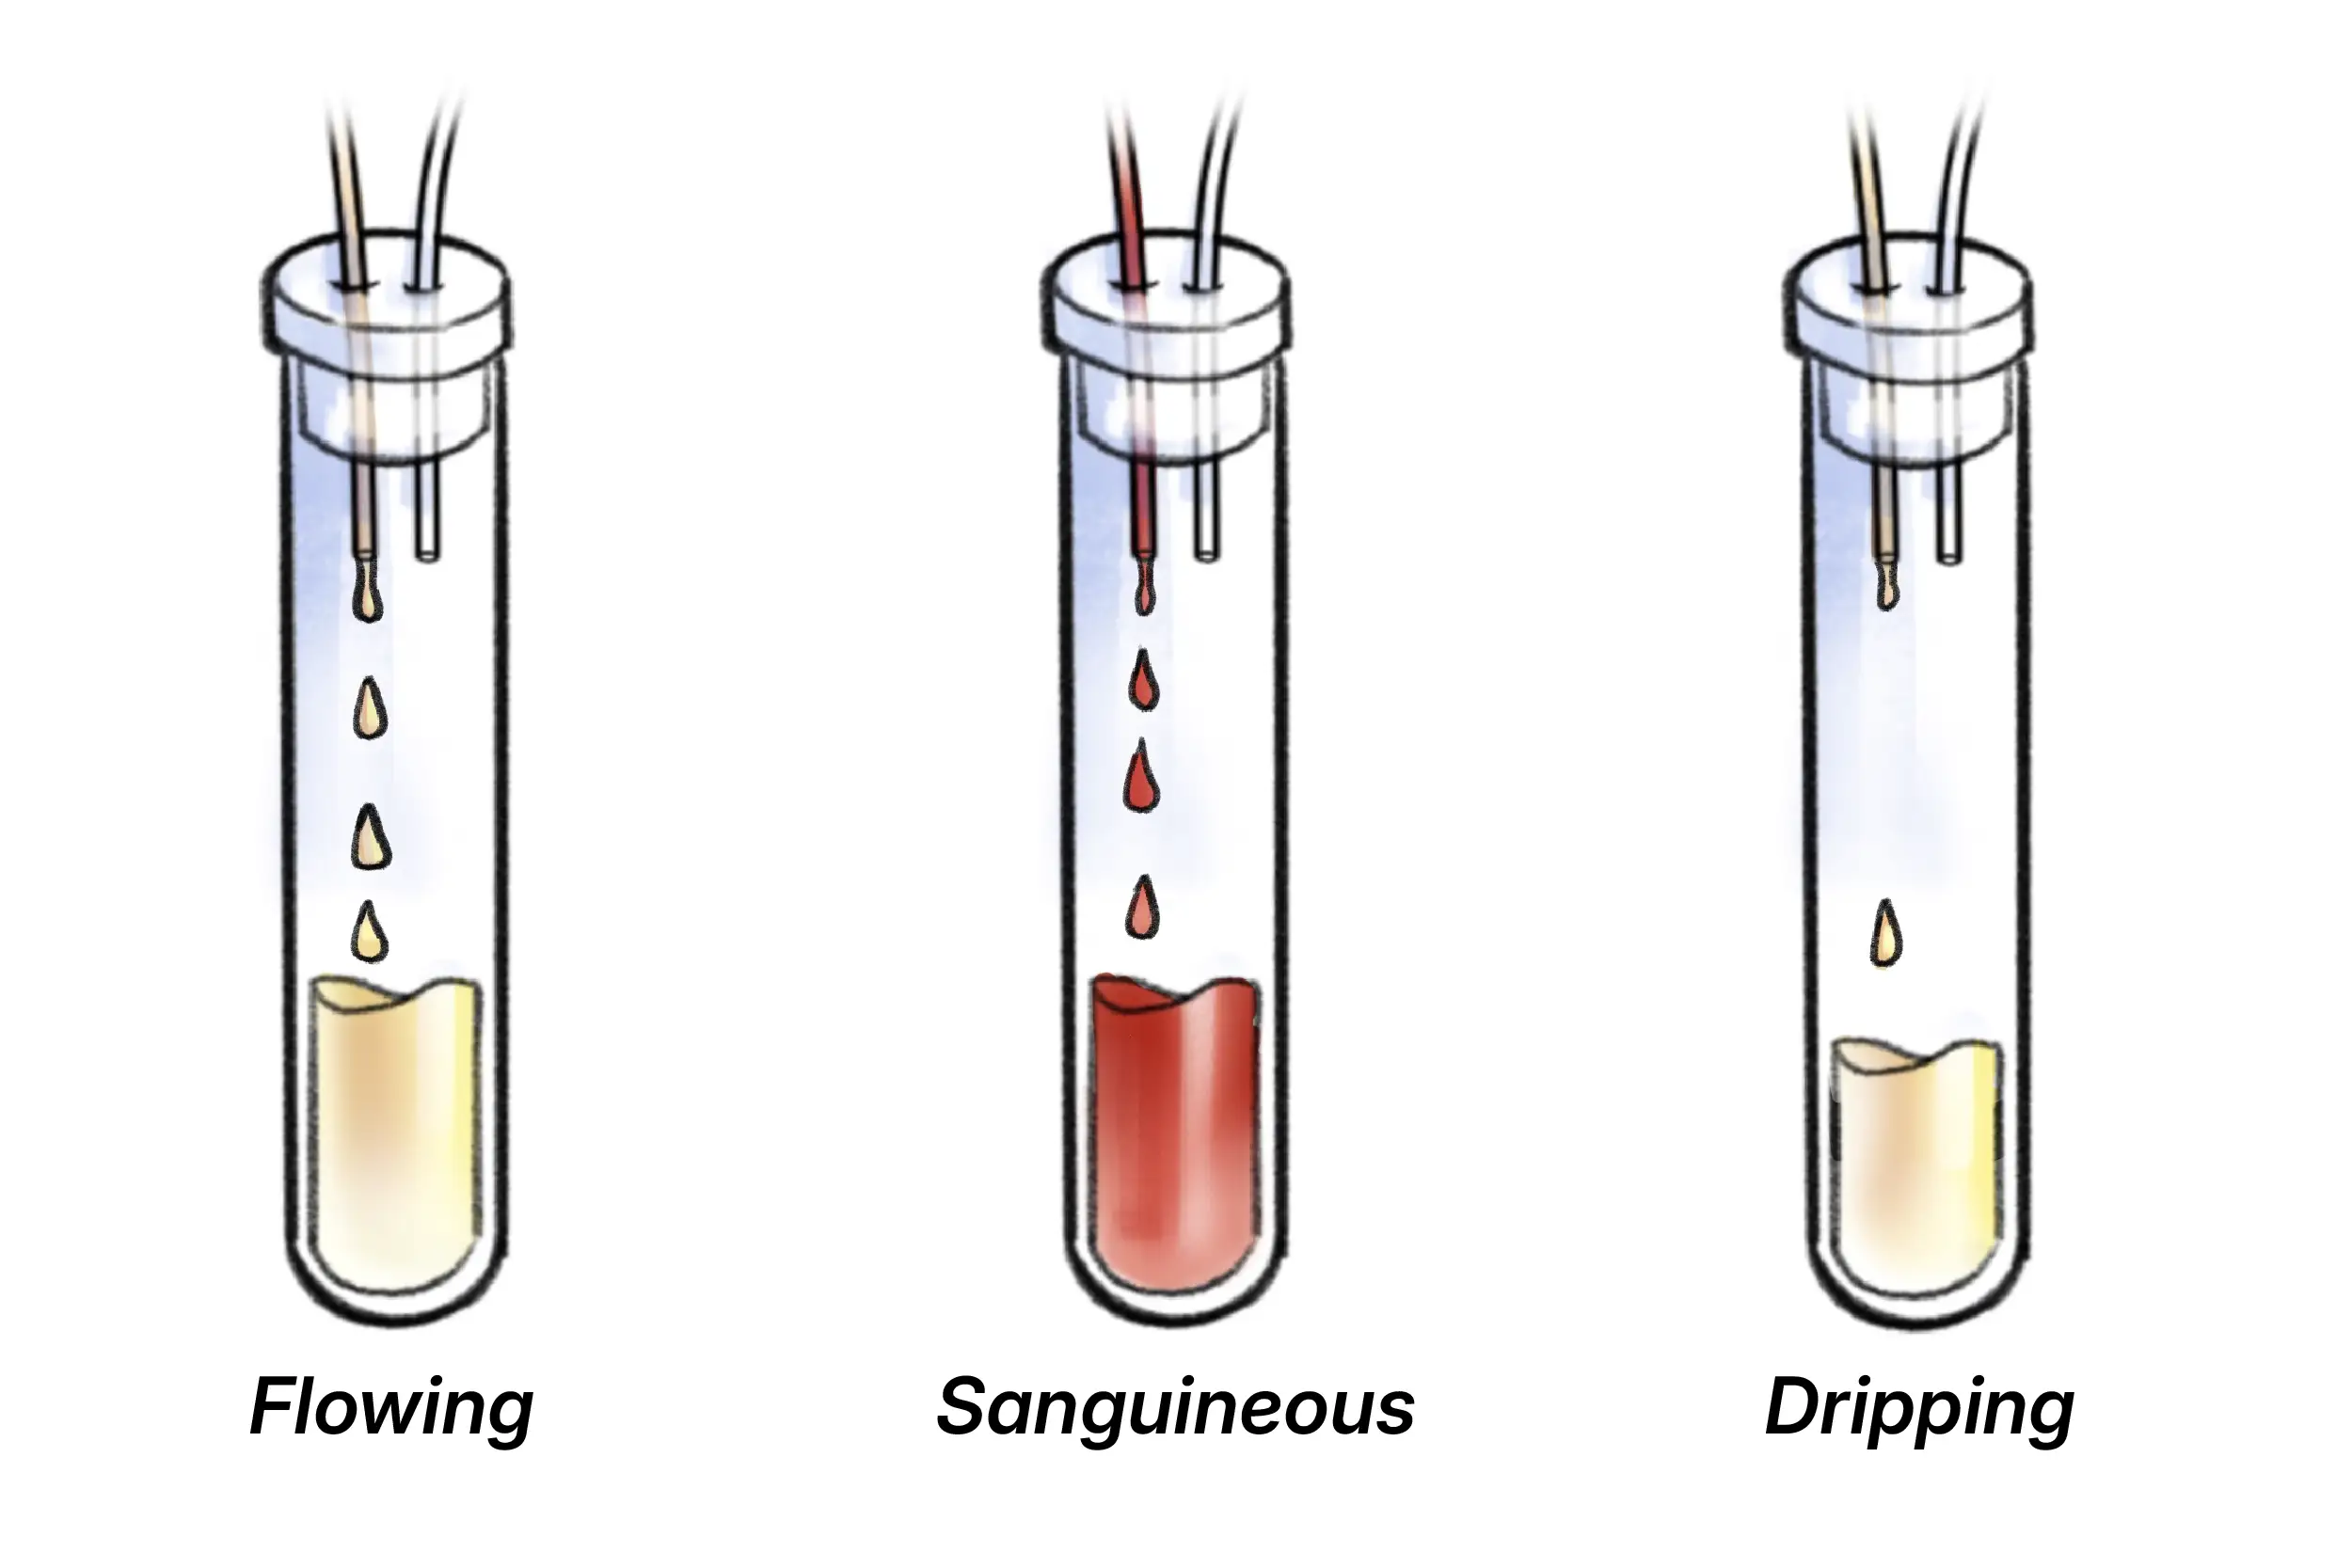
Figure 3.7b: Optimal colour and flow of follicular aspirate.
Once the first tube is filled, the provider or assistant at the retrieval worktable will stop suction, attach the silicone stopper to the next tube, and re-start suction. Uninterrupted flow should be verbally confirmed again. Filled tubes can be collected by the circulating nurse and transported to the embryology lab, where oocytes are counted. It is paramount to avoid any traffic between the worktable with the filled tubes and the embryology lab.
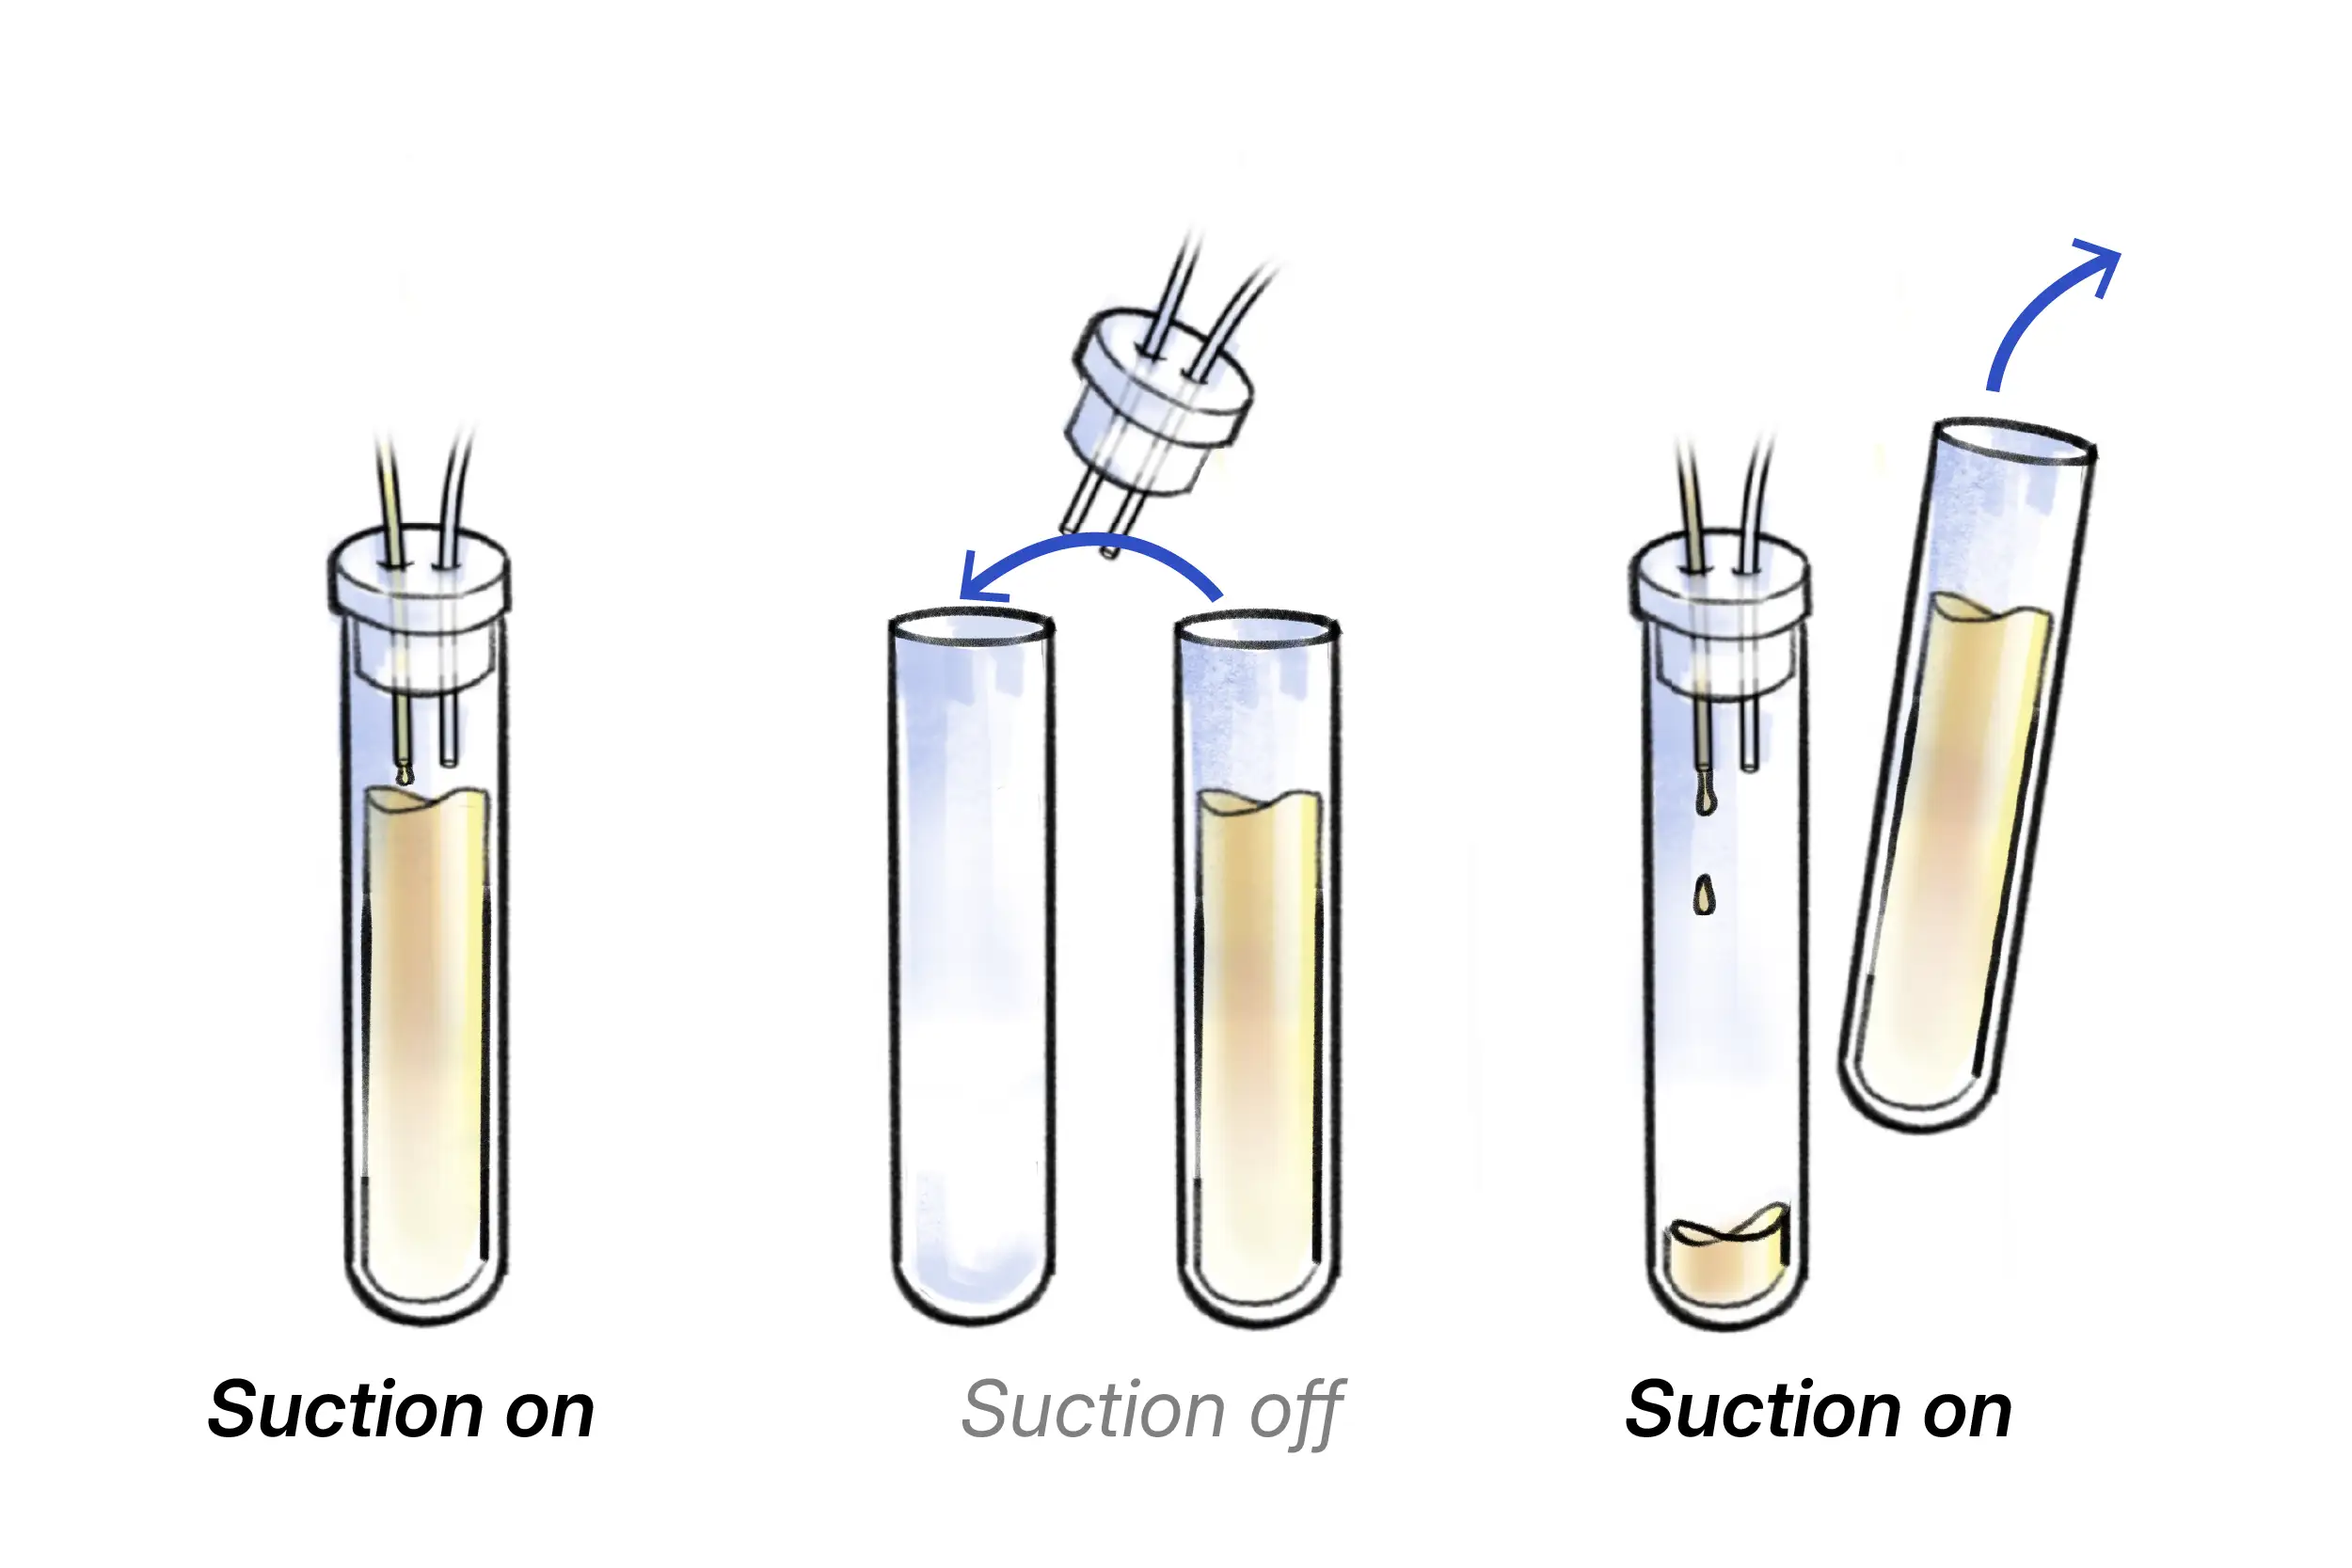
Figure 3.7c: Process of switching tubes.
When you are ready to start the procedure, gently push the needle through the vaginal wall and puncture the nearest follicle in one movement. Focus on entering the follicle perpendicular to the follicle wall and aiming for the center of the spherical follicle.
Depending on the patient and the provider, the needle can be introduced smoothly, in a "darted" quick jabbing motion, or twisted while puncturing in a "drilling" motion if the ovarian tissue is dense or the needle is very close to a blood vessel. The tactile resistance of the vaginal wall and ovarian cortex against the needle will become familiar as you perform more retrievals.
3.7d Smooth pucture technique.
3.7e Darted puncture technique.
3.7f Drilled puncture technique.
3.8 Follicle aspiration
Once the needle is introduced into the follicle, keep the tip of the needle in the centre of the follicle during aspiration. This will allow the follicle to collapse symmetrically and increase the chance of retrieving the oocyte. If the follicle is not centered, the bevel may get stuck to the follicular wall, and the oocyte may not be retrieved.
Figure 3.8a: Symmetrical and asymmetrical collapse of the follicle, and the impact on oocyte retrieval.
To ensure complete aspiration of the follicle, you can "curette" the needle by gently and rapidly rotating the needle clockwise and counterclockwise. This prevents the needle's bevel from sticking to the walls of the follicle.
Figure 3.8b: Curetting technique. Note the appearance of the rotating needle tip.
As the first follicle collapses, notice that it draws nearby follicles towards itself. Do not chase the next follicle with your probe and needle — instead, wait for the follicle to be drained completely and allow the next follicle to come towards the needle tip. This is especially important in large, hyperstimulated ovaries with high follicle counts where the needle tip cannot reach the entire length of the ovary.
This should allow you to strategically line up follicles so you can aspirate as many as possible with one ovarian puncture. Minimizing the number of punctures reduces the risk of bleeding and increases patient comfort.
Figure 3.8c: Sample ultrasound footage showing how follicles can be lined up for aspiration with minimal punctures to the ovarian cortex.
If you need to reposition the transducer between follicles and the needle tip is still in the ovary, do not make large lateral movements. This will cause lacerations to the ovarian cortex and is painful for the patient. Instead, withdraw the needle to the edge of the ovarian cortex without completely removing it, pivot the probe, then reintroduce the needle.
Figure 3.8d: Improper (left) and proper (right) technique for lateral repositioning within the ovary.
Flushing
If the patient has a very low follicle count, consider flushing follicles with culture medium to increase the chance of retrieving the oocyte. 2 3
- Aspirate most of the follicular fluid from the follicle, but leave some behind.
- Disconnect the stopper and vacuum from the test tube, and connect a syringe filled with culture medium.
- Push the culture medium into the follicle.
- Disconnect the syringe and re-connect the vacuum to the circuit.
- Re-aspirate the follicle.
Figure 3.8e: Flushing technique. Note how the follicle is refilled with culture medium, then aspirated again.
Once all the follicles in the first ovary have been aspirated, repeat the technique on the other ovary.
3.9 Post-procedure scan
After the procedure, conduct another systematic scan of the pelvis. Identify the left and right ovaries and ensure that all follicles have been aspirated.

Figure 3.9a: Post-procedure scan. Note the appearance of the aspirated follicles.
Verify that there is no bleeding, particularly in the rectouterine pouch. Bleeding can be identified by turbulent flow and expanding fluid volume.
3.10 Conclusion
This module provided a theoretical baseline for basic technique, troubleshooting, and strategy for transvaginal oocyte retrieval.
Key points to remember:
- Perform a systematic initial scan to identify anatomic landmarks and any pathology that may complicate the procedure.
- Optimize ultrasound settings and transducer position to achieve clear visualization of the ovary, follicles, and needle.
- Stabilize the ovary by applying firm pressure with the transvaginal transducer and/or external abdominal pressure.
- Ensure there are no intervening structures in the trajectory of the needle before puncturing.
- Focus on entering the follicle perpendicular to the follicle wall and aiming for the center of the follicle.
- Plan your retrieval to minimize the number of punctures to the ovarian cortex.
References
- Dinh V. Ultrasound machine basics: knobology, probes, and modes [Internet]. POCUS 101. [date unknown; cited 2026 Jul 6]. Available from: https://www.pocus101.com/ultrasound-machine-basics-knobology-probes-and-modes/
- Lainas GT, Makris AA, Xenariou MV, Petsas GK, Kolibianakis EM. Follicular flushing increases the number of oocytes retrieved: a randomized controlled trial. Hum Reprod. 2023;38(10):1927-37. Available from: https://doi.org/10.1093/humrep/dead169
- Neumann K, Griesinger G. Does follicular flushing increase oocyte number in poor responders? An update of a systematic review. Reprod Biomed Online. 2023;46(2):289-94. Available from: https://doi.org/10.1016/j.rbmo.2022.11.011